Since it is the same procedure for every plugin, this tutorial does not explain how to install the plugin. If you need help with the plugin installation, please see the Install WordPress plugins tutorial.
After you have installed and activated the plugin, you can go to Settings → ThemeZee Plugins → Toolkit and enable all the modules you’d like to use.
Use Widget Visibility
After you have enabled the Widget Visibility module, a new button “Visibility” is added to the widget settings on Appearance → Widgets.
It allows you to set conditions to show or hide your widgets based on whether a specific page, category, tag, author or archive is displayed. It is an incredible useful and small feature you will never want to miss again.
Since it is the same procedure for every plugin, this tutorial does not explain how to install the plugin. If you need help with the plugin installation, please see the Install WordPress plugins tutorial.
The Widget Bundle plugin is available to all purchasers of our Pro Add-ons and Bundles and can be downloaded at any time in your account.
Enable Widgets
By default, our plugin enables all widgets so you can start right away. In case you want to deactivate certain widgets you can go to Settings → ThemeZee Plugins → Widget Bundle and enable only the widgets you’d like to use.
Add Widgets
You can add the new widgets on Appearance → Widgets. Please see our widget tutorial if you need help with that.
All widgets from the ThemeZee Widget Bundle are slightly highlighted with a blue font.
Widget Settings
Each widget comes with a bunch of settings.
Recent Posts Widget Settings
Recent Comments Widget Settings
Social Icons Widget Settings
Tabbed Content Widget Settings
Facebook Like Box Widget Settings
We have removed the Facebook Like Box Widget with version 1.3 for GDPR compliance.
Since it is the same procedure for every plugin, this tutorial does not explain how to install the plugin. If you need help with the plugin installation, please see the Install WordPress plugins tutorial.
The Breadcrumbs plugin is available to all purchasers of our Pro Add-ons and Bundles and can be downloaded at any time in your account.
Activate License
After you have installed and activated the plugin, please go to Settings → ThemeZee Plugins → Breadcrumbs and activate your license key to receive regular updates.
Configure Plugin Settings
The Breadcrumbs plugin comes with three settings:
Browse Text – Enter the text which is displayed before the breadcrumb list.
Link Separator – Select the separator of the breadcrumb items.
Front Page – Enable the breadcrumb list on front page.
You can configure these settings on Settings → ThemeZee Plugins → Breadcrumbs.
Template Tag Usage (for developers)
This plugin works with all of our themes without any need to edit the code. That means you just have to activate it and the breadcrumbs are displayed.
However, in case you want to use this plugin with themes from other developers you can use the themezee_breadcrumbs() template tag in your theme. This function will display the breadcrumb navigation for the current active site anywhere you want.
It is highly recommended to use a function_exists() wrapper to avoid breaking the theme template file if the plugin is not activated:
<?php if ( function_exists( 'themezee_breadcrumbs' ) ) themezee_breadcrumbs(); ?>
Since it is the same procedure for every plugin, this tutorial does not explain how to install the plugin. If you need help with the plugin installation, please see the Install WordPress plugins tutorial.
The Related Posts plugin is available to all purchasers of our Pro Add-ons and Bundles and can be downloaded at any time in your account.
Activate License
After you have installed and activated the plugin, please go to Settings → ThemeZee Plugins → Related Posts and activate your license key to receive regular updates.
Configure Plugin Settings
The Related Posts plugin comes with a bunch of settings which allow you to adjust the related posts to your needs. You can configure these settings on Settings → ThemeZee Plugins → Related Posts.
The Post Matching setting let you choose how the plugin should search and find relevant posts. Every site is different, so test which method works best for you. The plugin can select related posts based on similiar categories, tags or categories and tags together.
You can use the Layout Settings to add your own title above the related posts, to select the post layout and to enable or disable post meta and images. There are also extra settings to choose the number of posts and the post order.
Since it is the same procedure for every plugin, this tutorial does not explain how to install the plugin. If you need help with the plugin installation, please see the Install WordPress plugins tutorial.
The Social Sharing plugin is available to all purchasers of our Pro Add-ons and Bundles and can be downloaded at any time in your account.
Activate License
After you have installed and activated the plugin, please go to Settings → ThemeZee Plugins → Social Sharing and activate your license key to receive regular updates.
Configure Plugin Settings
The Social Sharing plugin comes with a bunch of settings which allow you to adjust the social sharing feature to your needs. You can configure these settings on Settings → ThemeZee Plugins → Social Sharing.
The Social Networks setting let you choose which sharing buttons should be displayed. Furthermore you can select the exact locations where the sharing icons should appear.
The plugin supports three different button stylings by default: Icons, Labels or Icons + Labels. Please look at the next section of this tutorial for more available styling customizations with CSS.
CSS Customizations
You can change the styling of the social sharing buttons with CSS code if you want. The following CSS snippets help you to get started.
Since it is the same procedure for every plugin, this tutorial does not explain how to install the plugin. If you need help with the plugin installation, please see the Install WordPress plugins tutorial.
Adding Blocks
Create a new page or edit one in order to add Blocks to your website. You need to use the new WordPress Block Editor introduced with WordPress 5.0.
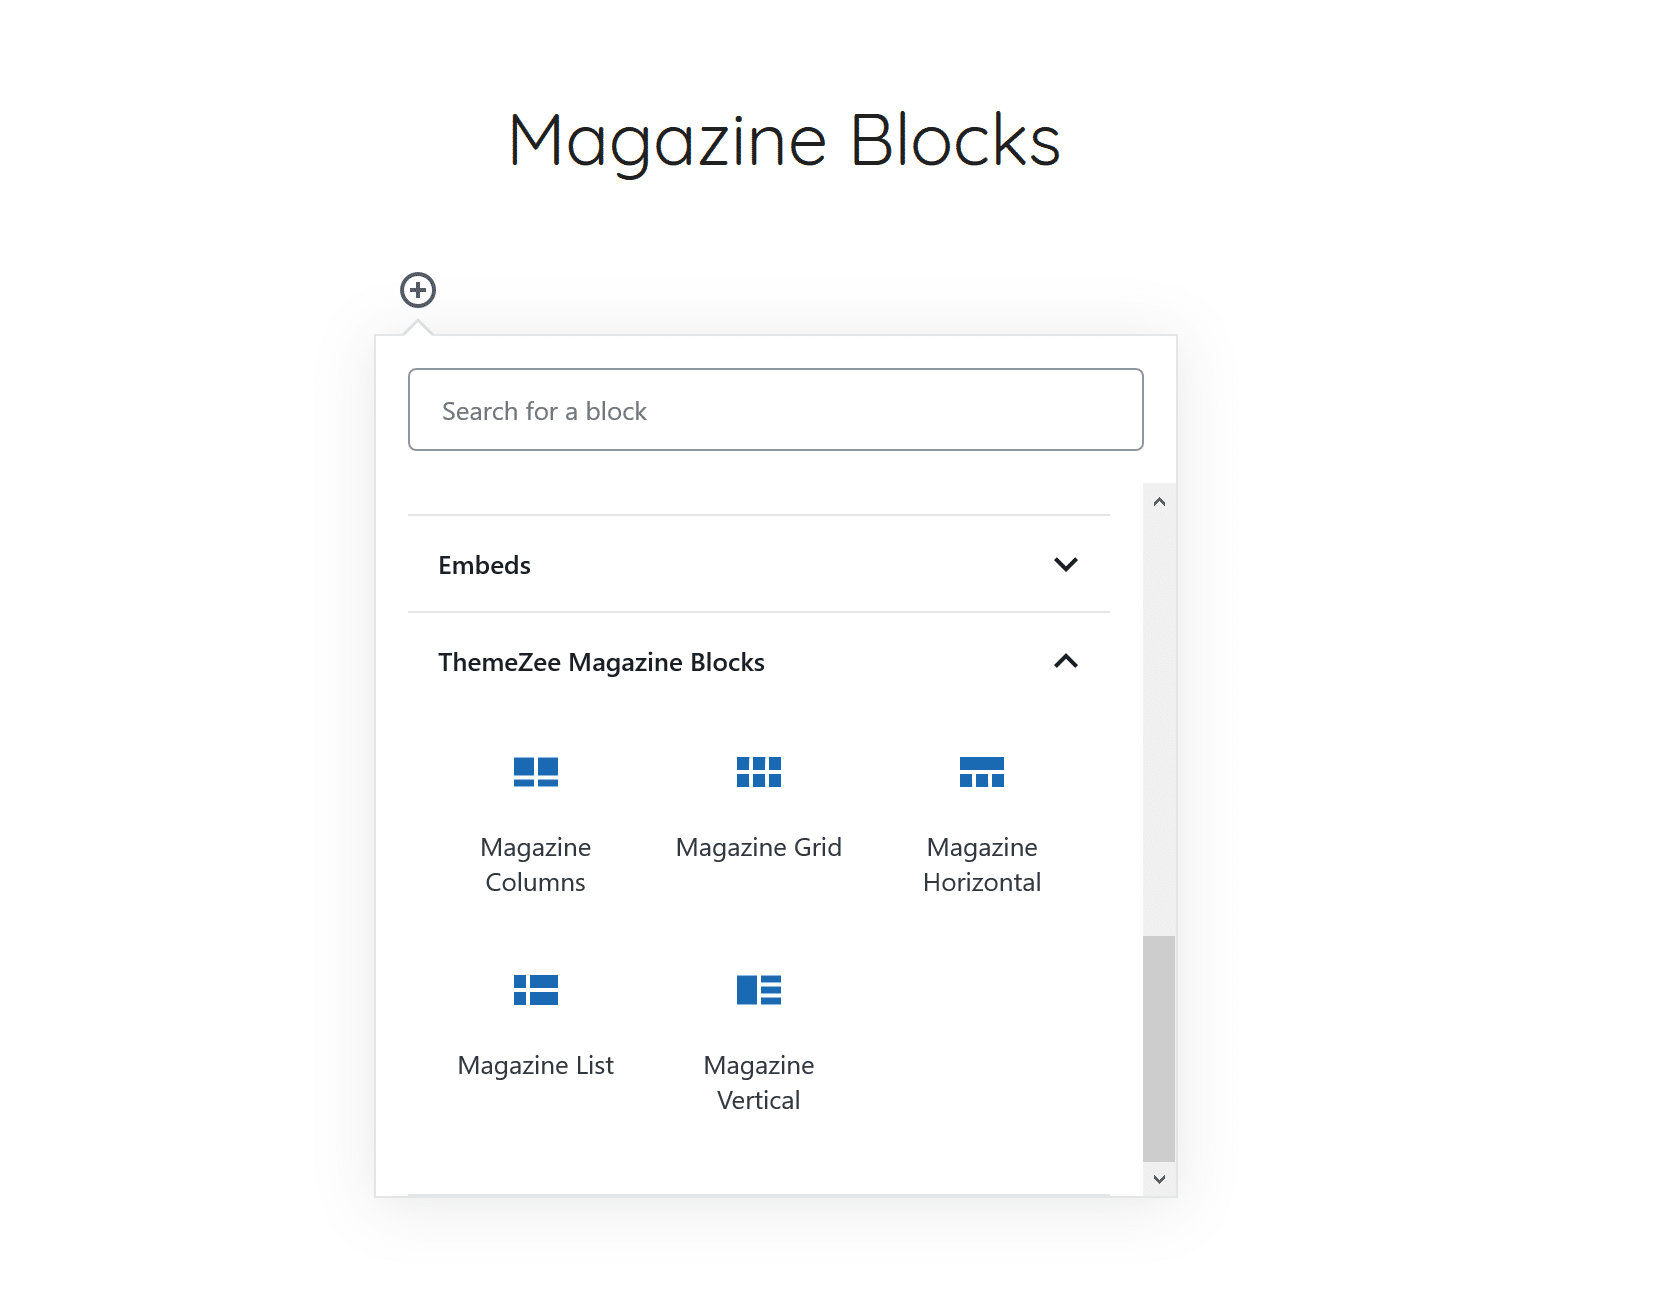
You can find the Magazine Blocks in a new category ThemeZee Magazine Blocks in the Block Inserter.
Magazine Blocks Inserter
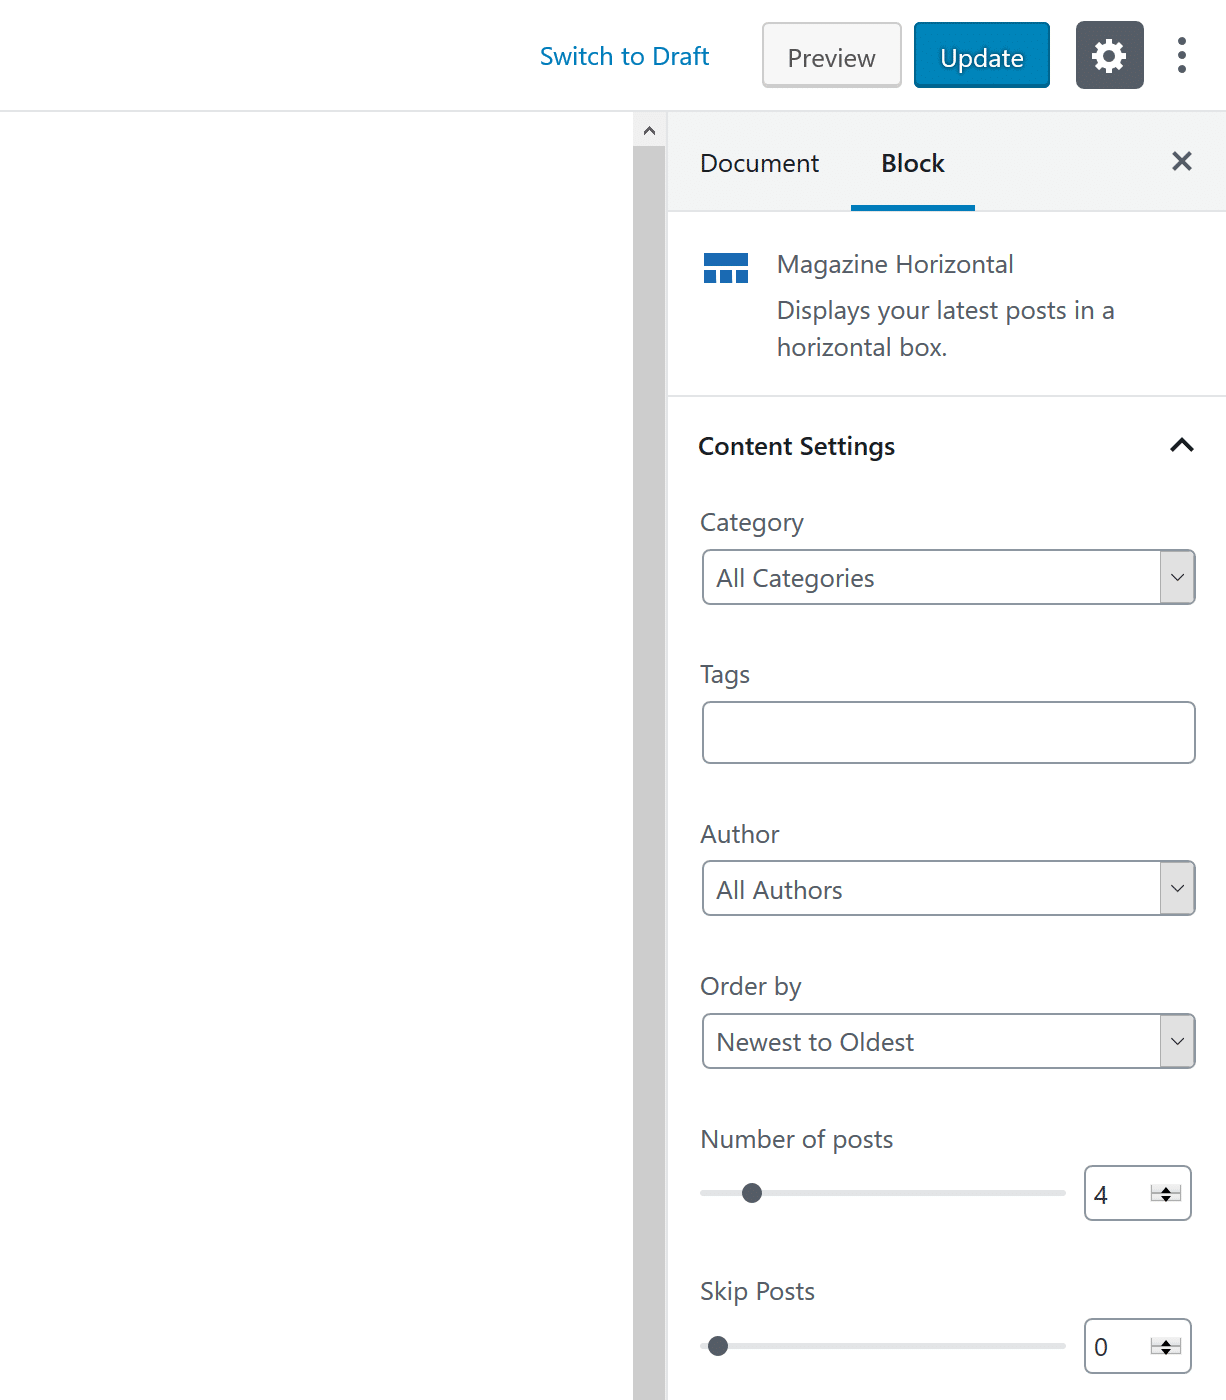
Content Settings
After adding a block you can select posts in the Content Settings panel in the right sidebar. You can filter posts by category, tags and post author. You can also configure the number of posts and in which order they appear.
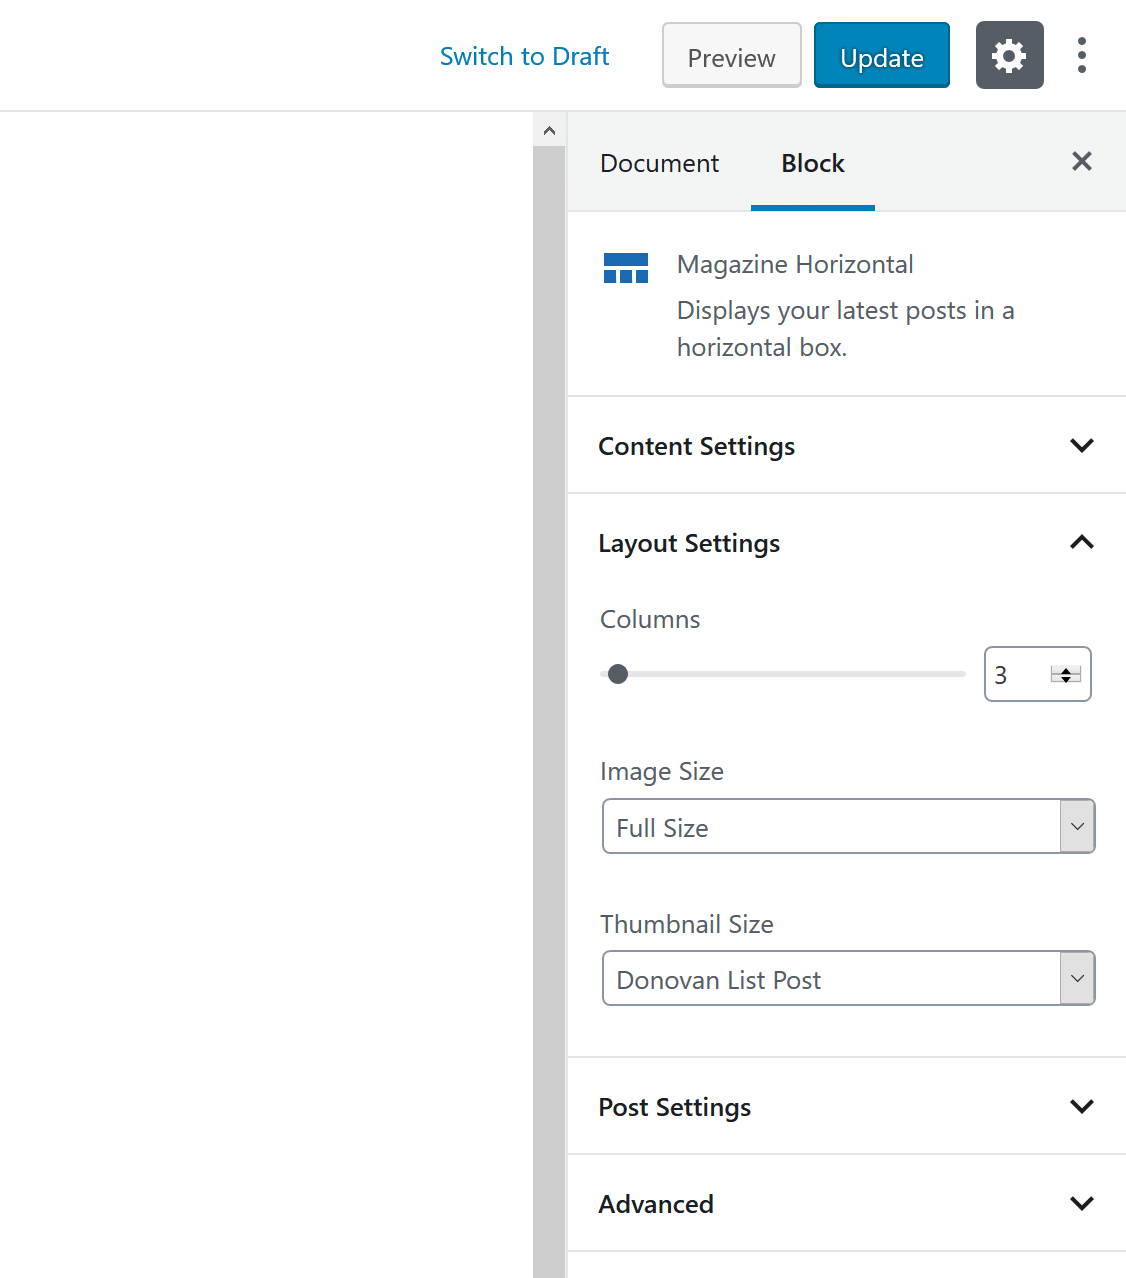
Layout Settings
In the Layout Settings, you can change the featured image sizes. Depending on the block, there are column options or other layout related settings.
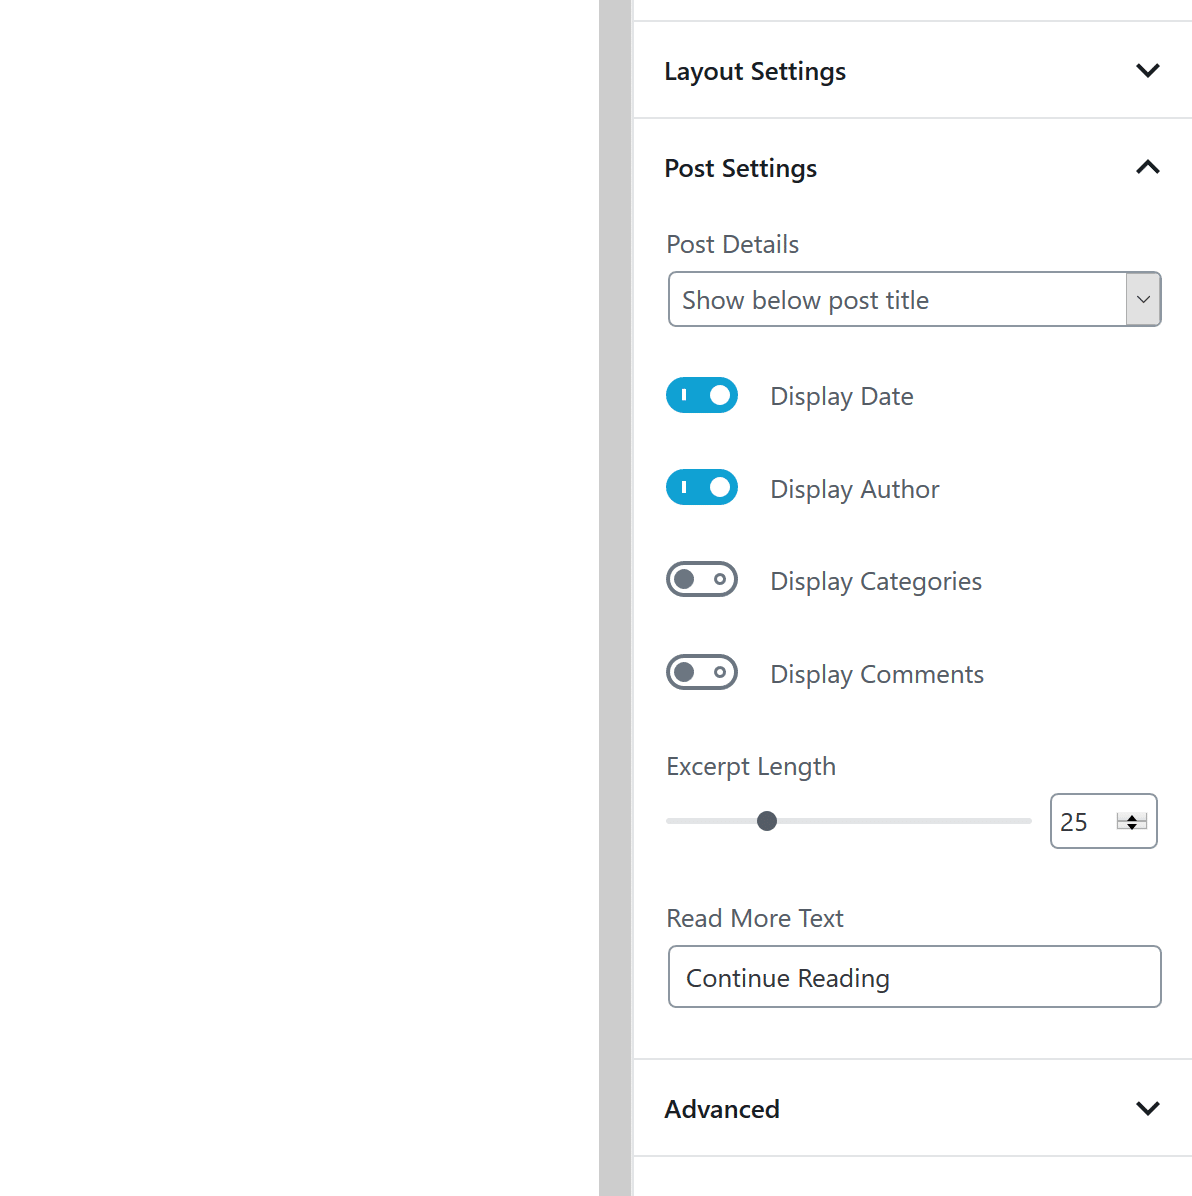
Post Settings
In the last panel, you can choose which post details like date, author, categories and comments are displayed. You can also set the excerpt length and change the text of the Read More link.
You can find all our available premium WordPress blocks on themezee.com/blocks/.
Icon Block
Icon Buttons Block
Icon Heading Block
Icon List Block
You have access to our WordPress blocks with a Plus, Infinite or Lifetime subscription. You can download them from themezee.com/downloads/ in your account.
Install Block Plugin
Since it is the same procedure for every plugin, this tutorial does not explain how to install the plugin. If you need help with the plugin installation, please see the Install WordPress plugins tutorial.
Our WordPress blocks are available to all purchasers of our Plus, Infinite or Lifetime subscriptions and can be downloaded at any time in your account.
Activate License
After you have installed and activated the block plugin, please go to Settings → ThemeZee Blocks and activate your license key to receive regular updates.
Adding Blocks in Editor
Create a new post or static page or edit an existing one. You can insert our WordPress blocks as any other block by clicking on the Plus icon.
The block plugins also adds a new category ‘ThemeZee Blocks‘ where you can find all blocks: