Since it is the same procedure for every theme, this tutorial does not explain how to install the theme. If you need help with the theme installation, please see the Install WordPress themes tutorial.
Site Editor
Lewis is a block theme. That means every element like the header, content area and footer all consist of blocks. There are no extra theme options, everything is configured with blocks.
You can edit the theme with the new Site Editor on Appearance → Editor.
Since it is the same procedure for every theme, this tutorial does not explain how to install the theme. If you need help with the theme installation, please see the Install WordPress themes tutorial.
Site Editor
Clarke is a block theme. That means every element like the header, content area and footer all consist of blocks. There are no extra theme options, everything is configured with blocks.
You can edit the theme with the new Site Editor on Appearance → Editor.
Since it is the same procedure for every theme, this tutorial does not explain how to install the theme. If you need help with the theme installation, please see the Install WordPress themes tutorial.
Site Editor
Smartcube is a block theme. That means every element like the header, content area and footer all consist of blocks. There are no extra theme options, everything is configured with blocks.
You can edit the theme with the new Site Editor on Appearance → Editor.
Since it is the same procedure for every theme, this tutorial does not explain how to install the theme. If you need help with the theme installation, please see the Install WordPress themes tutorial.
Site Editor
Ambitio is a block theme. That means every element like the header, content area and footer all consist of blocks. There are no extra theme options, everything is configured with blocks.
You can edit the theme with the new Site Editor on Appearance → Editor.
Since it is the same procedure for every theme, this tutorial does not explain how to install the theme. If you need help with the theme installation, please see the Install WordPress themes tutorial.
Site Editor
Lawson is a block theme. That means every element like the header, content area and footer all consist of blocks. There are no extra theme options, everything is configured with blocks.
You can edit the theme with the new Site Editor on Appearance → Editor.
Since it is the same procedure for every theme, this tutorial does not explain how to install the theme. If you need help with the theme installation, please see the Install WordPress themes tutorial.
Site Editor
Driven is a block theme. That means every element like the header, content area and footer all consist of blocks. There are no extra theme options, everything is configured with blocks.
You can edit the theme with the new Site Editor on Appearance → Editor.
Since it is the same procedure for every theme, this tutorial does not explain how to install the theme. If you need help with the theme installation, please see the Install WordPress themes tutorial.
Site Editor
Charta is a block theme. That means every element like the header, content area and footer all consist of blocks. There are no extra theme options, everything is configured with blocks.
You can edit the theme with the new Site Editor on Appearance → Editor.
Since it is the same procedure for every theme, this tutorial does not explain how to install the theme. If you need help with the theme installation, please see the Install WordPress themes tutorial.
Install PRO Version Plugin
Please be aware that the PRO Version of Dynamico is an Add-on plugin for the Dynamico theme. Therefore you have to install and activate the Dynamico theme and install the Dynamico Pro plugin in addition. You can learn how to install Plugins on the Install WordPress plugins tutorial.
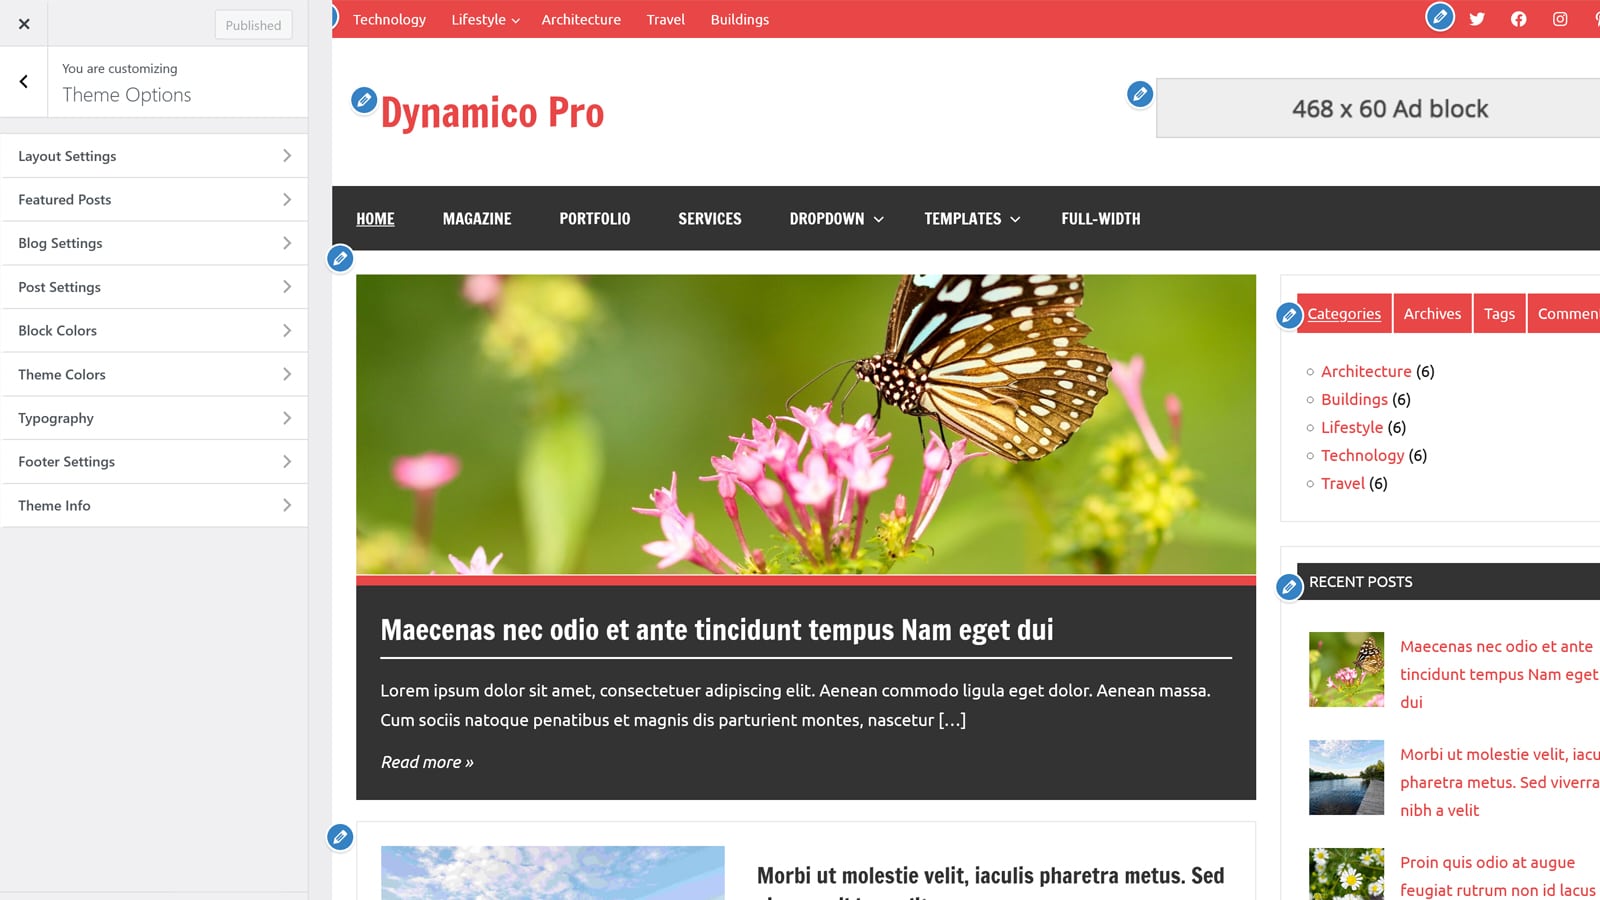
Configure Theme Options
Dynamico supports the awesome Theme Customizer. You can configure all theme settings on Appearance → Customize → Theme Options.
The Theme Options panel in the Customizer includes following sections:
Layout Settings
Featured Posts
Blog Settings
Post Settings
Footer Settings
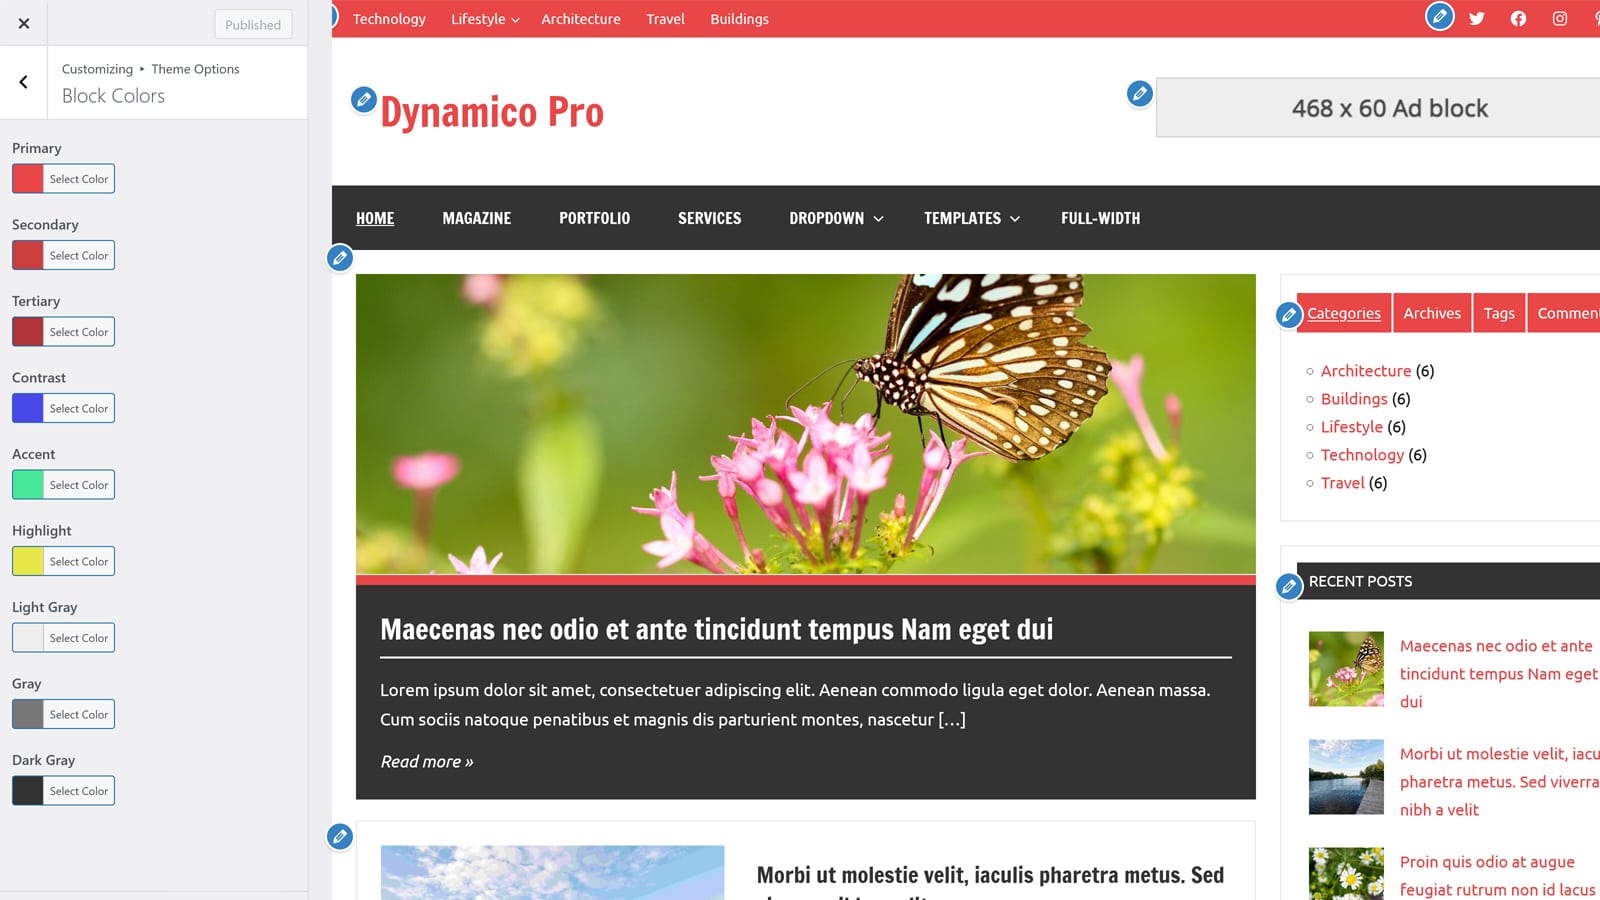
Block Colors (only with PRO version)
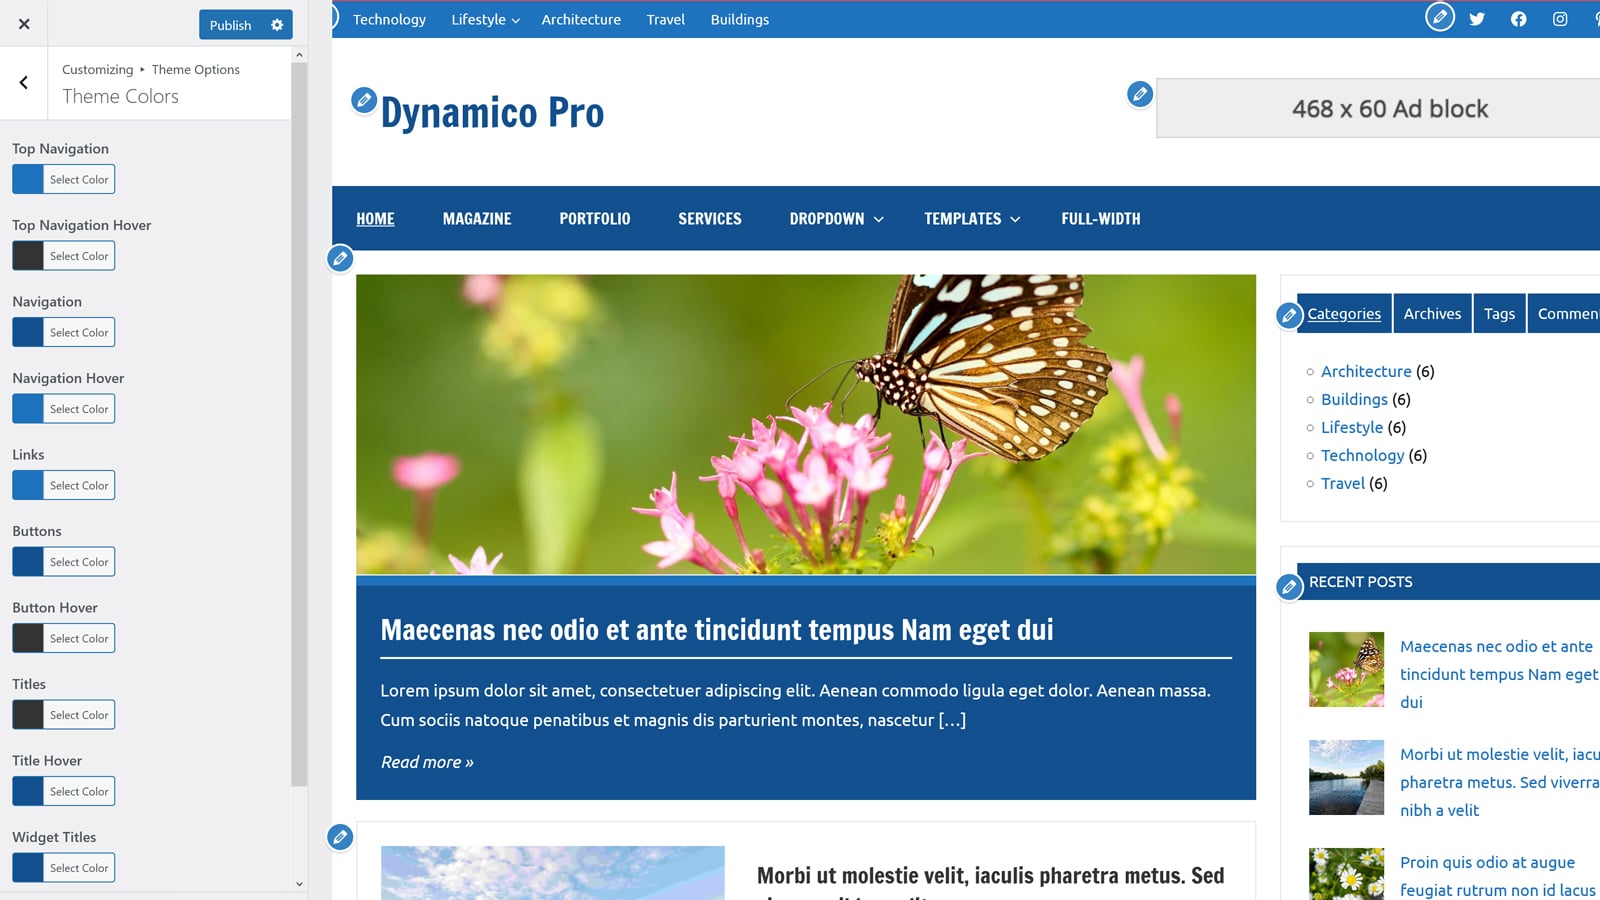
Theme Colors (only with PRO version)
Typography (only with PRO version)
Theme Info
Set up WordPress Features
The theme supports several WordPress core features you know:
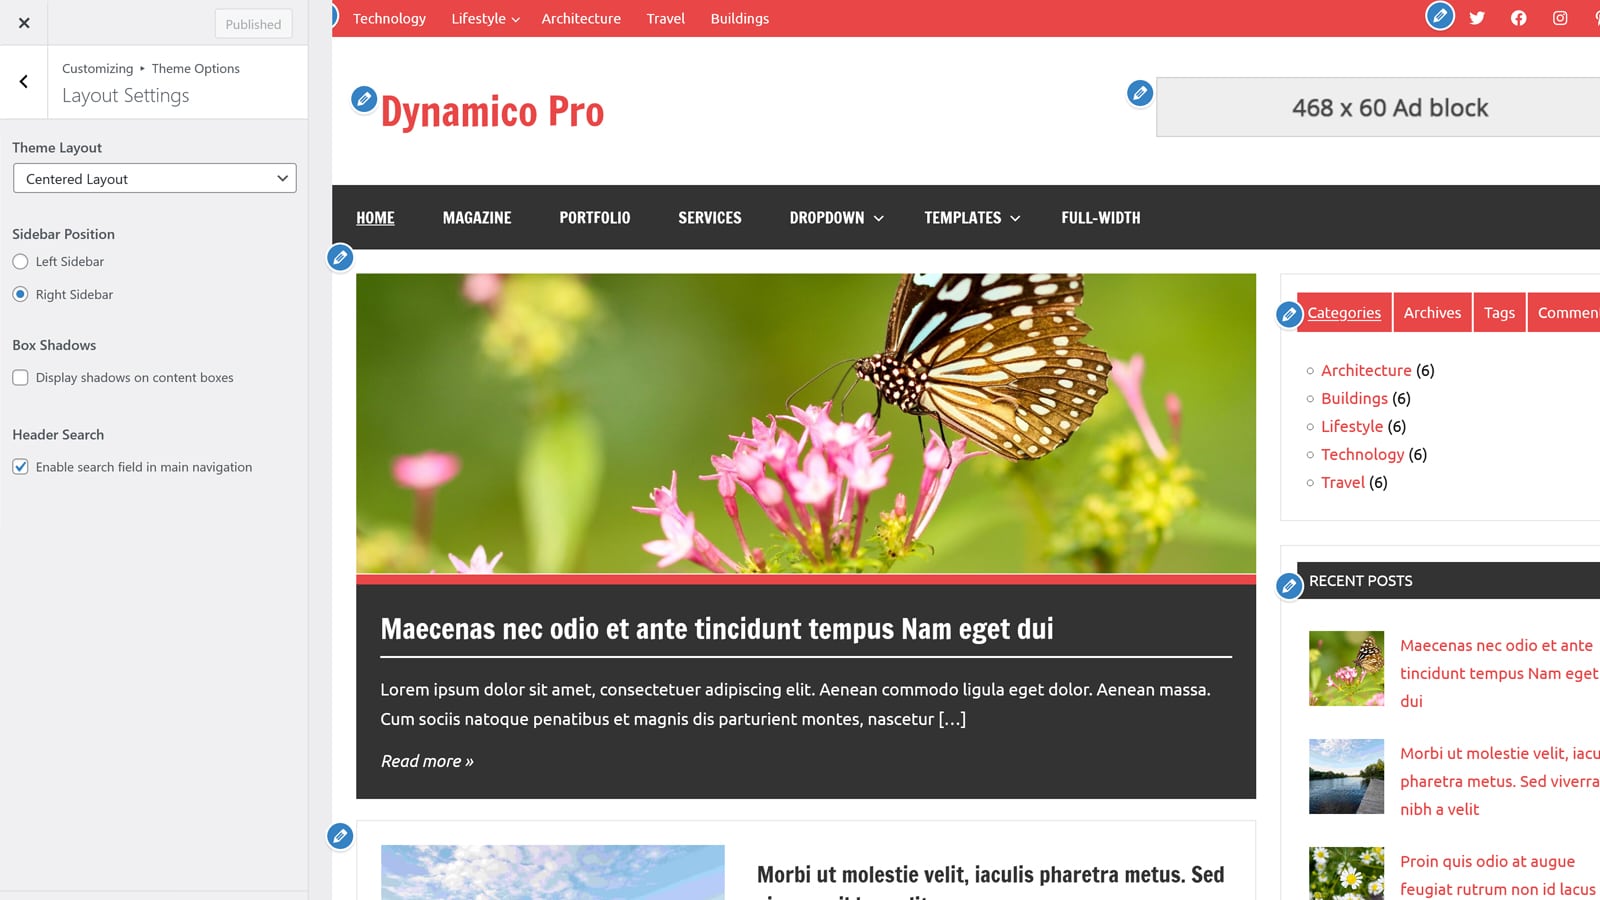
You can find the Layout Options in the Customizer on Appearance → Customize → Theme Options → Layout Settings.
You can choose between the default Centered Layout and the full-width Wide Layout for the theme container. You can also select the position of the sidebar here.
With Dynamico Pro, you can also enable a search function in the main navigation menu.
Featured Posts
You can configure the Featured Content area in the Customizer on Appearance → Customize → Theme Options → Featured Posts.
It allows you to highlight posts from certain categories on the blog page above the latest posts. Posts displayed in the Featured Content area will be excluded automatically from the main blog list, therefore they do not show up twice.
Blog Settings
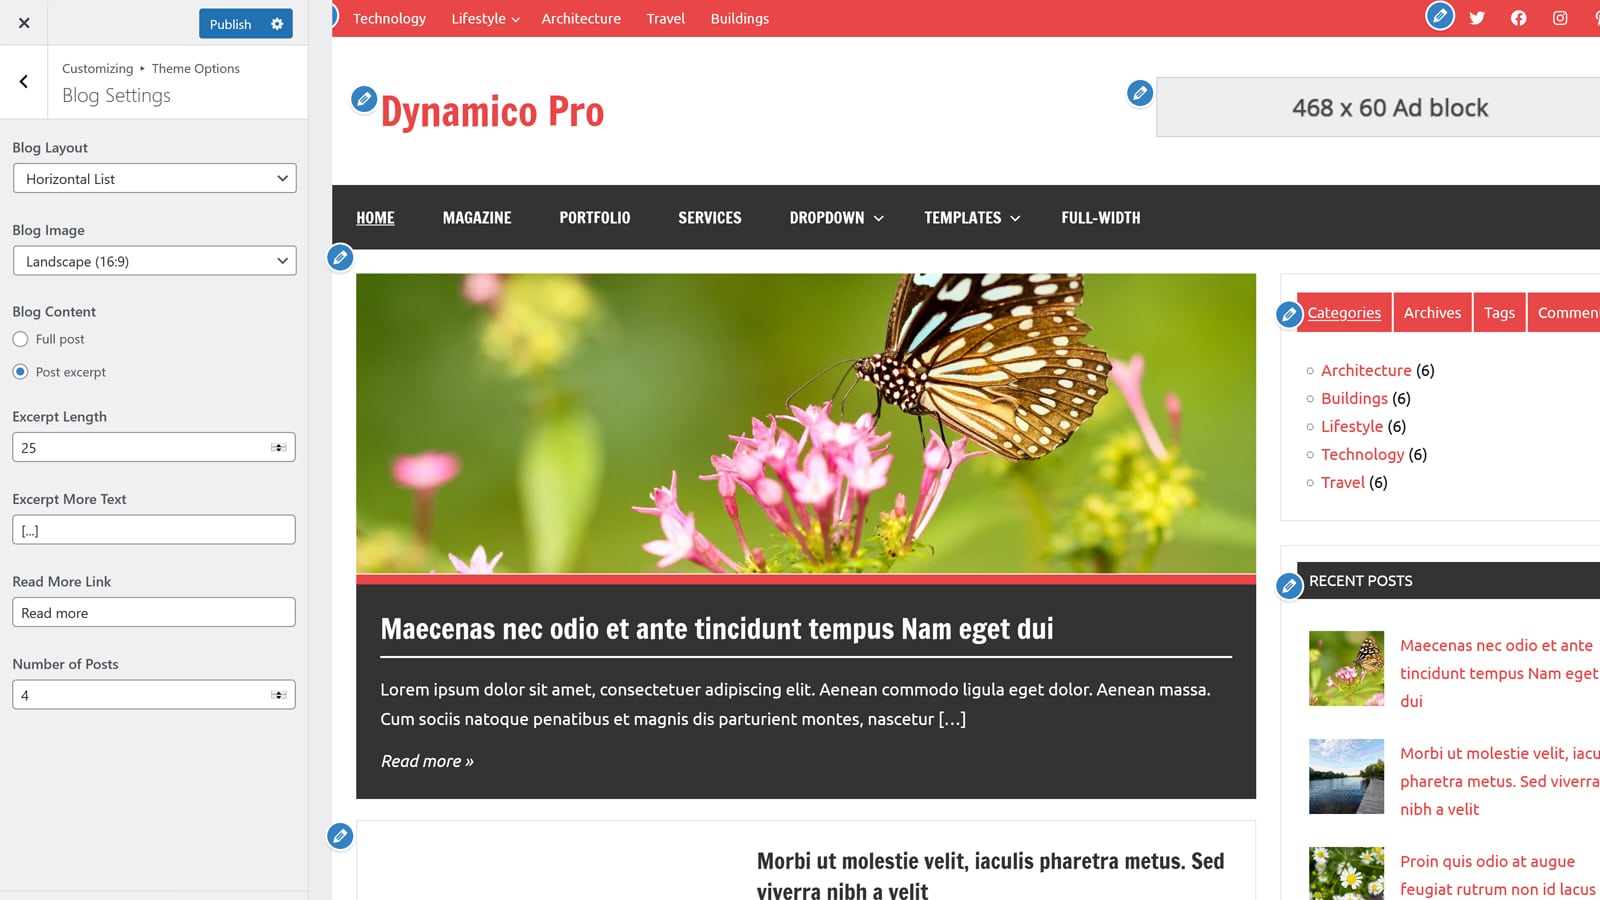
You can set the Blog Layout in the Customizer. Therefore go to Appearance → Customize → Theme Options → Blog Settings.
You can use the Blog Layout setting to choose between four different layouts for the blog. There are two list layouts and two grid-layouts with either two or three columns. In addition you can configure the Excerpt Length, Read More link and Number of Posts here.
Post Settings
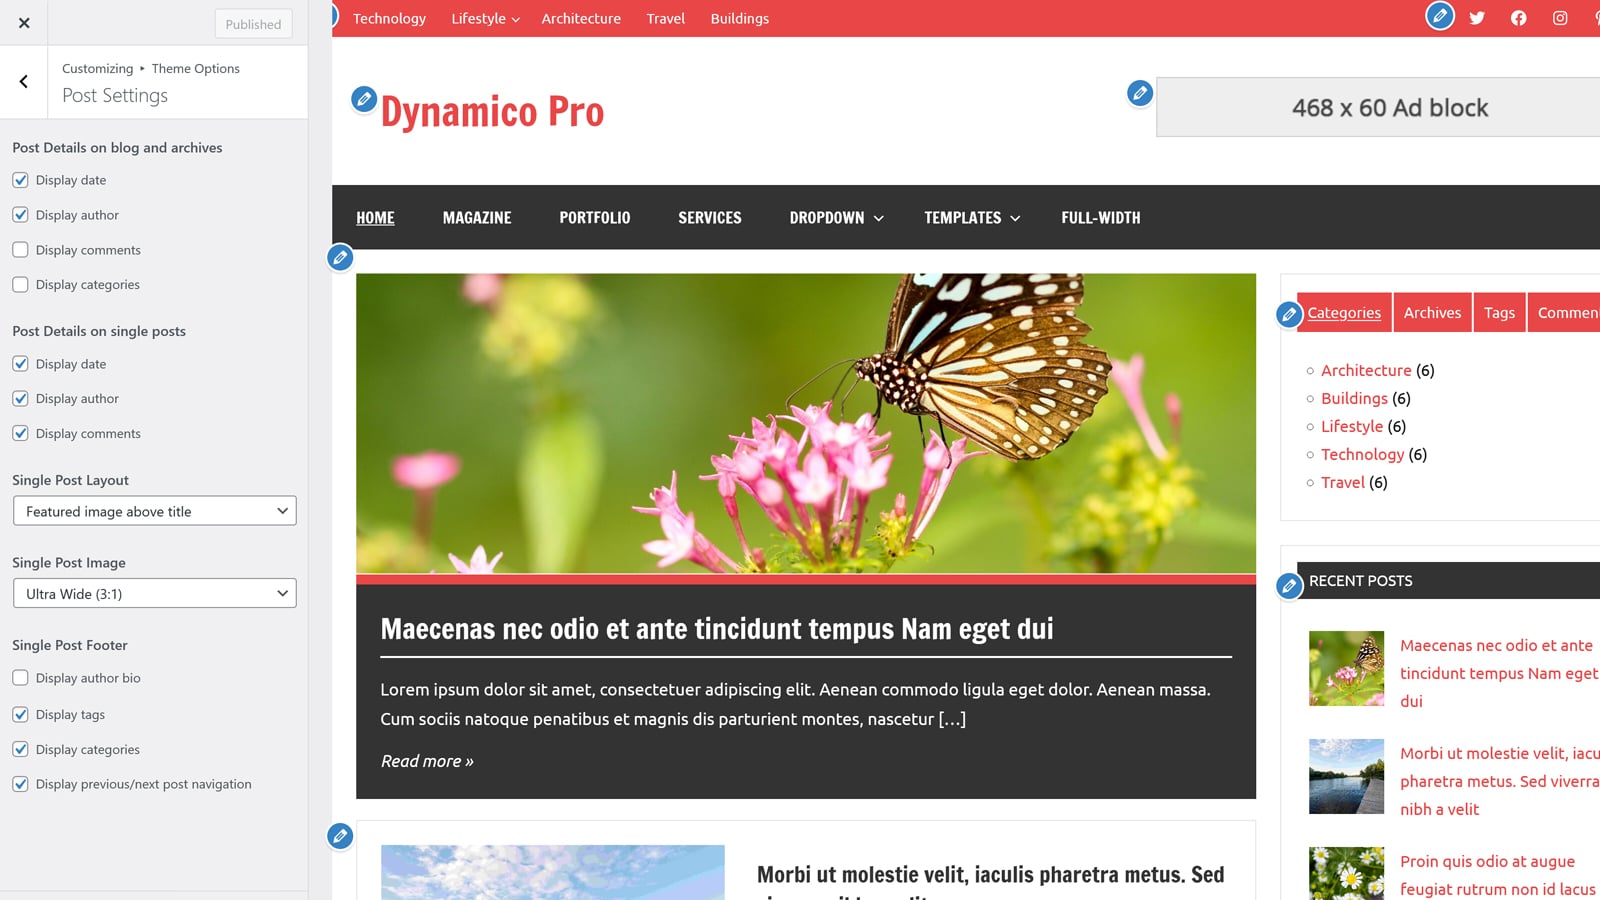
You can go to Appearance → Customize → Theme Options → Post Settings to configure the appearance of posts.
The options let you choose if post date, author, comments and categories are shown. You can disable the featured images as well.
With Dynamico Pro, you can also enable the Author Bio box on single posts.
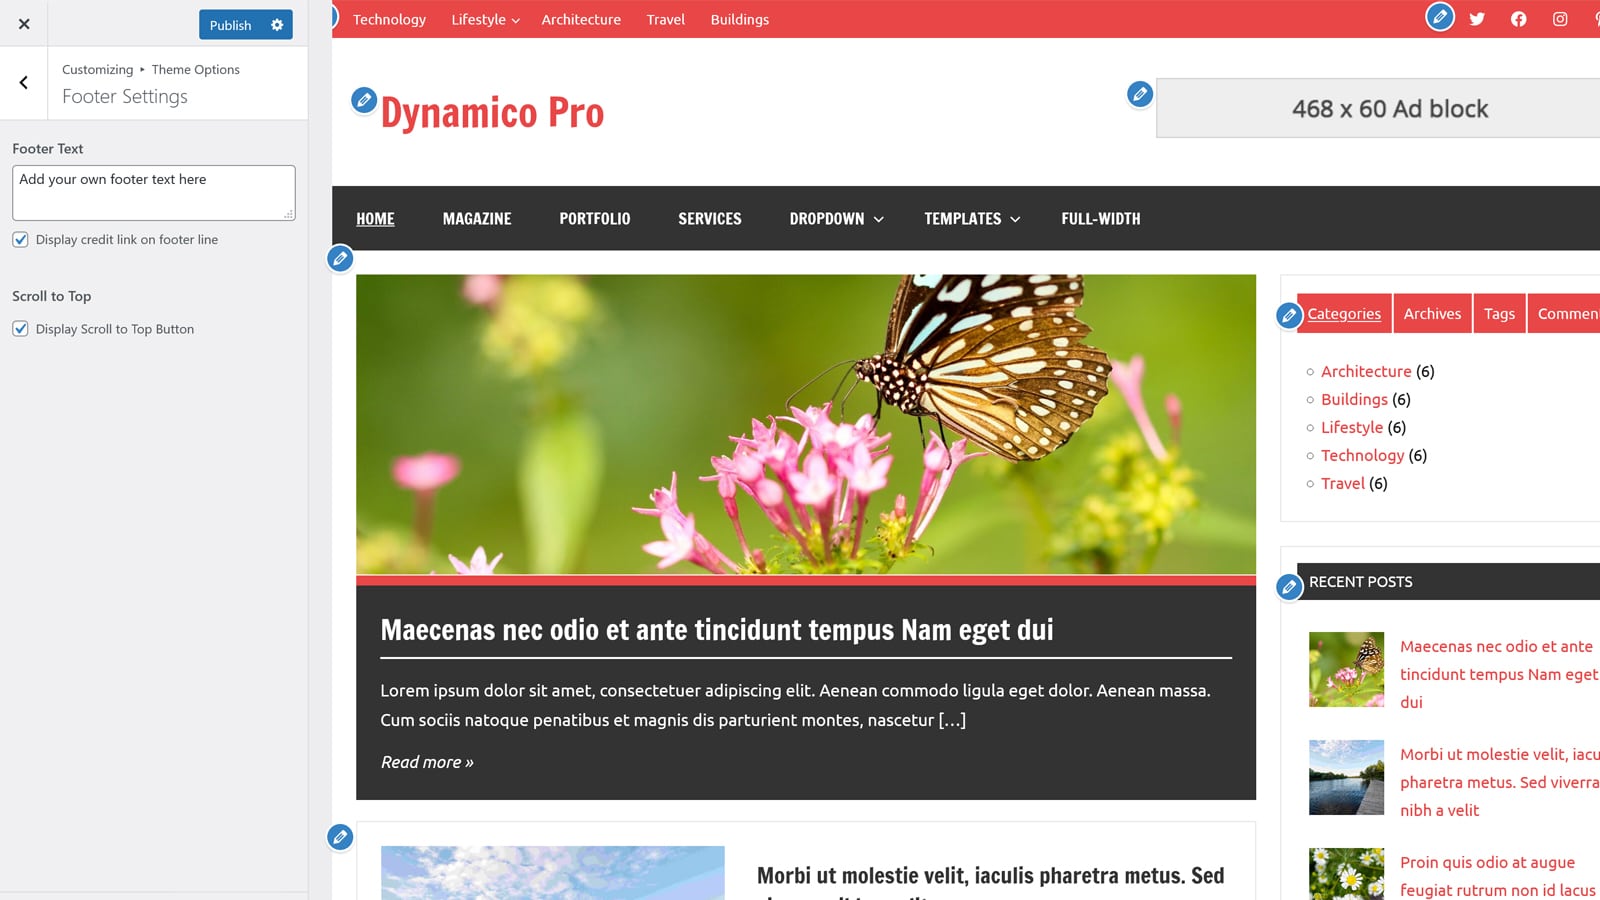
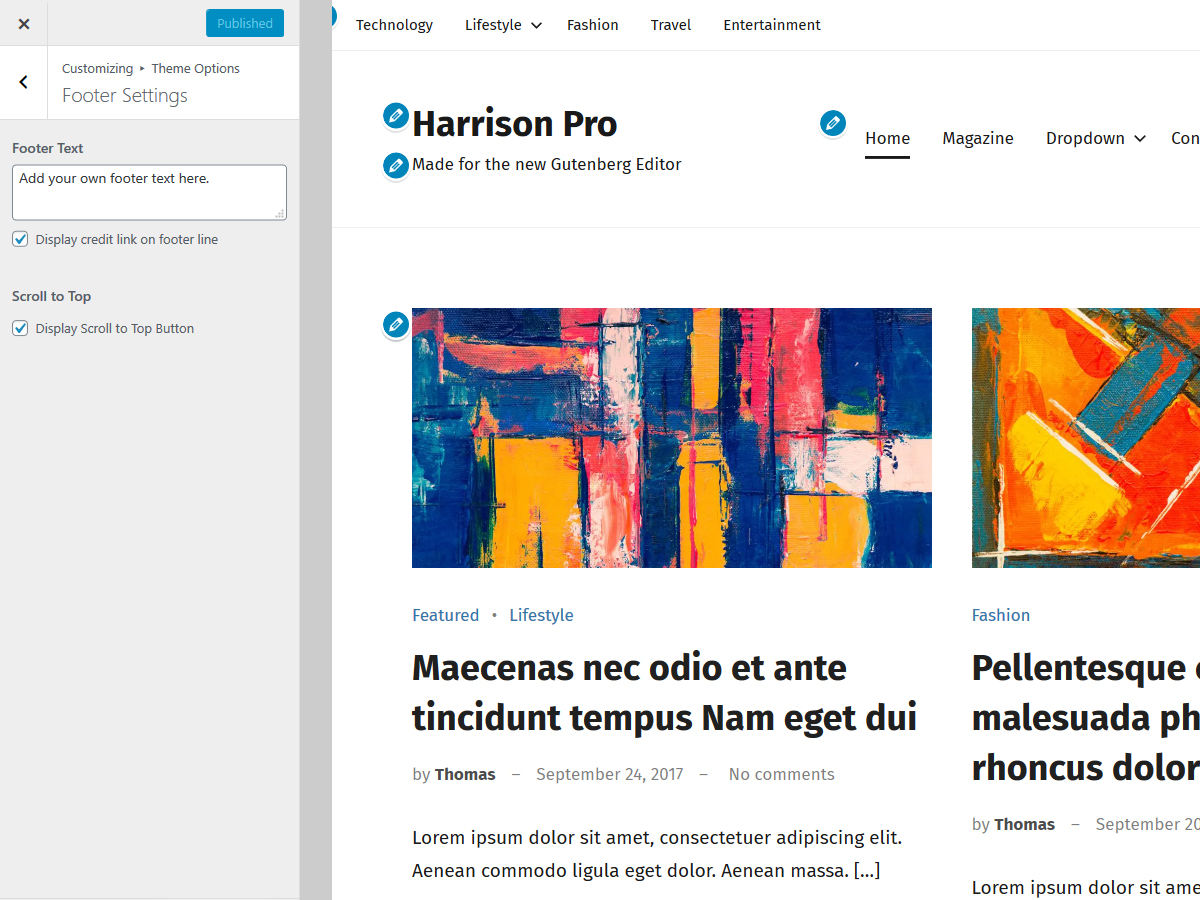
Footer Settings
The options for the footer area can be found on Appearance → Customize → Theme Options → Footer Settings. You can add your own Footer Copyright text here and deactivate the credit link to ThemeZee if you want.
With Dynamico Pro, you can also enable the Scroll-to-Top Button here.
Magazine Blocks
You can use our Magazine Blocks plugin to create a very flexible and magazine-styled home page, showcasing your most important posts from different categories.
You can create your own custom color palette for usage in the new WordPress Block Editor. You can set the Editor colors on Appearance → Customize → Theme Options → Block Colors.
Theme Colors
You can customize the theme colors on Appearance → Customize → Theme Options → Theme Colors. There are eleven color picker options for various theme elements available.
Typography
You can change the default fonts of the theme on Appearance → Customize → Theme Options → Typography. You can also choose bold and uppercase font styles for titles and navigation.
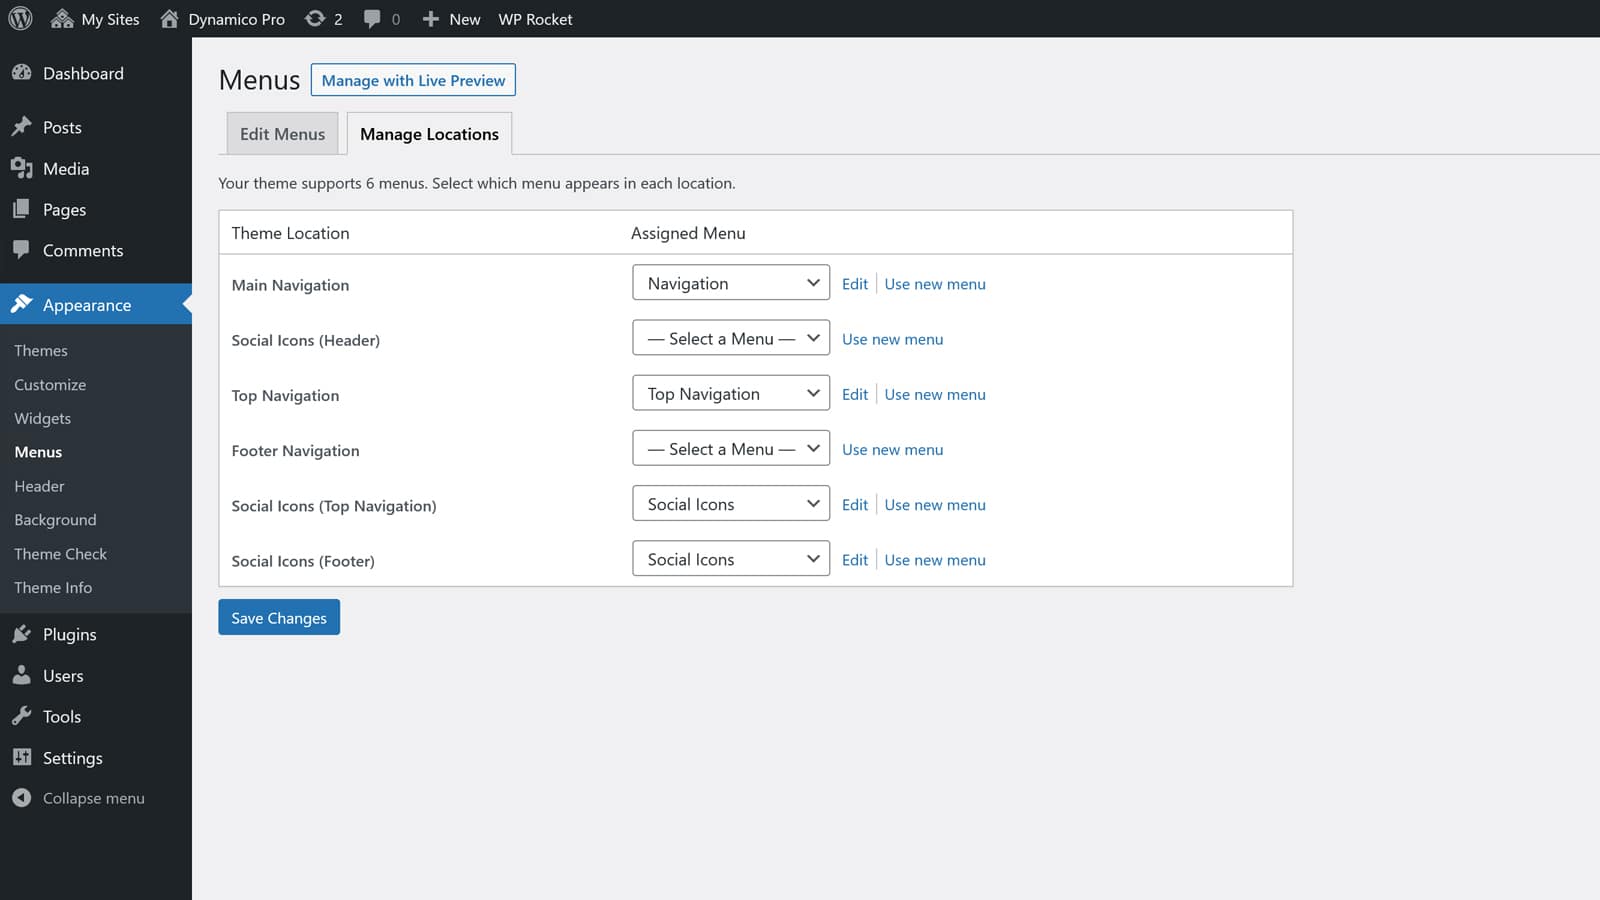
Additional Menus
With Dynamico Pro, you can use two additional menu positions, one in the header and one in the footer. You can create your menus and assign them on Appearance → Menus → Manage Locations.
Top Navigation
Footer Navigation
Social Icons
In addition to the normal navigation menus the Pro Version also adds two menu locations for displaying social icons in the header bar and footer area.
Since it is the same procedure for every theme, this tutorial does not explain how to install the theme. If you need help with the theme installation, please see the Install WordPress themes tutorial.
Install PRO Version Plugin
Please be aware that the PRO Version of Occasio is an Add-on plugin for the Occasio theme. Therefore you have to install and activate the Occasio theme and install the Occasio Pro plugin in addition. You can learn how to install Plugins on the Install WordPress plugins tutorial.
Configure Theme Options
Occasio supports the awesome Theme Customizer. You can configure all theme settings on Appearance → Customize → Theme Options.
The Theme Options panel in the Customizer includes following sections:
Layout Settings
Blog Settings
Post Settings
Footer Settings
Block Colors (only with PRO version)
Theme Colors (only with PRO version)
Typography (only with PRO version)
Theme Info
Set up WordPress Features
The theme supports several WordPress core features you know:
You can find the Layout Options in the Customizer on Appearance → Customize → Theme Options → Layout Settings.
You can choose between the default Centered Layout and the full-width Wide Layout for the theme container. You can also select the position of the sidebar here.
With Occasio Pro, you can also enable a search function in the header area.
Blog Settings
You can set the Blog Layout in the Customizer. Therefore go to Appearance → Customize → Theme Options → Blog Settings.
You can use the Blog Layout setting to choose between four different layouts for the blog. There are two list layouts and two grid-layouts with either two or three columns. In addition you can configure the Excerpt Length, Read More link and Number of Posts here.
Post Settings
You can go to Appearance → Customize → Theme Options → Post Settings to configure the appearance of posts.
The options let you choose if post date, author, comments and categories are shown. You can disable the featured images as well.
With Occasio Pro, you can also enable the Author Bio box on single posts.
Footer Settings
The options for the footer area can be found on Appearance → Customize → Theme Options → Footer Settings. You can add your own Footer Copyright text here and deactivate the credit link to ThemeZee if you want.
With Occasio Pro, you can also enable the Scroll-to-Top Button here.
Magazine Blocks
You can use our Magazine Blocks plugin to create a very flexible and magazine-styled home page, showcasing your most important posts from different categories.
You can create your own custom color palette for usage in the new WordPress Block Editor. You can set the Editor colors on Appearance → Customize → Theme Options → Block Colors.
Theme Colors
You can customize the theme colors on Appearance → Customize → Theme Options → Theme Colors. There are eleven color picker options for various theme elements available.
Typography
You can change the default fonts of the theme on Appearance → Customize → Theme Options → Typography. You can also choose bold and uppercase font styles for titles and navigation.
Additional Menus
With Occasio Pro, you can use two additional menu positions, one in the header and one in the footer. You can create your menus and assign them on Appearance → Menus → Manage Locations.
Top Navigation
Footer Navigation
Social Icons
In addition to the normal navigation menus the Pro Version also adds two menu locations for displaying social icons in the header and footer area.
Since it is the same procedure for every theme, this tutorial does not explain how to install the theme. If you need help with the theme installation, please see the Install WordPress themes tutorial.
Install PRO Version Plugin
Please be aware that the PRO Version of Harrison is an Add-on plugin for the Harrison theme. Therefore you have to install and activate the Harrison theme and install the Harrison Pro plugin in addition. You can learn how to install Plugins on the Install WordPress plugins tutorial.
Configure Theme Options
Harrison supports the awesome Theme Customizer. You can configure all theme settings on Appearance → Customize → Theme Options.
The Theme Options panel in the Customizer includes following sections:
Layout Settings
Blog Settings
Post Settings
Footer Settings
Block Colors (only with PRO version)
Theme Colors (only with PRO version)
Typography (only with PRO version)
Theme Info
Set up WordPress Features
The theme supports several WordPress core features you know:
You can find the Layout Options in the Customizer on Appearance → Customize → Theme Options → Layout Settings.
You can choose between the default Centered Layout and the full-width Wide Layout for the theme container and between a horizontal or vertical header layout, which controls the position of the site title and navigation menu.
With Harrison Pro, you can also enable a search function in the header area.
Blog Settings
You can set the Blog Layout in the Customizer. Therefore go to Appearance → Customize → Theme Options → Blog Settings.
You can use the Blog Layout setting to choose between six different layouts for the blog. There are four list layouts and two grid-layouts with either two or three columns. In addition you can configure the Excerpt Length, Read More link and Number of Posts here.
Post Settings
You can go to Appearance → Customize → Theme Options → Post Settings to configure the appearance of posts.
The options let you choose if post date, author, comments and categories are shown. You can select from different methods for displaying the featured image as well.
With Harrison Pro, you can also enable the Author Bio box on single posts.
Footer Settings
The options for the footer area can be found on Appearance → Customize → Theme Options → Footer Settings. You can add your own Footer Copyright text here and deactivate the credit link to ThemeZee if you want.
With Harrison Pro, you can also enable the Scroll-to-Top Button here.
Magazine Blocks
You can use our Magazine Blocks plugin to create a very flexible and magazine-styled home page, showcasing your most important posts from different categories.
You can create your own custom color palette for usage in the new WordPress Block Editor. You can set the Editor colors on Appearance → Customize → Theme Options → Block Colors.
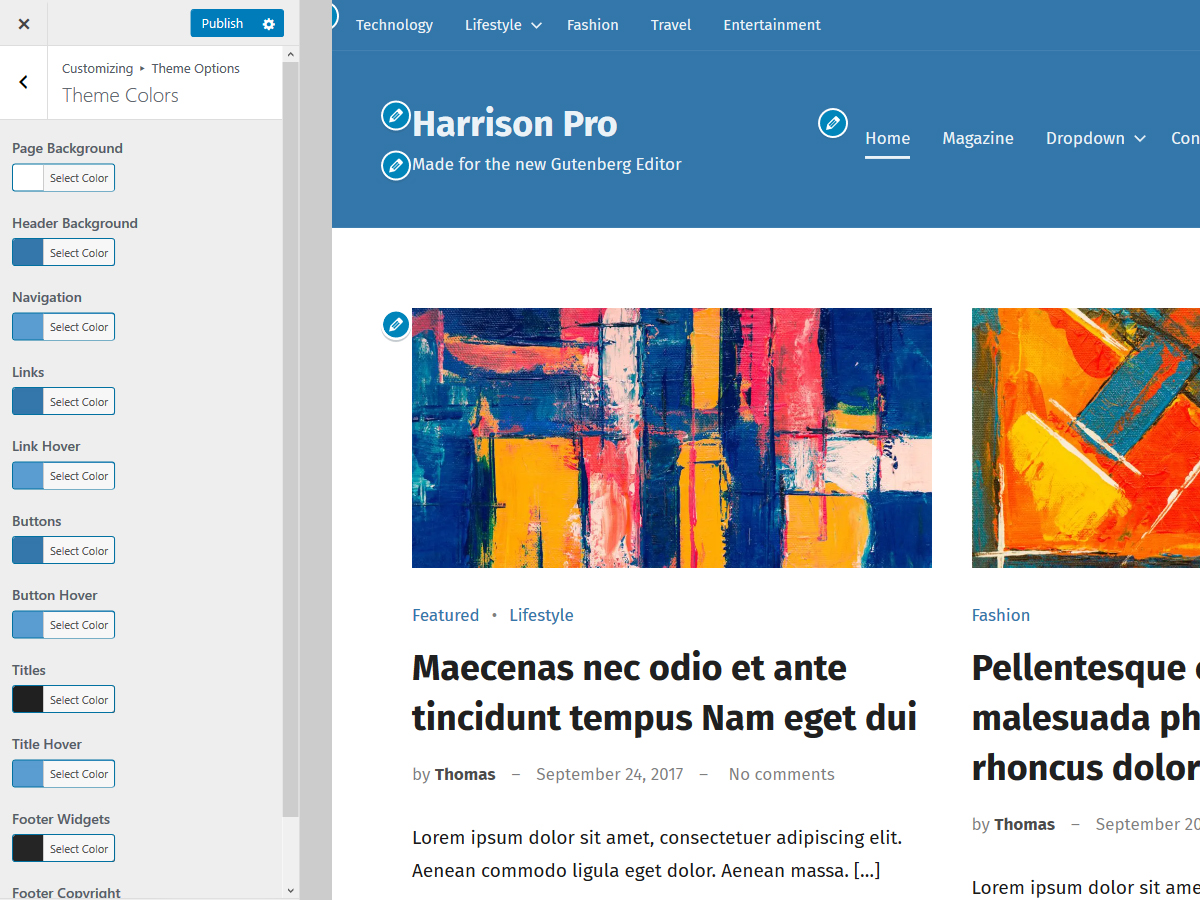
Theme Colors
You can customize the theme colors on Appearance → Customize → Theme Options → Theme Colors. There are eleven color picker options for various theme elements available.
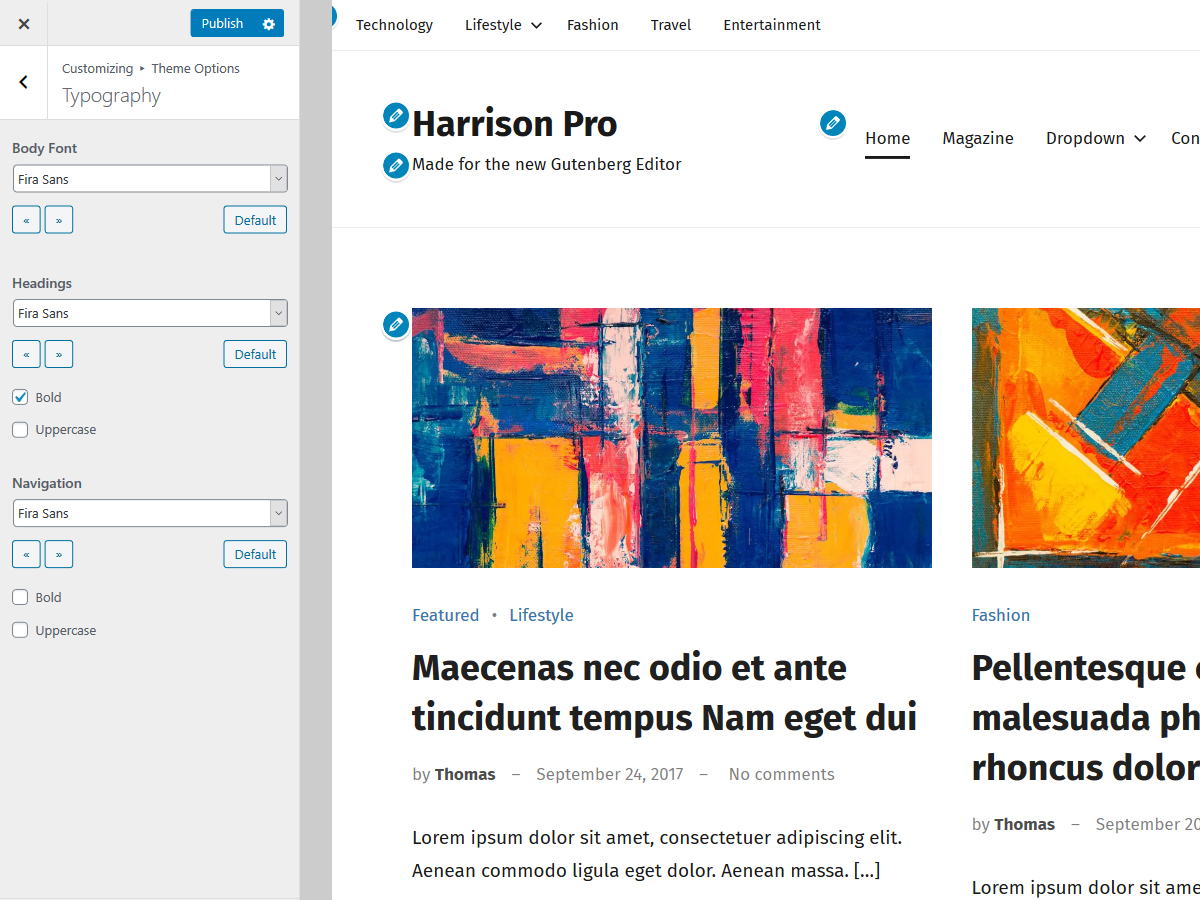
Typography
You can change the default fonts of the theme on Appearance → Customize → Theme Options → Typography.
Additional Menus
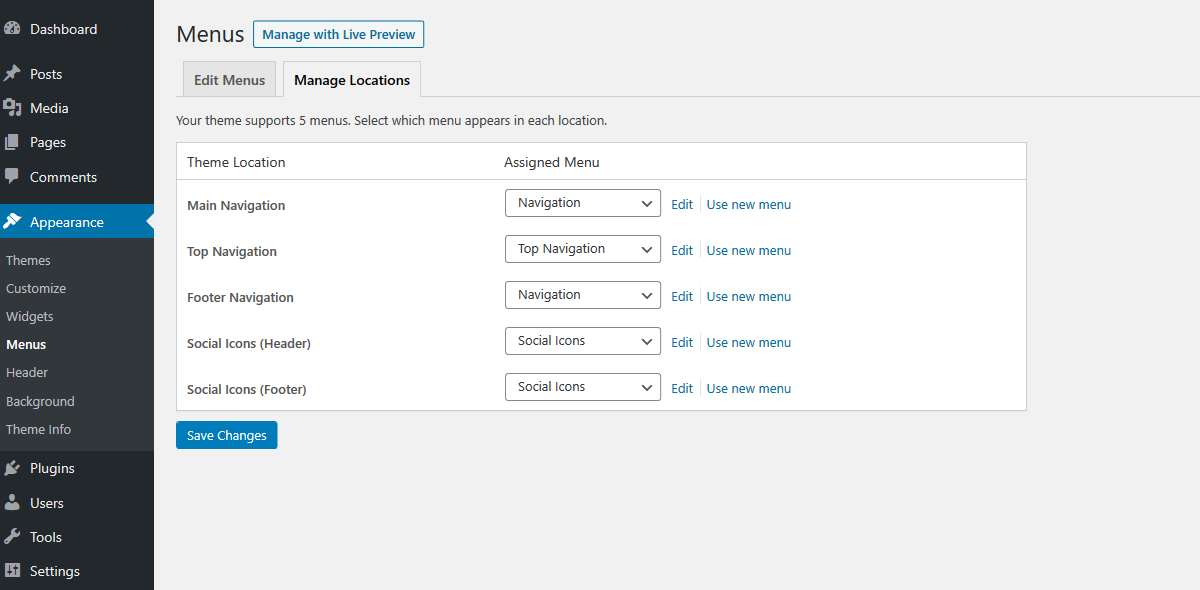
With Harrison Pro, you can use two additional menu positions, one in the header and one in the footer. You can create your menus and assign them on Appearance → Menus → Manage Locations.
Top Navigation
Footer Navigation
Social Icons
In addition to the normal navigation menus the Pro Version also adds two menu locations for displaying social icons in the header and footer area.
Since it is the same procedure for every theme, this tutorial does not explain how to install the theme. If you need help with the theme installation, please see the Install WordPress themes tutorial.
Install PRO Version Plugin
Please be aware that the PRO Version of Donovan is an Add-on plugin for the Donovan theme. Therefore you have to install and activate the Donovan theme and install the Donovan Pro plugin in addition. You can learn how to install Plugins on the Install WordPress plugins tutorial.
Configure Theme Options
Donovan supports the awesome Theme Customizer. You can configure all theme settings on Appearance → Customize → Theme Options.
The Theme Options panel in the Customizer includes following sections:
Layout Settings
Header Settings (only with PRO version)
Blog Settings
Post Settings
Color Settings (only with PRO version)
Typography (only with PRO version)
Footer Settings (only with PRO version)
Set up WordPress Features
The theme supports several WordPress core features you know:
You can find the Layout Options in the Customizer on Appearance → Customize → Theme Options → Layout Settings. You can choose between three different theme layouts – Wide, Centered or Boxed Layout. You can also configure the Sidebar position there.
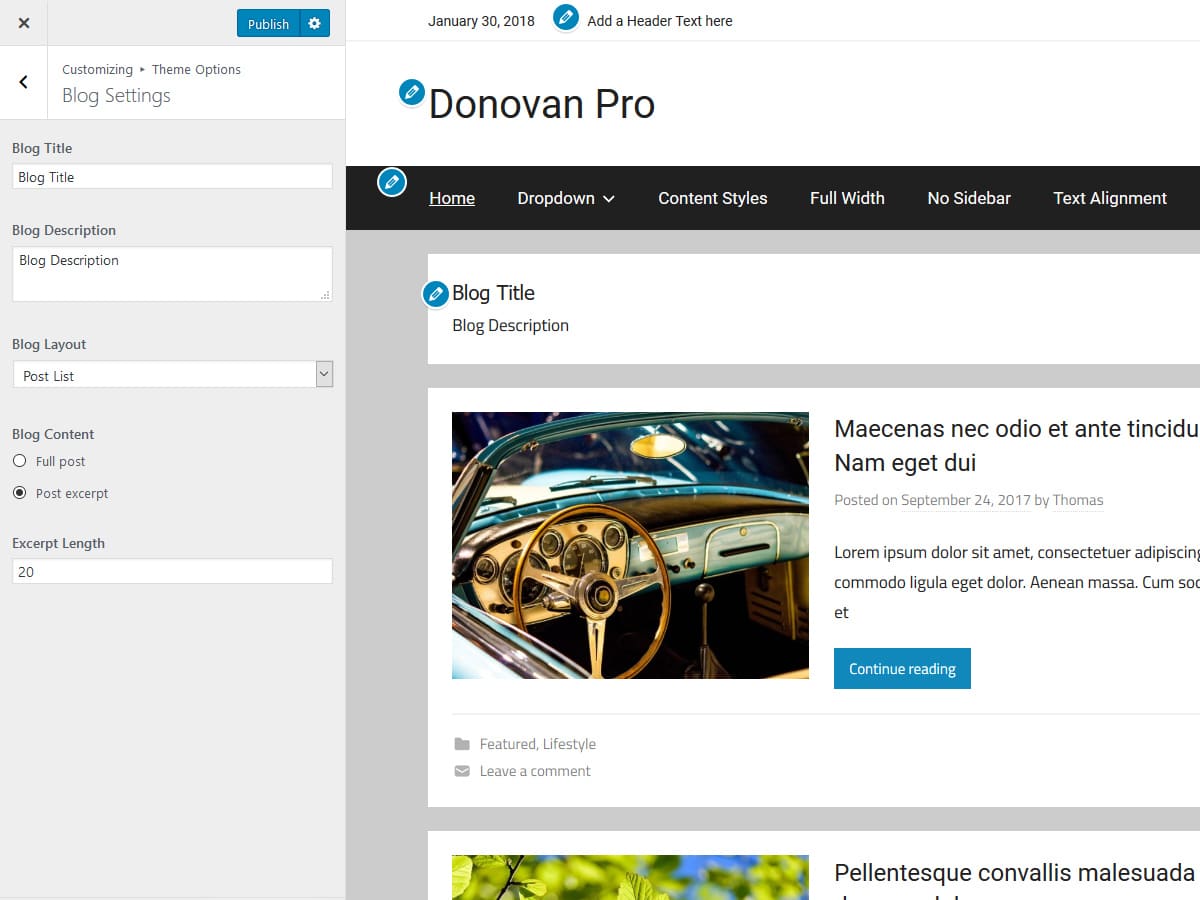
Blog Settings
You can set the Blog Layout in the Customizer. Therefore go to Appearance → Customize → Theme Options → Blog Settings.
You can use the Blog Layout setting to choose between Post Grid, Post List or Large Posts. There are also options to set a blog title and choose between excerpt or full posts.
No Magazine Widgets
Donovan is a pure Blogging Theme and does not support our usual Magazine Widgets.
Page Templates
Donovan supports two different page templates for static pages and blog posts:
No Sidebar: Displays no widgets and centers the content
Full Width: Displays also no sidebar and shows the content in full width
Theme Specifications
Donovan defines two custom image sizes with an image ratio of 16:9 and 4:3.
The main content column width is 910.
Single Posts use an image size of 1360x765. Ratio is 16:9.
For Large Post and the Post Grid Layout, the image sizes are also 1360x765. Ratio 16:9.
For the Blog List layout, the image size is 600x450. Ratio 4:3.
The Custom Header image will display at a maximum width of 2560 and a flexible height (default height = 500).
All measurements in pixels.
Pro Version Features
The Pro Version of Donovan is an add-on plugin which you can purchase on the Donovan Pro page.
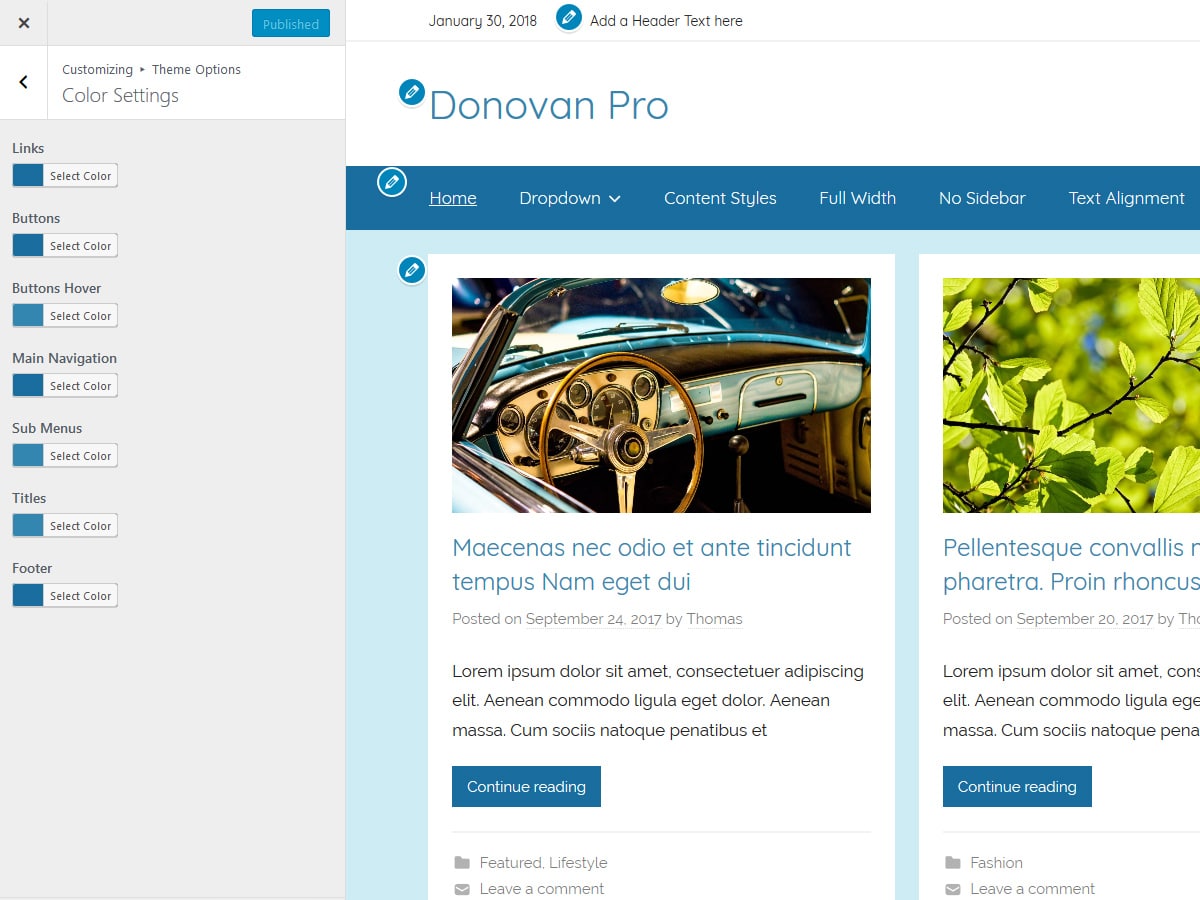
You can customize the theme colors and fonts on Appearance → Customize → Theme Options → Colors Settings / Typography.
Header Settings
Go to Appearance → Customize → Theme Options → Header Settings in order to create a header text. You can also display the current date in the header or activate the search function in the navigation menu there.
Additional Menus
Widh Donovan Pro, you can use two additional menu positions to show a second navigation in the header and in the footer. You can create your menus and assign them on Appearance → Menus → Manage Locations.
Footer Widgets
Donovan Pro adds a widgetized footer area. You can add your footer widgets on Appearance → Widgets.
Footer Copyright
You can disable the credit link to themezee.com on Appearance → Customize → Theme Options → Footer Settings. You can also add your own footer text there and activate the Scroll-to-Top Button.
Thank you so much for using the Donovan WordPress theme.
Since it is the same procedure for every theme, this tutorial does not explain how to install the theme. If you need help with the theme installation, please see the Install WordPress themes tutorial.
Install PRO Version Plugin
Please be aware that the PRO Version of Mercia is an Add-on plugin for the Mercia theme. Therefore you have to install and activate the Mercia theme and install the Mercia Pro plugin in addition. You can learn how to install Plugins on the Install WordPress plugins tutorial.
Configure Theme Options
Mercia supports the awesome Theme Customizer. You can configure all theme settings on Appearance → Customize → Theme Options.
The Theme Options panel in the Customizer includes following sections:
Layout Settings
Header Settings (only with PRO version)
Blog Settings
Post Settings
Color Settings (only with PRO version)
Typography (only with PRO version)
Footer Settings (only with PRO version)
Set up WordPress Features
The theme supports several WordPress core features you know:
You can use the Magazine Widgets to create a magazine-styled homepage in the Customizer. Therefore go to Appearance → Customize → Widgets → Magazine Homepage.
Since it is the same procedure for every theme, this tutorial does not explain how to install the theme. If you need help with the theme installation, please see the Install WordPress themes tutorial.
Install PRO Version Plugin
Please be aware that the PRO Version of Chronus is an Add-on plugin for the Chronus theme. Therefore you have to install and activate the Chronus theme and install the Chronus Pro plugin in addition. You can learn how to install Plugins on the Install WordPress plugins tutorial.
Configure Theme Options
Chronus supports the awesome Theme Customizer. You can configure all theme settings on Appearance → Customize → Theme Options.
The Theme Options panel in the Customizer includes following sections:
Layout Settings
Blog Settings
Post Settings
Featured Posts
Theme Colors (only with PRO version)
Theme Fonts (only with PRO version)
Footer Settings (only with PRO version)
Set up WordPress Features
The theme supports several WordPress core features you know:
To set up featured posts, go to Appearance → Customize → Theme Options → Featured Posts.
Please see our Featured Posts Tutorial if you need more help to setup the Featured Content area.
Magazine Homepage
You can use the Magazine Widgets to create a magazine-styled homepage in the Customizer. Therefore go to Appearance → Customize → Widgets → Magazine Homepage.
Since it is the same procedure for every theme, this tutorial does not explain how to install the theme. If you need help with the theme installation, please see the Install WordPress themes tutorial.
Install PRO Version Plugin
Please be aware that the PRO Version of Treville is an Add-on plugin for the Treville theme. Therefore you have to install and activate the Treville theme and install the Treville Pro plugin in addition. You can learn how to install Plugins on the Install WordPress plugins tutorial.
Configure Theme Options
Treville supports the awesome Theme Customizer. You can configure all theme settings on Appearance → Customize → Theme Options.
The Theme Options panel in the Customizer includes following sections:
General Settings
Post Settings
Post Slider
Theme Colors (only with PRO version)
Theme Fonts (only with PRO version)
Footer Settings (only with PRO version)
Set up WordPress Features
The theme supports several WordPress core features you know:
You can use the Magazine Widgets to create a magazine-styled homepage in the Customizer. Therefore go to Appearance → Customize → Widgets → Magazine Homepage.
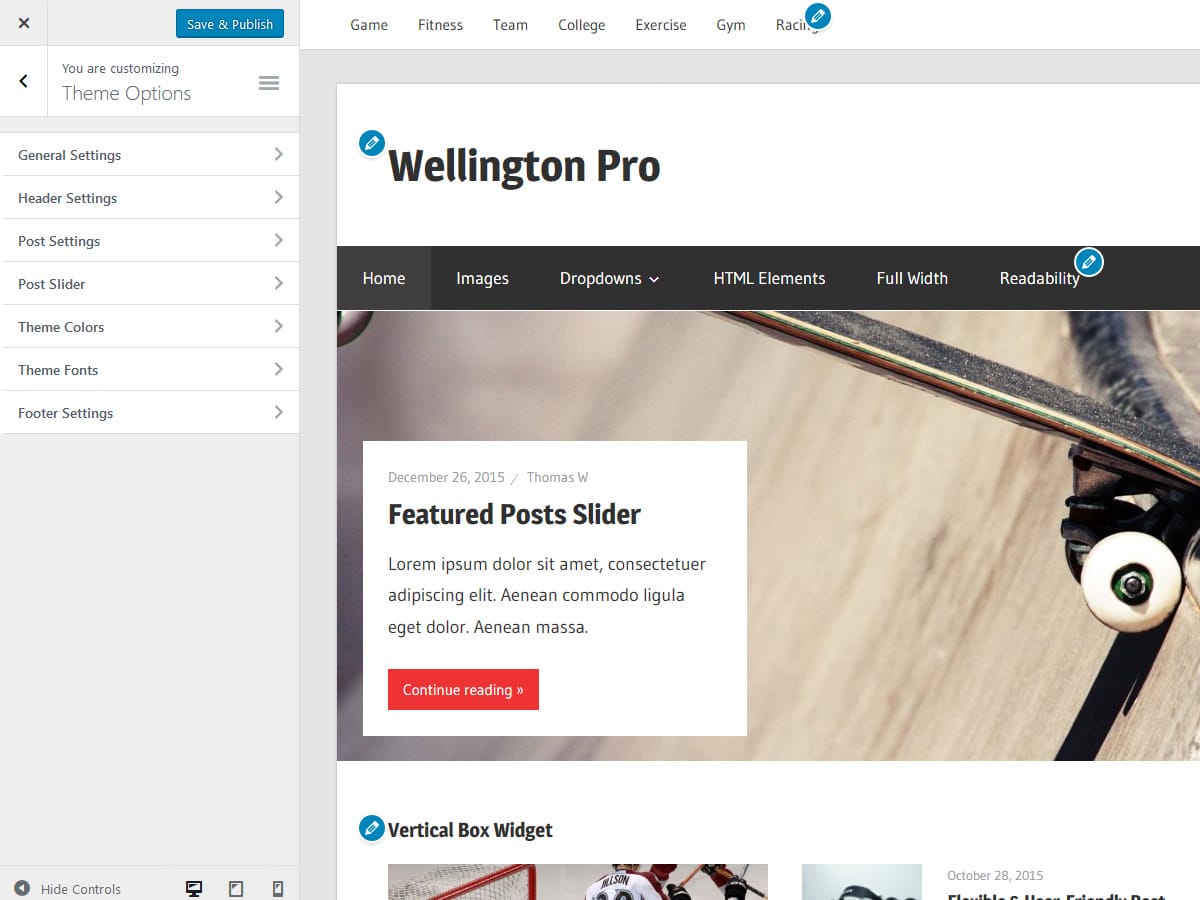
Since it is the same procedure for every theme, this tutorial does not explain how to install the theme. If you need help with the theme installation, please see the Install WordPress themes tutorial.
Install PRO Version Plugin
Please be aware that the PRO Version of Wellington is an Add-on plugin for the Wellington theme. Therefore you have to install and activate the Wellington theme and install the Wellington Pro plugin in addition. You can learn how to install Plugins on the Install WordPress plugins tutorial.
Configure Theme Options
Wellington supports the awesome Theme Customizer. You can configure all theme settings on Appearance → Customize → Theme Options.
The Theme Options panel in the Customizer includes following sections:
General Settings
Header Spacing (only with PRO version)
Post Settings
Post Slider
Theme Colors (only with PRO version)
Theme Fonts (only with PRO version)
Footer Settings (only with PRO version)
Set up WordPress Features
The theme supports several WordPress core features you know:
You can use the Magazine Widgets to create a magazine-styled homepage in the Customizer. Therefore go to Appearance → Customize → Widgets → Magazine Homepage.
Since it is the same procedure for every theme, this tutorial does not explain how to install the theme. If you need help with the theme installation, please see the Install WordPress themes tutorial.
Install PRO Version Plugin
Please be aware that the PRO Version of Napoli is an Add-on plugin for the Napoli theme. Therefore you have to install and activate the Napoli theme and install the Napoli Pro plugin in addition. You can learn how to install Plugins on the Install WordPress plugins tutorial.
Configure Theme Options
Napoli supports the awesome Theme Customizer. You can configure all theme settings on Appearance → Customize → Theme Options.
The Theme Options panel in the Customizer includes following sections:
General Settings
Post Settings
Post Slider
Theme Colors (only with PRO version)
Theme Fonts (only with PRO version)
Footer Settings (only with PRO version)
Set up WordPress Features
The theme supports several WordPress core features you know:
You can use the Magazine Widgets to create a magazine-styled homepage in the Customizer. Therefore go to Appearance → Customize → Widgets → Magazine Homepage.
Since it is the same procedure for every theme, this tutorial does not explain how to install the theme. If you need help with the theme installation, please see the Install WordPress themes tutorial.
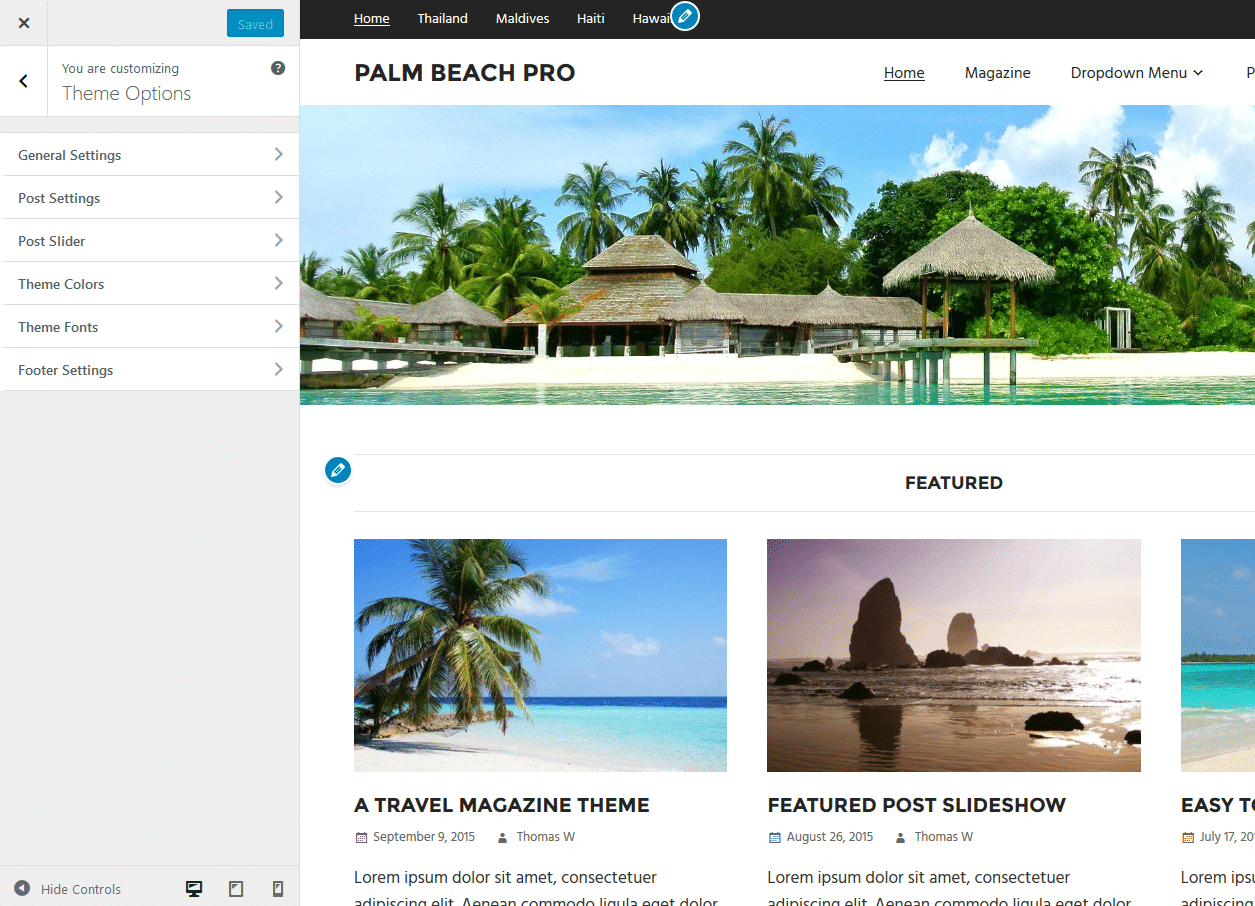
Install PRO Version Plugin
Please be aware that the PRO Version of Palm Beach is an Add-on plugin for the Palm Beach theme. Therefore you have to install and activate the Palm Beach theme and install the Palm Beach Pro plugin in addition. You can learn how to install Plugins on the Install WordPress plugins tutorial.
Configure Theme Options
Palm Beach supports the awesome Theme Customizer. You can configure all theme settings on Appearance → Customize → Theme Options.
The Theme Options panel in the Customizer includes following sections:
General Settings
Post Settings
Post Slider
Theme Colors (only with PRO version)
Theme Fonts (only with PRO version)
Footer Settings (only with PRO version)
Set up WordPress Features
The theme supports several WordPress core features you know:
You can use the Magazine Widgets to create a magazine-styled homepage in the Customizer. Therefore go to Appearance → Customize → Widgets → Magazine Homepage.
Since it is the same procedure for every theme, this tutorial does not explain how to install the theme. If you need help with the theme installation, please see the Install WordPress themes tutorial.
Install PRO Version Plugin
Please be aware that the PRO Version of Pocono is an Add-on plugin for the Pocono theme. Therefore you have to install and activate the Pocono theme and install the Pocono Pro plugin in addition. You can learn how to install Plugins on the Install WordPress plugins tutorial.
Configure Theme Options
Pocono supports the awesome Theme Customizer. You can configure all theme settings on Appearance → Customize → Theme Options.
The Theme Options panel in the Customizer includes following sections:
General Settings
Post Settings
Post Slider
Set up WordPress Features
The theme supports several WordPress core features you know:
You can use the Magazine Widgets to create a magazine-styled homepage in the Customizer. Therefore go to Appearance → Customize → Widgets → Magazine Homepage.
Since it is the same procedure for every theme, this tutorial does not explain how to install the theme. If you need help with the theme installation, please see the Install WordPress themes tutorial.
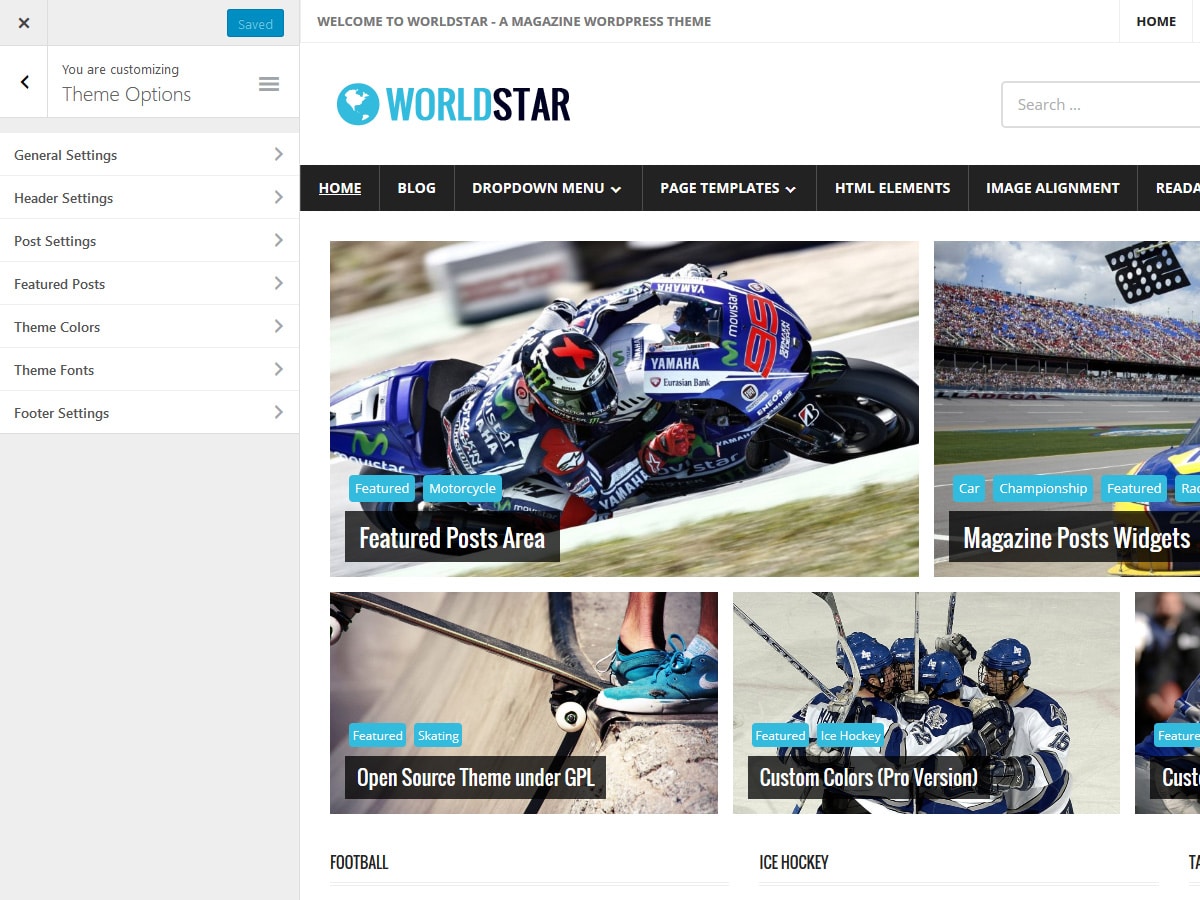
Install PRO Version Plugin
Please be aware that the PRO Version of WorldStar is an Add-on plugin for the WorldStar theme. Therefore you have to install and activate the WorldStar theme and install the WorldStar Pro plugin in addition. You can learn how to install Plugins on the Install WordPress plugins tutorial.
Configure Theme Options
WorldStar supports the awesome Theme Customizer. You can configure all theme settings on Appearance → Customize → Theme Options.
The Theme Options panel in the Customizer includes following sections:
General Settings
Header Settings (only with PRO version)
Post Settings
Featured Posts
Theme Colors (only with PRO version)
Theme Fonts (only with PRO version)
Footer Settings (only with PRO version)
Set up WordPress Features
The theme supports several WordPress core features you know:
To set up featured posts, go to Appearance → Customize → Theme Options → Featured Posts.
Please see our Featured Posts Tutorial if you need more help to setup the Featured Content area.
Magazine Homepage
You can use the Magazine Widgets to create a magazine-styled homepage in the Customizer. Therefore go to Appearance → Customize → Widgets → Magazine Homepage.
Since it is the same procedure for every theme, this tutorial does not explain how to install the theme. If you need help with the theme installation, please see the Install WordPress themes tutorial.
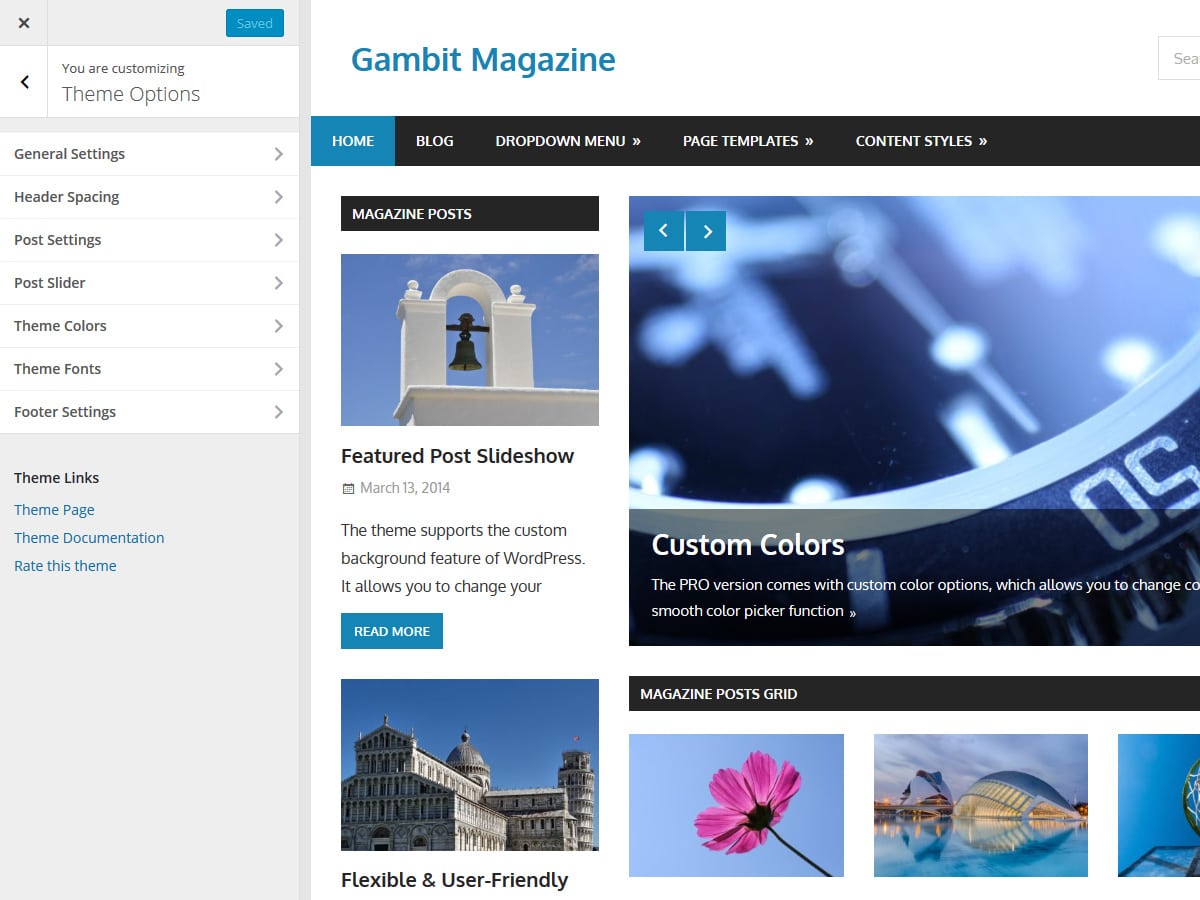
Install PRO Version Plugin
Please be aware that the PRO Version of Gambit is an Add-on plugin for the Gambit theme. Therefore you have to install and activate the Gambit theme and install the Gambit Pro plugin in addition. You can learn how to install Plugins on the Install WordPress plugins tutorial.
Configure Theme Options
Gambit supports the awesome Theme Customizer. You can configure all theme settings on Appearance → Customize → Theme Options.
The Theme Options panel in the Customizer includes following sections:
General Settings
Header Spacing (only with PRO version)
Post Settings
Post Slider
Theme Colors (only with PRO version)
Theme Fonts (only with PRO version)
Footer Settings (only with PRO version)
Set up WordPress Features
The theme supports several WordPress core features you know:
You can use the Magazine Widgets to create a magazine-styled homepage in the Customizer. Therefore go to Appearance → Customize → Widgets → Magazine Homepage.
Since it is the same procedure for every theme, this tutorial does not explain how to install the theme. If you need help with the theme installation, please see the Install WordPress themes tutorial.
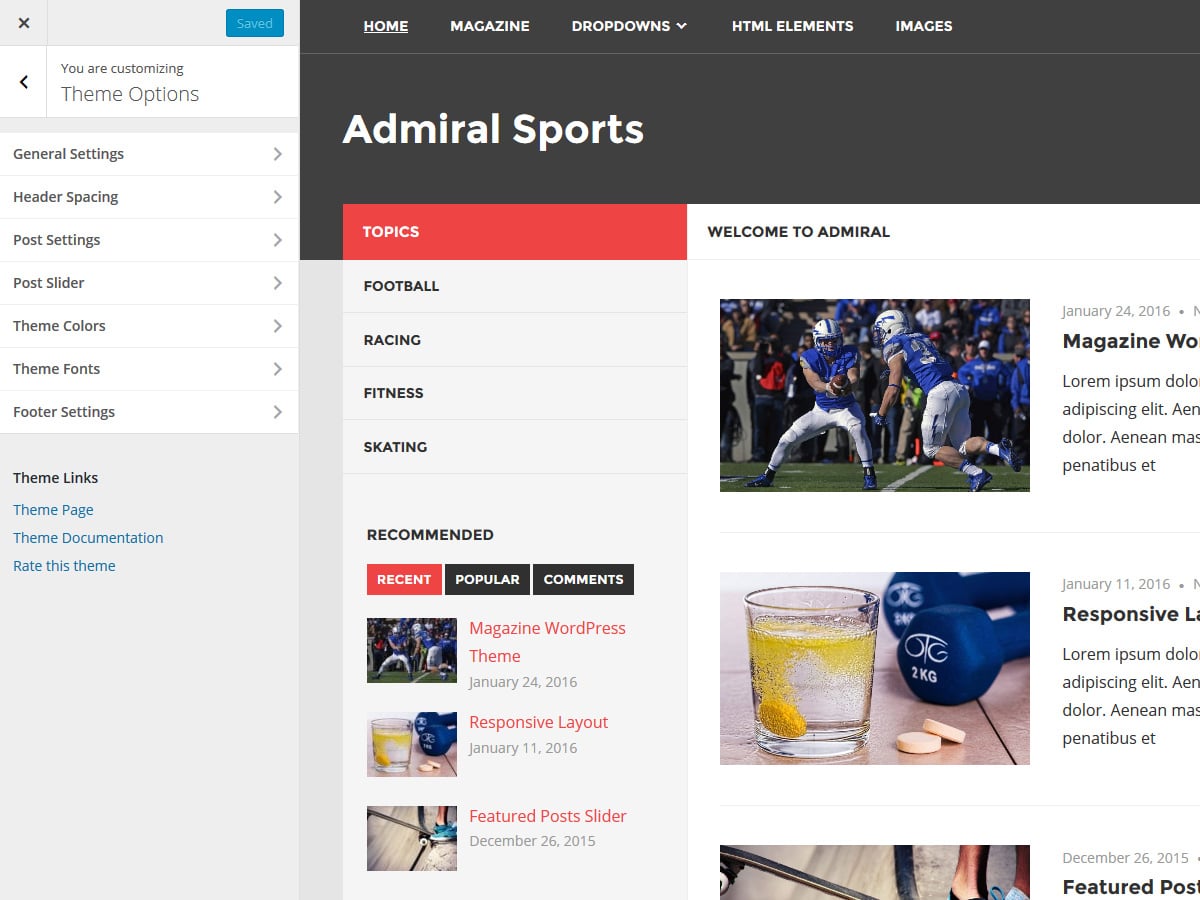
Install PRO Version Plugin
Please be aware that the PRO Version of Admiral is an Add-on plugin for the Admiral theme. Therefore you have to install and activate the Admiral theme and install the Admiral Pro plugin in addition. You can learn how to install Plugins on the Install WordPress plugins tutorial.
Configure Theme Options
Admiral supports the awesome Theme Customizer. You can configure all theme settings on Appearance → Customize → Theme Options.
The Theme Options panel in the Customizer includes following sections:
General Settings
Header Spacing (only with PRO version)
Post Settings
Post Slider
Theme Colors (only with PRO version)
Theme Fonts (only with PRO version)
Footer Settings (only with PRO version)
Set up WordPress Features
The theme supports several WordPress core features you know:
You can use the Magazine Widgets to create a magazine-styled homepage in the Customizer. Therefore go to Appearance → Customize → Widgets → Magazine Homepage.
Since it is the same procedure for every theme, this tutorial does not explain how to install the theme. If you need help with the theme installation, please see the Install WordPress themes tutorial.
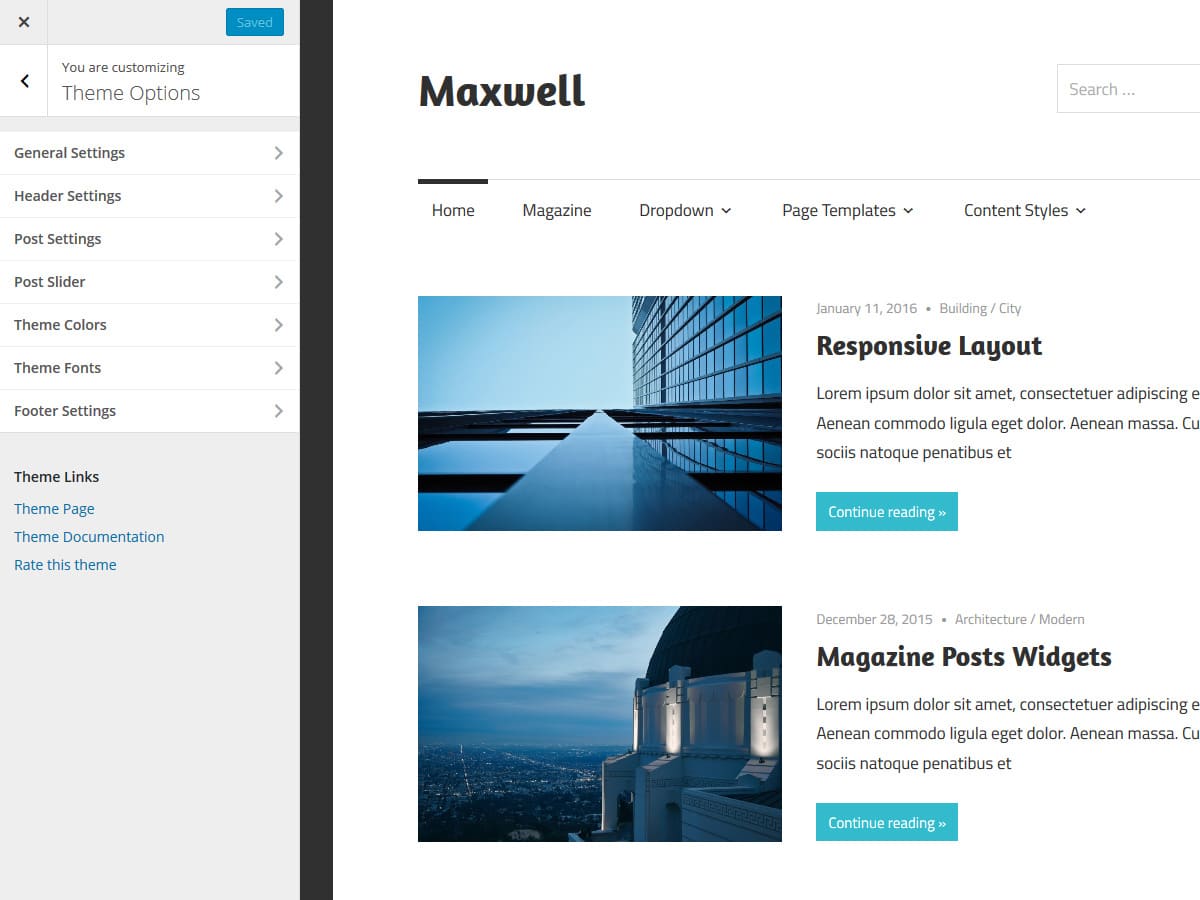
Install PRO Version Plugin
Please be aware that the PRO Version of Maxwell is an Add-on plugin for the Maxwell theme. Therefore you have to install and activate the Maxwell theme and install the Maxwell Pro plugin in addition. You can learn how to install Plugins on the Install WordPress plugins tutorial.
Configure Theme Options
Maxwell supports the awesome Theme Customizer. You can configure all theme settings on Appearance → Customize → Theme Options.
The Theme Options panel in the Customizer includes following sections:
General Settings
Header Spacing (only with PRO version)
Post Settings
Post Slideshow
Theme Colors (only with PRO version)
Theme Fonts (only with PRO version)
Footer Settings (only with PRO version)
Set up WordPress Features
The theme supports several WordPress core features you know:
You can use the Magazine Widgets to create a magazine-styled homepage in the Customizer. Therefore go to Appearance → Customize → Widgets → Magazine Homepage.
Since it is the same procedure for every theme, this tutorial does not explain how to install the theme. If you need help with the theme installation, please see the Install WordPress themes tutorial.
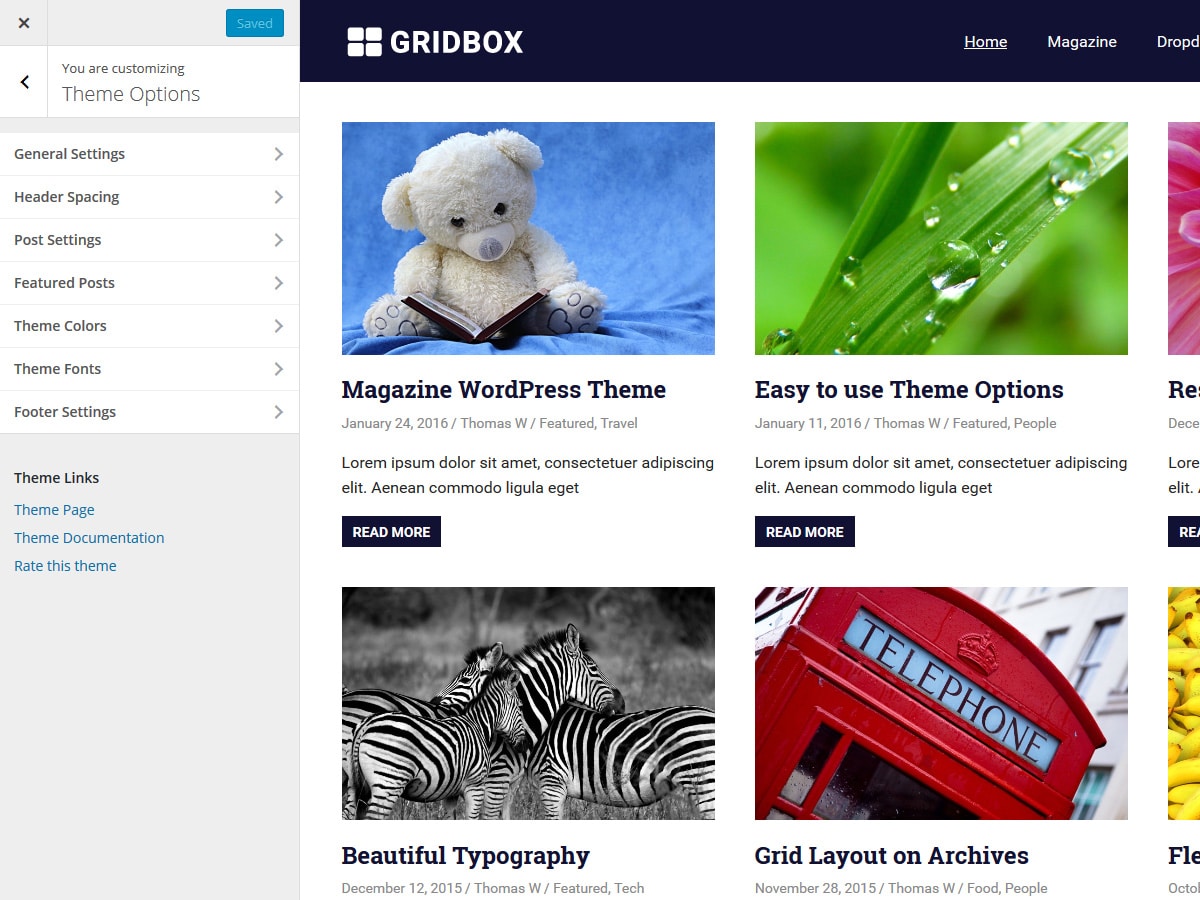
Install PRO Version Plugin
Please be aware that the PRO Version of Gridbox is an Add-on plugin for the Gridbox theme. Therefore you have to install and activate the Gridbox theme and install the Gridbox Pro plugin in addition. You can learn how to install Plugins on the Install WordPress plugins tutorial.
Configure Theme Options
Gridbox supports the awesome Theme Customizer. You can configure all theme settings on Appearance → Customize → Theme Options.
The Theme Options panel in the Customizer includes following sections:
General Settings
Header Spacing (only with PRO version)
Post Settings
Featured Posts
Theme Colors (only with PRO version)
Theme Fonts (only with PRO version)
Footer Settings (only with PRO version)
Set up WordPress Features
The theme supports several WordPress core features you know:
To set up featured posts, go to Appearance → Customize → Theme Options → Featured Posts.
Please see our Featured Posts Tutorial if you need more help to setup the Featured Content area.
Magazine Homepage
You can use the Magazine Widgets to create a magazine-styled homepage in the Customizer. Therefore go to Appearance → Customize → Widgets → Magazine Homepage.
Since it is the same procedure for every theme, this tutorial does not explain how to install the theme. If you need help with the theme installation, please see the Install WordPress themes tutorial.
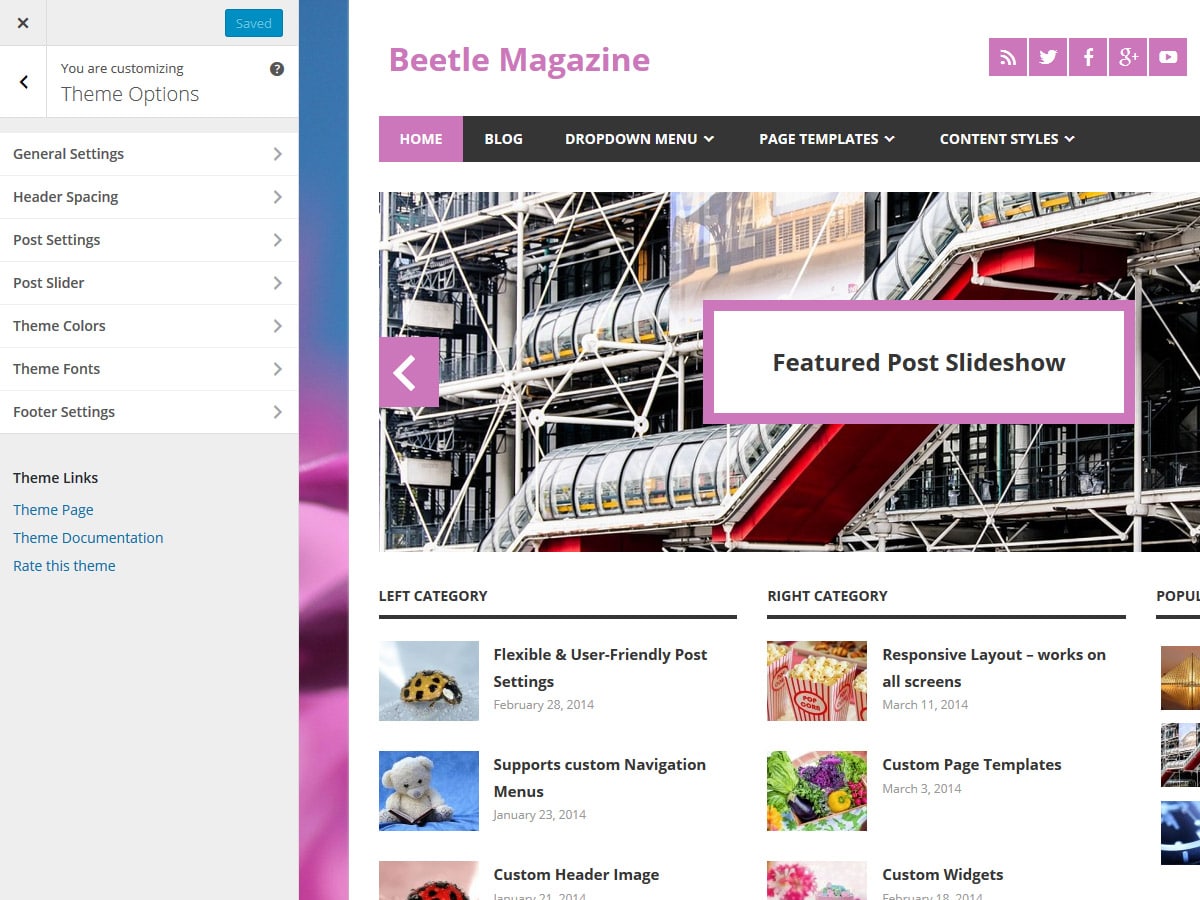
Install PRO Version Plugin
Please be aware that the PRO Version of Beetle is an Add-on plugin for the Beetle theme. Therefore you have to install and activate the Beetle theme and install the Beetle Pro plugin in addition. You can learn how to install Plugins on the Install WordPress plugins tutorial.
Configure Theme Options
Beetle supports the awesome Theme Customizer. You can configure all theme settings on Appearance → Customize → Theme Options.
The Theme Options panel in the Customizer includes following sections:
General Settings
Header Spacing (only with PRO version)
Post Settings
Post Slideshow
Theme Colors (only with PRO version)
Theme Fonts (only with PRO version)
Footer Settings (only with PRO version)
Set up WordPress Features
The theme supports several WordPress core features you know:
You can use the Magazine Widgets to create a magazine-styled homepage in the Customizer. Therefore go to Appearance → Customize → Widgets → Magazine Homepage.
Since it is the same procedure for every theme, this tutorial does not explain how to install the theme. If you need help with the theme installation, please see the Install WordPress themes tutorial.
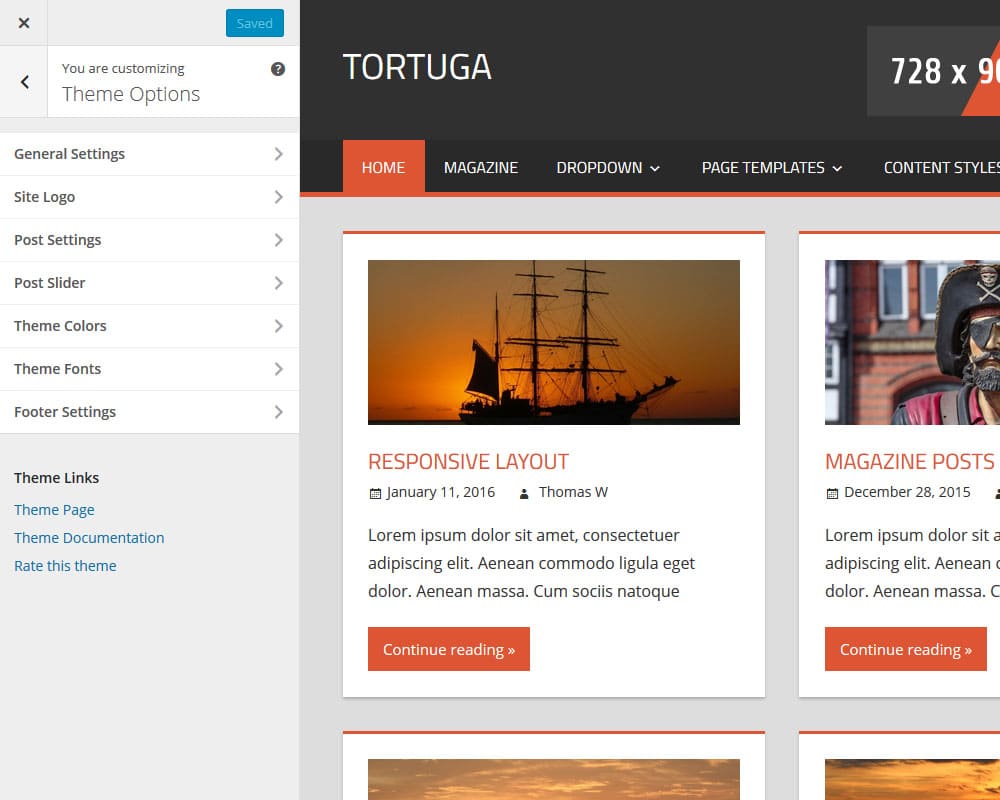
Install PRO Version Plugin
Please be aware that the PRO Version of Tortuga is an Add-on plugin for the Tortuga theme. Therefore you have to install and activate the Tortuga theme and install the Tortuga Pro plugin in addition. You can learn how to install Plugins on the Install WordPress plugins tutorial.
Configure Theme Options
Tortuga supports the awesome Theme Customizer. You can configure all theme settings on your WordPress admin panel → Appearance → Customize on the “Theme Options” section.
The “Theme Options” section in the Customizer includes following sub sections:
General Settings Choose the sidebar and add a blog title and description.
Header Settings (only with PRO version) Configure the spacing of the logo and header area.
Post Settings Choose between diffrent post layouts. Deactivate date, author and other post meta information.
Post Slideshow Activate and configure the Post Slideshow.
Theme Colors (only with PRO version)
This section let you choose the font and background colors of various theme elements.
Theme Fonts (only with PRO version)
Change the text, navigation and title fonts easily in this section.
Footer Settings (only with PRO version)
Add your own footer text and remove the copyright link of ThemeZee
Set up WordPress Features
The theme supports several WordPress core features you know:
You can use the Magazine Widgets to create a magazine-styled homepage in the Customizer. Therefore go to Appearance → Customize → Widgets → Magazine Homepage.
Since it is the same procedure for every theme, this tutorial does not explain how to install the theme. If you need help with the theme installation, please see the Install WordPress themes tutorial.
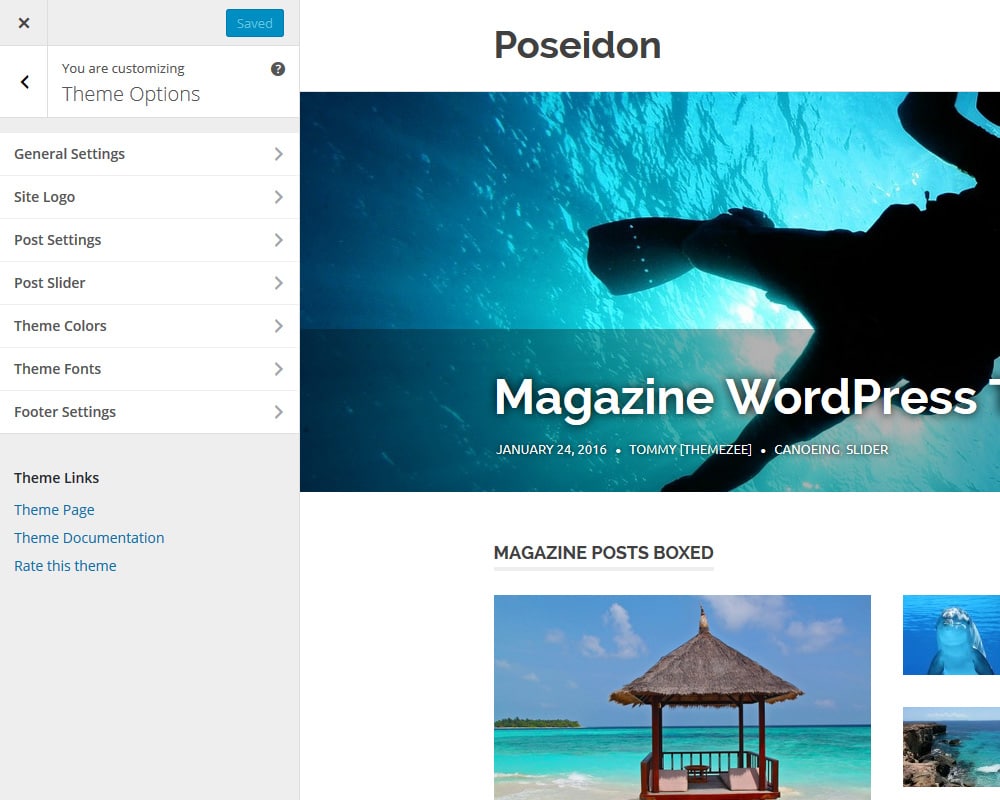
Install PRO Version Plugin
Please be aware that the PRO Version of Poseidon is an Add-on plugin for the Poseidon theme. Therefore you have to install and activate the Poseidon theme and install the Poseidon Pro plugin in addition. You can learn how to install Plugins on the Install WordPress plugins tutorial.
Configure Theme Options
Poseidon supports the awesome Theme Customizer. You can configure all theme settings on your WordPress admin panel → Appearance → Customize on the “Theme Options” section.
The “Theme Options” section in the Customizer includes following sub sections:
General Settings Choose the sidebar and post layouts.
Header Settings (only with PRO version) Configure the spacing of the logo and navigation menu.
Post Settings Choose between full posts and post excerpts. Deactivate date, author and other post meta information.
Post Slideshow Activate and configure the Post Slideshow.
Theme Colors (only with PRO version)
This section let you choose the font and background colors of various theme elements.
Theme Fonts (only with PRO version)
Change the text, navigation and title fonts easily in this section.
Footer Settings (only with PRO version)
Add your own footer text and remove the copyright link of ThemeZee
Set up WordPress Features
The theme supports several WordPress core features you know:
You can use the Magazine Widgets to create a magazine-styled homepage in the Customizer. Therefore go to Appearance → Customize → Widgets → Magazine Homepage.
Since it is the same procedure for every theme, this tutorial does not explain how to install the theme. If you need help with the theme installation, please see the Install WordPress themes tutorial.
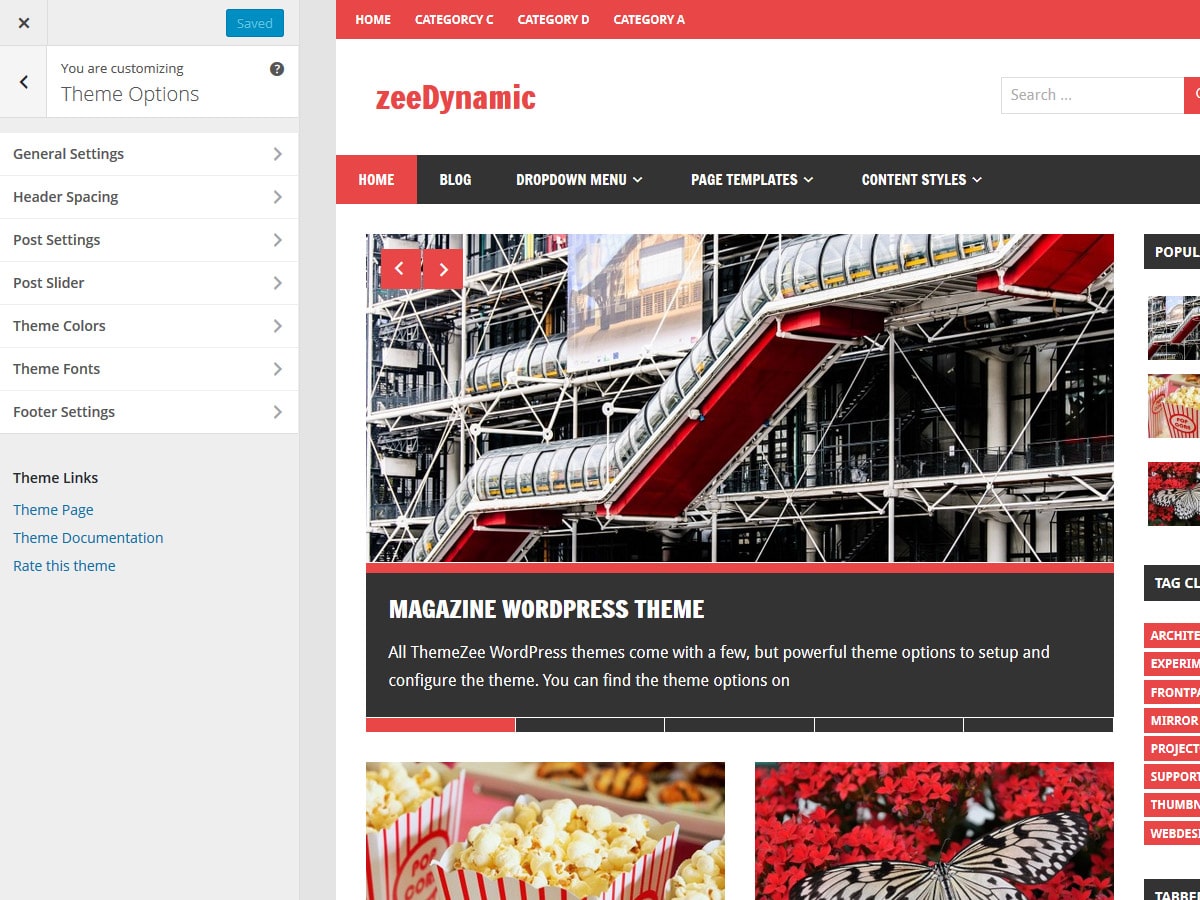
Install PRO Version Plugin
Please be aware that the PRO Version of zeeDynamic is an Add-on plugin for the zeeDynamic theme. Therefore you have to install and activate the zeeDynamic theme and install the zeeDynamic Pro plugin in addition. You can learn how to install Plugins on the Install WordPress plugins tutorial.
Configure Theme Options
zeeDynamic supports the awesome Theme Customizer. You can configure all theme settings on Appearance → Customize → Theme Options.
The Theme Options panel in the Customizer includes following sections:
General Settings
Header Spacing (only with PRO version)
Post Settings
Post Slideshow
Theme Colors (only with PRO version)
Theme Fonts (only with PRO version)
Footer Settings (only with PRO version)
Set up WordPress Features
The theme supports several WordPress core features you know:
You can use the Magazine Widgets to create a magazine-styled homepage in the Customizer. Therefore go to Appearance → Customize → Widgets → Magazine Homepage.
Since it is the same procedure for every theme, this tutorial does not explain how to install the theme. If you need help with the theme installation, please see the Install WordPress themes tutorial.
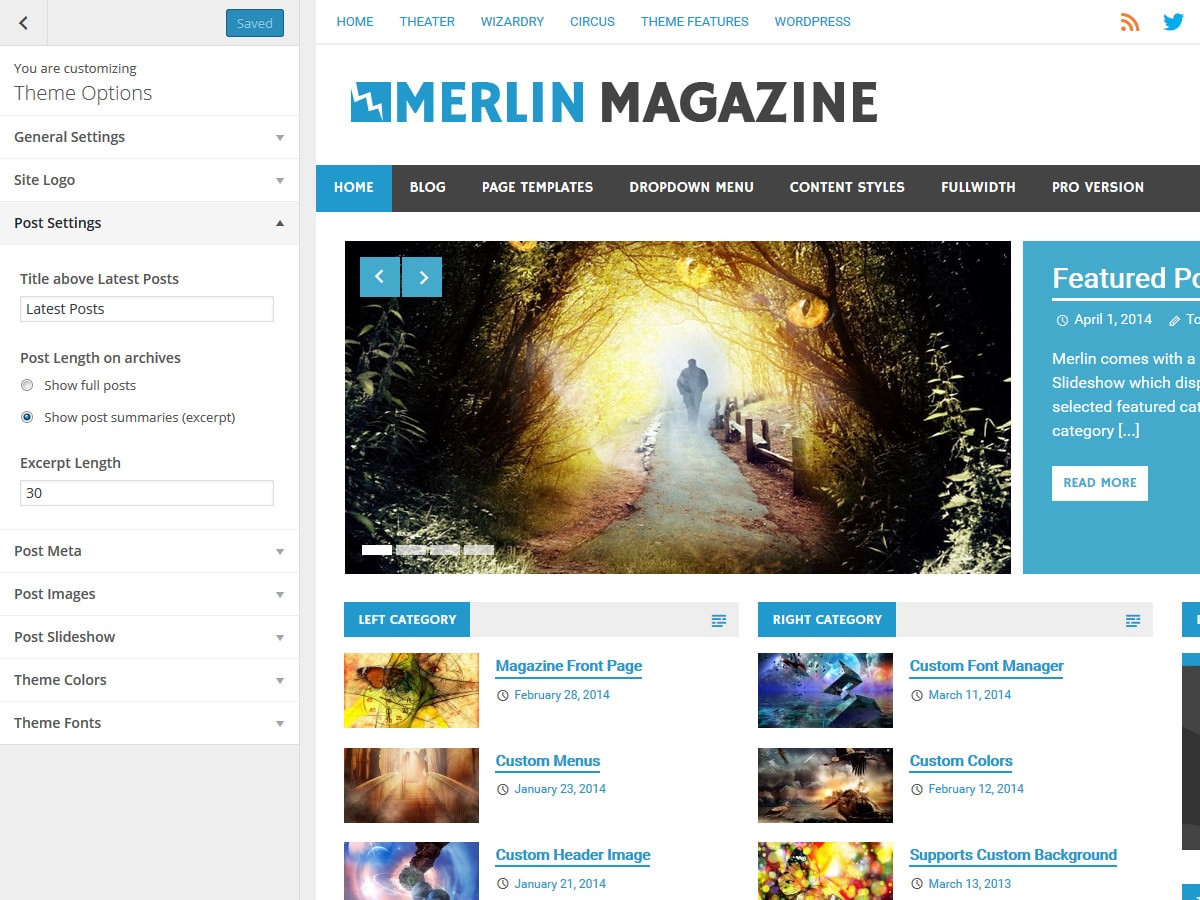
Install PRO Version Plugin
Please be aware that the PRO Version of Merlin is an Add-on plugin for the Merlin theme. Therefore you have to install and activate the Merlin theme and install the Merlin Pro plugin in addition. You can learn how to install Plugins on the Install WordPress plugins tutorial.
Configure Theme Options
Merlin supports the awesome Theme Customizer. You can configure all theme settings on your WordPress admin panel → Appearance → Customize on the “Theme Options” section.
Merlin adds a “Theme Options” section to the Customizer containing following sub sections:
General Settings Choose the sidebar layout and make the navigation menu sticky.
Header Spacing (only with PRO version) Configure the logo spacing.
Post Settings Choose between full posts and post summaries and configure the length of post excerpts.
Post Meta Deactivate date, author and other post meta information.
Post Images Configure where featured images of the posts should appear.
Post Slideshow Activate and configure the Post Slideshow.
Theme Colors (only with PRO version)
This section let you choose the font and background colors of various theme elements.
Theme Fonts (only with PRO version)
Change the text, navigation and title fonts easily in this section.
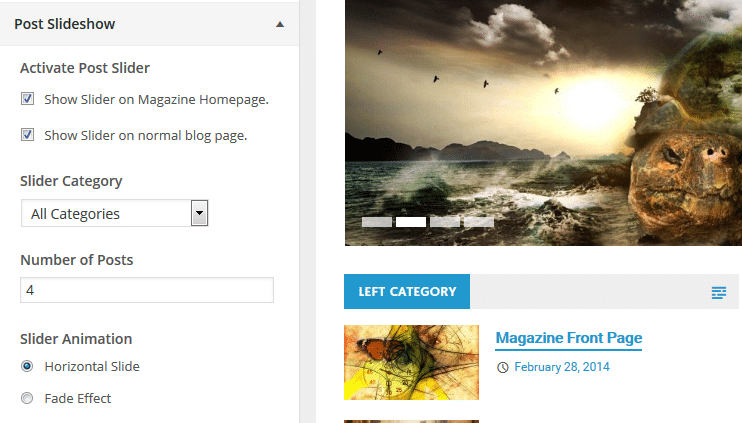
If you’d like to display the post slideshow on your homepage like the demo website, follow these instructions.
To set up your post slider, go to Appearance → Customize → Theme Options → Post Slideshow, and activate the Slider first. You can enable the slider on the Magazine Homepage and / or the normal blog page.
After you have activated the Post Slider some more settings should appear.
Next, you have to configure which posts are highlighted in the post slideshow. Therefore select a category in the Slide Category setting. The slideshow will display all posts which are assigned to that category.
You can also set the maximum number of posts and the slider animation effect within the slider settings.
Featured Images
The Post Slider as well as the Magazine Homepage template make use of featured images as thumbnails. The slideshow and Category Post widgets will look as intended when your posts have featured images.
If your existing posts have already had featured images, they may look disformed because they do not match the new required sizes for the front page template. In order to fix that you have to regenerate your thumbnails.
Your uploaded featured images should have a minimum image size of 880×440 pixels in order to look good at any screen size. You can find all defined image sizes at the bottom of this page.
Configure Magazine Homepage template
If you’d like to have a home page with the magazine-style layout like the demo website, follow these detailed instructions:
Create a new static page
Go to Pages → Add New to create a new static page, or edit an existing page. Change the page template of your selected page to the Magazine Homepage template from the Page Attributes box.
Set Magazine Homepage Template as Front Page
If you want to use the Magazine Homepage template as your front page, go to Settings → Reading and set “Front page displays” to “A static page”. From the dropdown menu, select the Magazine page you created earlier. You can learn more about setting up a front page here.
Add Category Posts Widgets
After you created your Magazine Homepage, go to Appearance → Widgets and set up your Magazine Homepage widget area.
Merlin comes with four different Category Posts widgets geared to creating a magazine-style site, but you can also add any other widget you like.
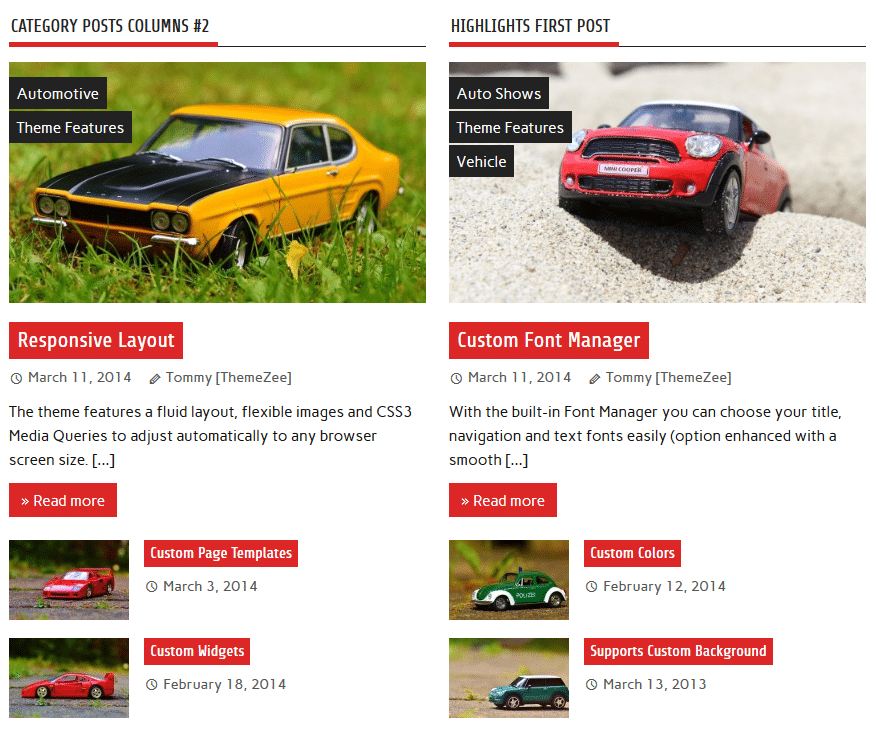
Category Posts Columns
This widget displays the latest blog posts from two configured categories: Category Left and Category Right. The first post of each category can be highlighted in the widget settings and is then displayed with the excerpt, followed by the other posts with small thumbnails.
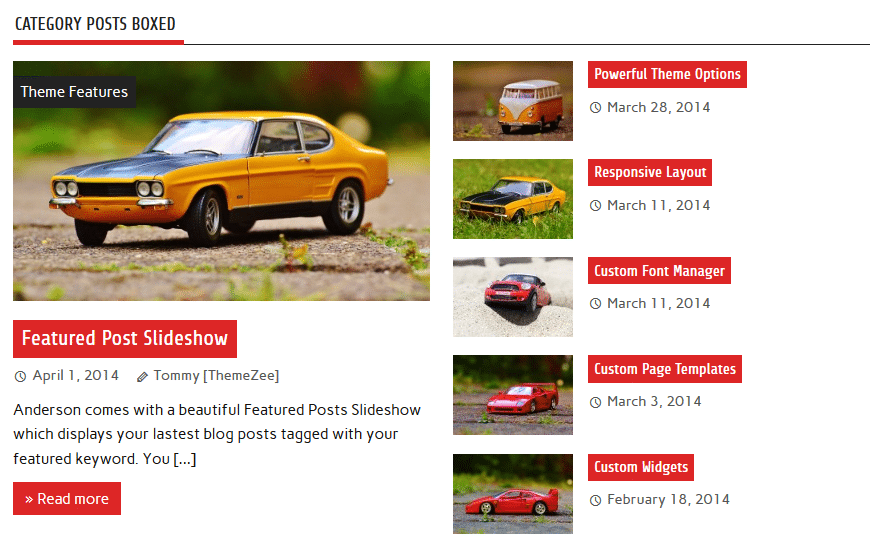
Category Posts Boxed
This widget displays the latest four blog posts from a configured category in a boxed layout, like in the screenshot below. The latest post is highlighted on the left column and displayed with the excerpt, and the right column displays three additional posts.
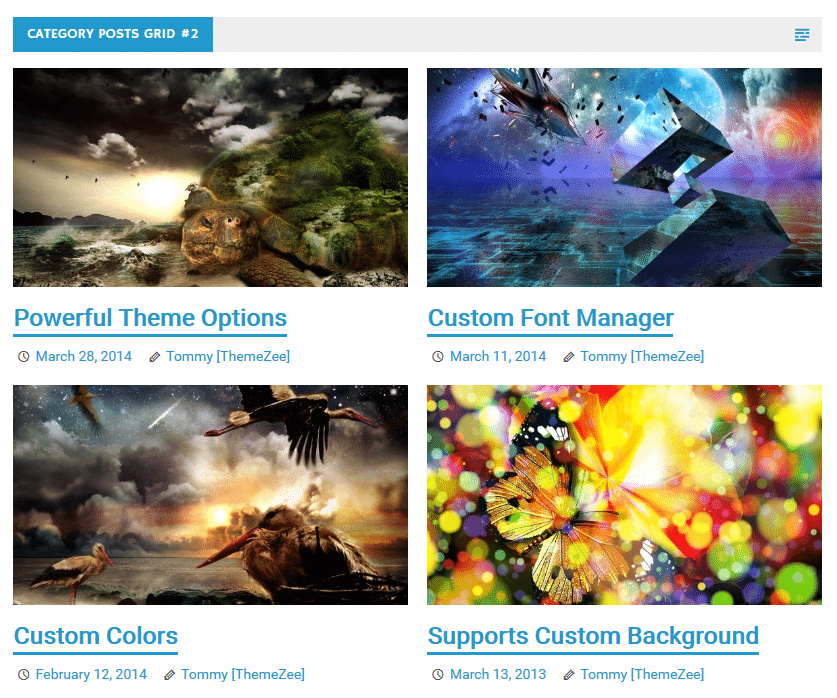
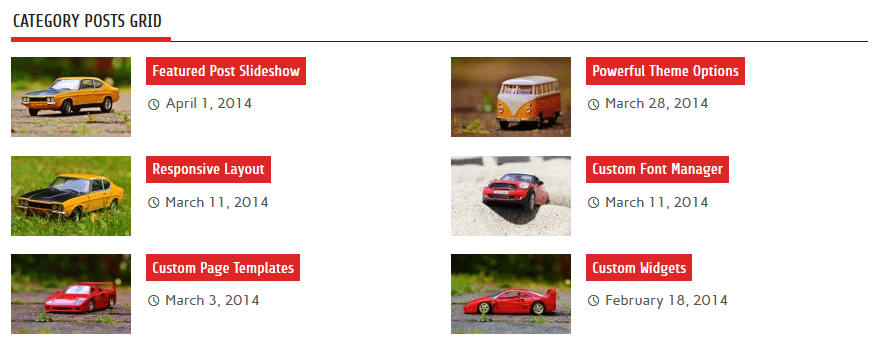
Category Posts Grid
This widget creates a two-column grid layout, showing the latest blog posts from a category you select. You can also specify the number of posts to be displayed.
Setup and Configure Pro Version Features
The Pro Version of Merlin is an add-on plugin which you can purchase on the Merlin theme page.
Since it is the same procedure for every theme, this tutorial does not explain how to install the theme. If you need help with the theme installation, please see the Install WordPress themes tutorial.
Install PRO Version Plugin
Please be aware that the PRO Version of Dynamic News is an Add-on plugin for the Dynamic News theme. Therefore you have to install and activate the Dynamic News Lite theme and install the Dynamic News Pro plugin in addition. You can learn how to install Plugins on the Install WordPress plugins tutorial.
In case you are using the old Dynamic News Pro theme and want to switch to the new Pro Version Plugin, please follow this tutorial.
Configure Theme Options
Dynamic News supports the awesome Theme Customizer. You can configure all theme settings on your WordPress admin panel → Appearance → Customize on the “Theme Options” section.
Dynamic News adds a “Theme Options” section to the Customizer containing following sub sections:
General Settings Choose the theme layout and sidebar position.
Header Settings Upload your own logo image and turn on header content like search field and social icons.
Post Settings Decide between full posts and post summary and configure featured images of posts.
Post Slider Activate and configure the Featured Post Slideshow.
Theme Colors (only in PRO Version)
This section let you choose the font and background colors of various theme elements.
Theme Fonts (only in PRO Version)
Change the text, navigation and title fonts easily in this section.
If you’d like to have a home page with the magazine-style layout like the demo website, follow these detailed instructions:
Create a new static page
Go to Pages → Add New to create a new static page, or edit an existing page. Change the page template of your selected page to the Magazine Front Page template from the Page Attributes box.
Set Magazine Front Page Template as Front Page
If you want to use the Magazine Front Page as your homepage, go to Settings → Reading and set “Front page displays” to “A static page”. From the dropdown menu, select the homepage you created earlier. You can learn more about setting up a front page here.
Add Category Posts Widgets
After you created your Magazine Front Page homepage, go to Appearance → Widgets and set up your Magazine Front Page widget area.
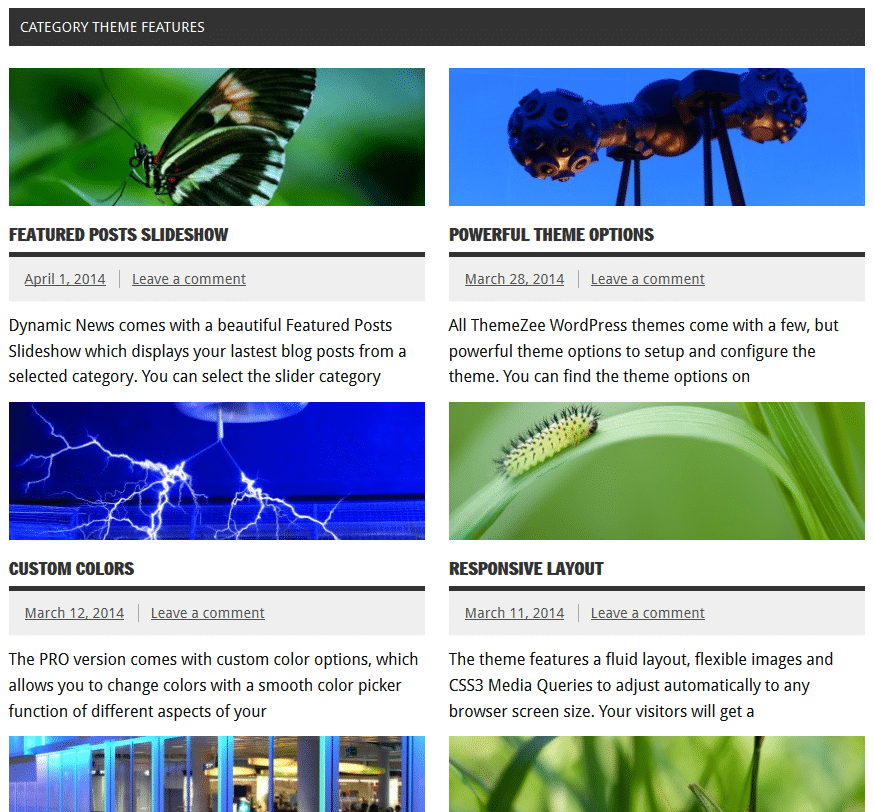
Dynamic News comes with three different Category Posts widgets geared to creating a magazine-style site, but you can also add any other widget you like.
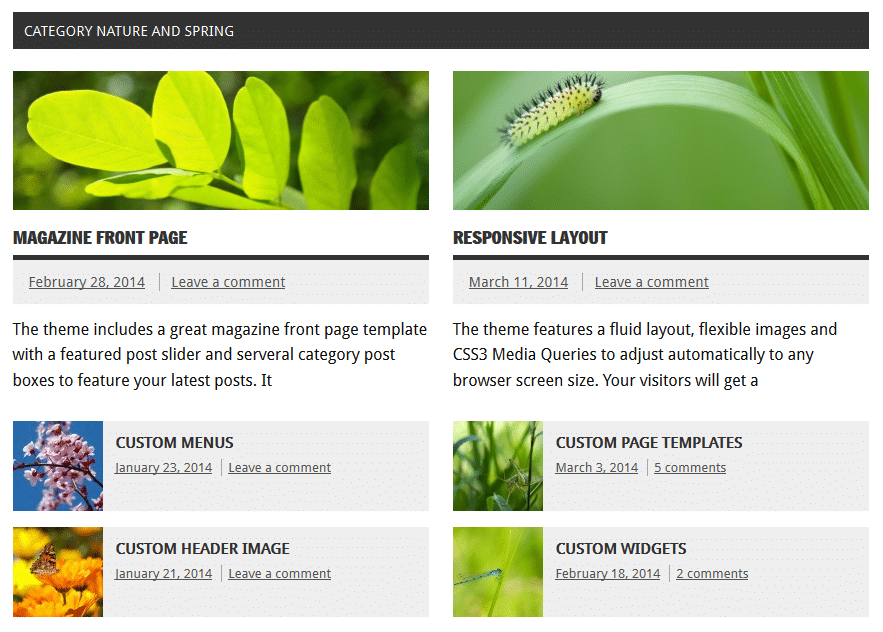
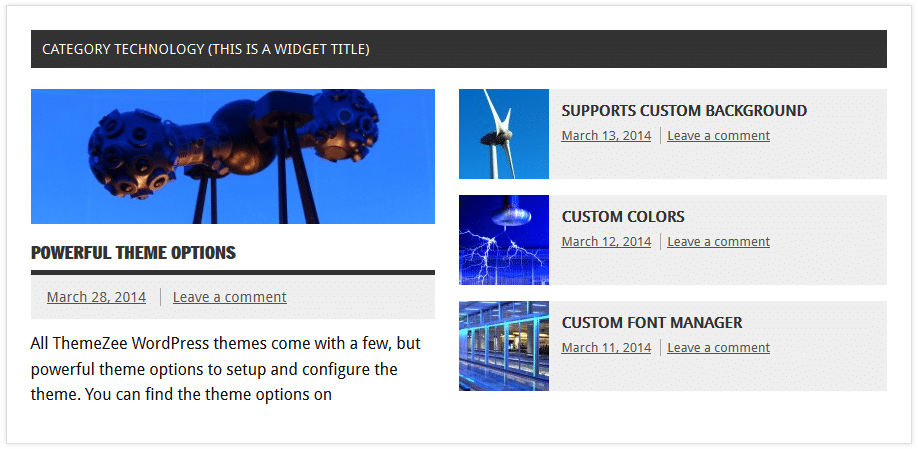
Category Posts Columns
This widget displays the latest eight blog posts from two configured categories: Category Left and Category Right. The first post of each category is displayed with the excerpt, followed by two further posts in small boxes.
Category Posts Boxed
This widget displays the latest four blog posts from a configured category in a boxed layout, like in the screenshot below. The latest post is highlighted on the left column and displayed with the excerpt, and the right column displays three additional posts.
Category Posts Grid
This widget creates a two-column grid layout, showing the latest blog posts from a category you select. You can also specify the number of posts to be displayed.
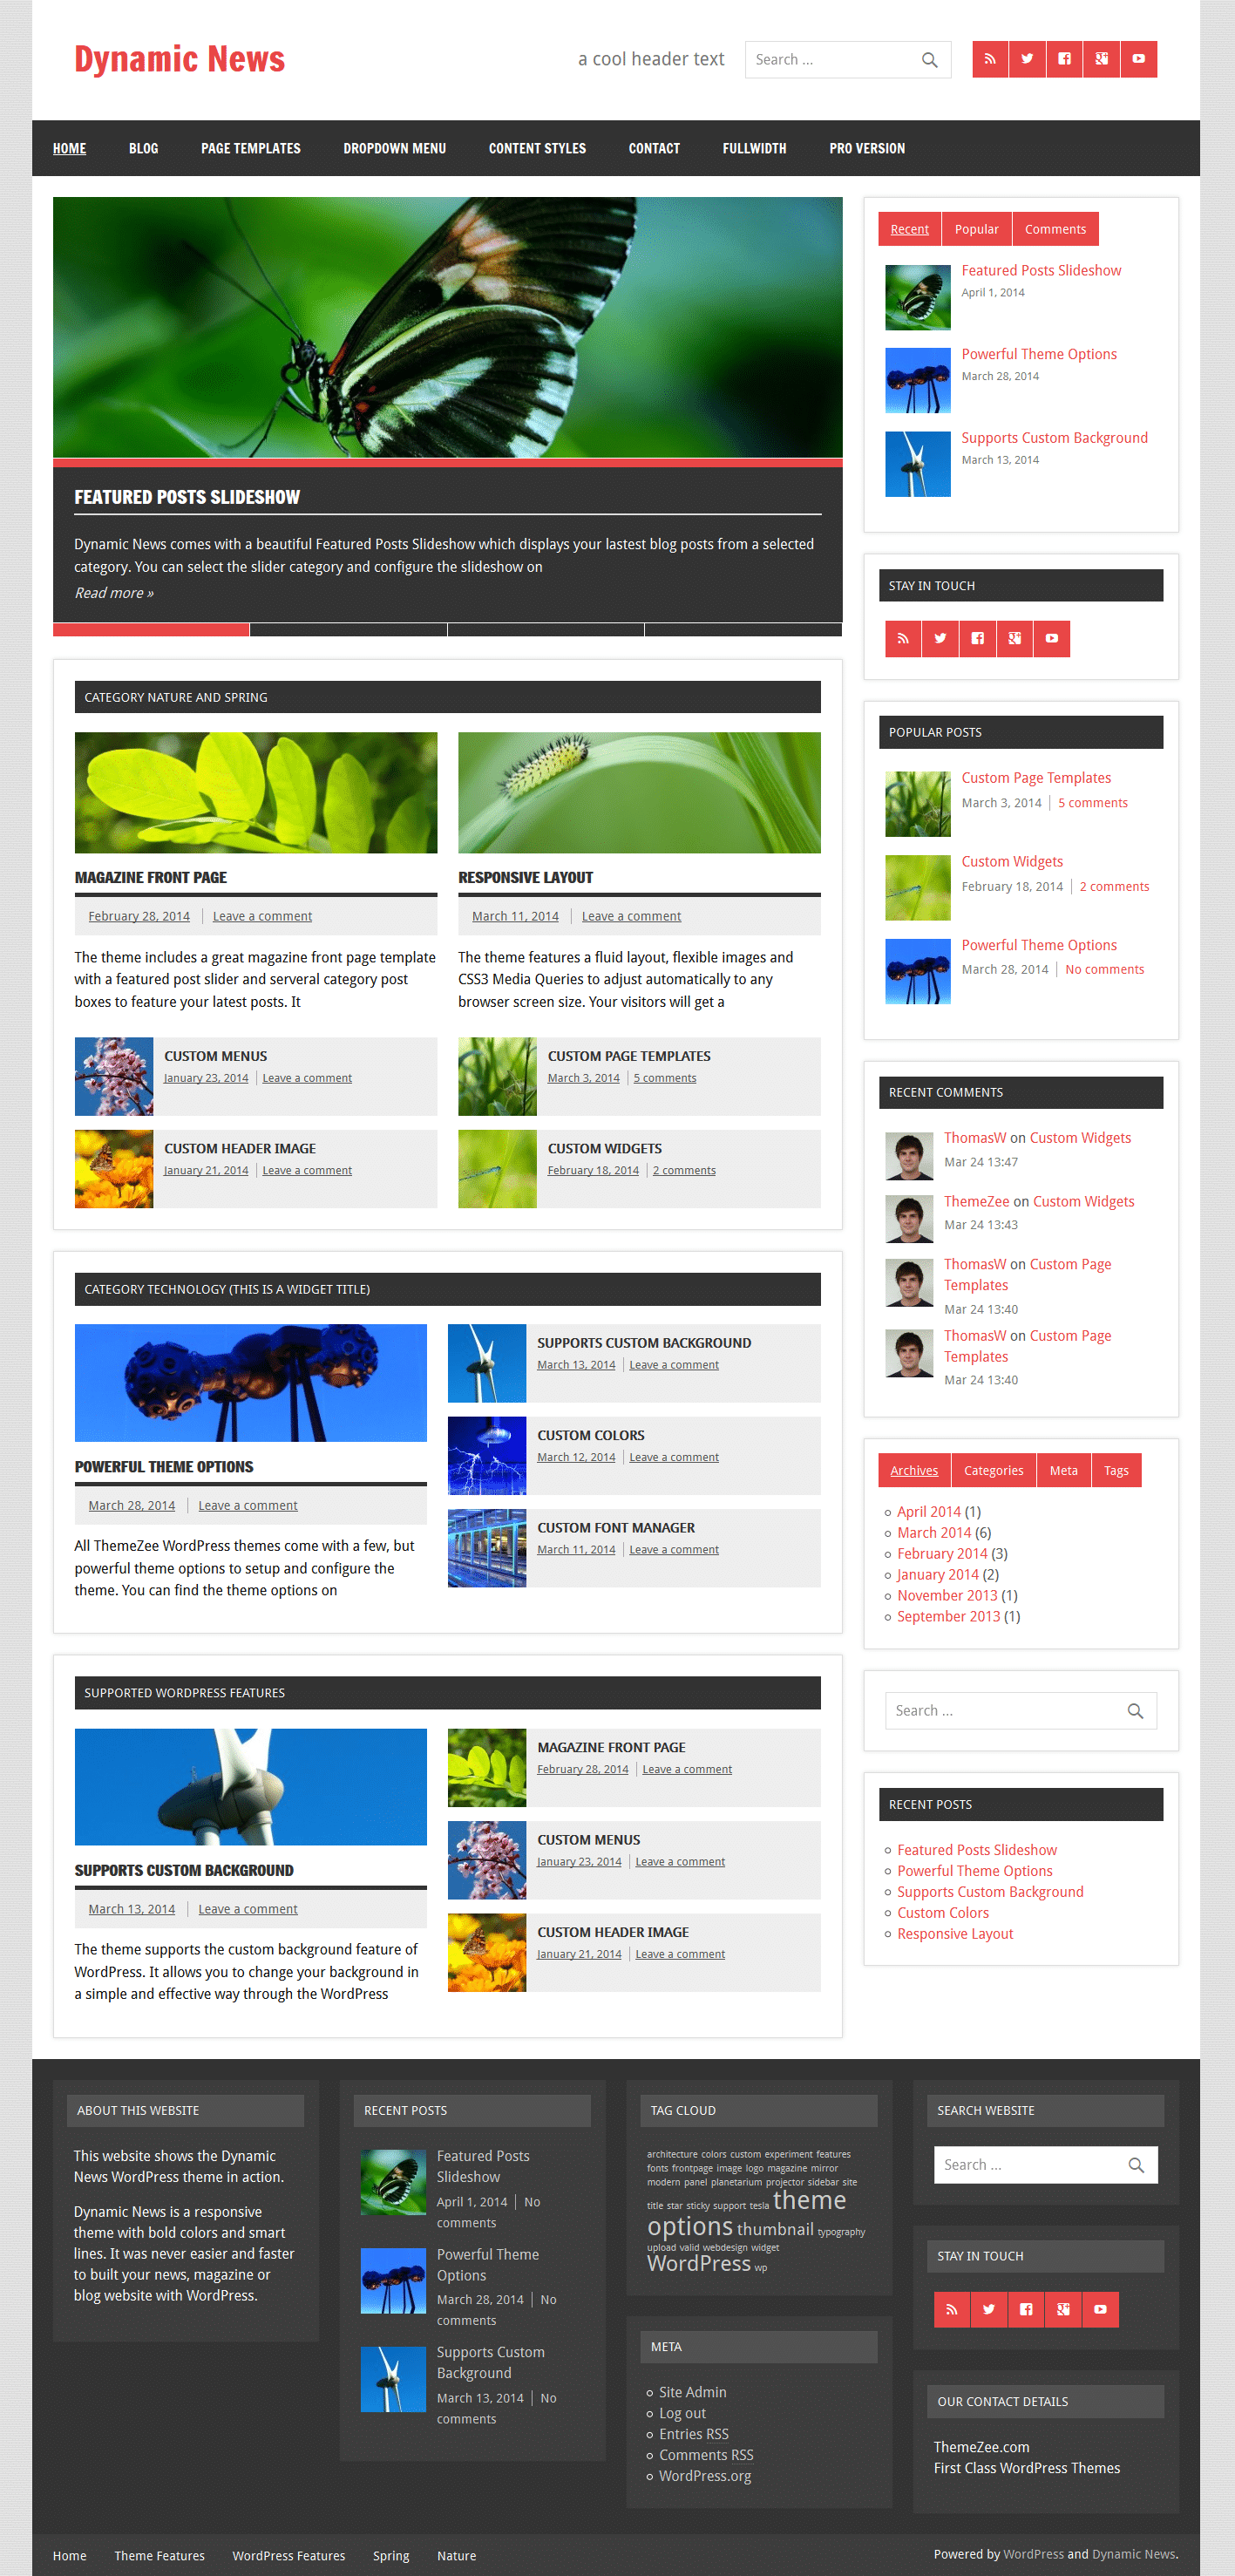
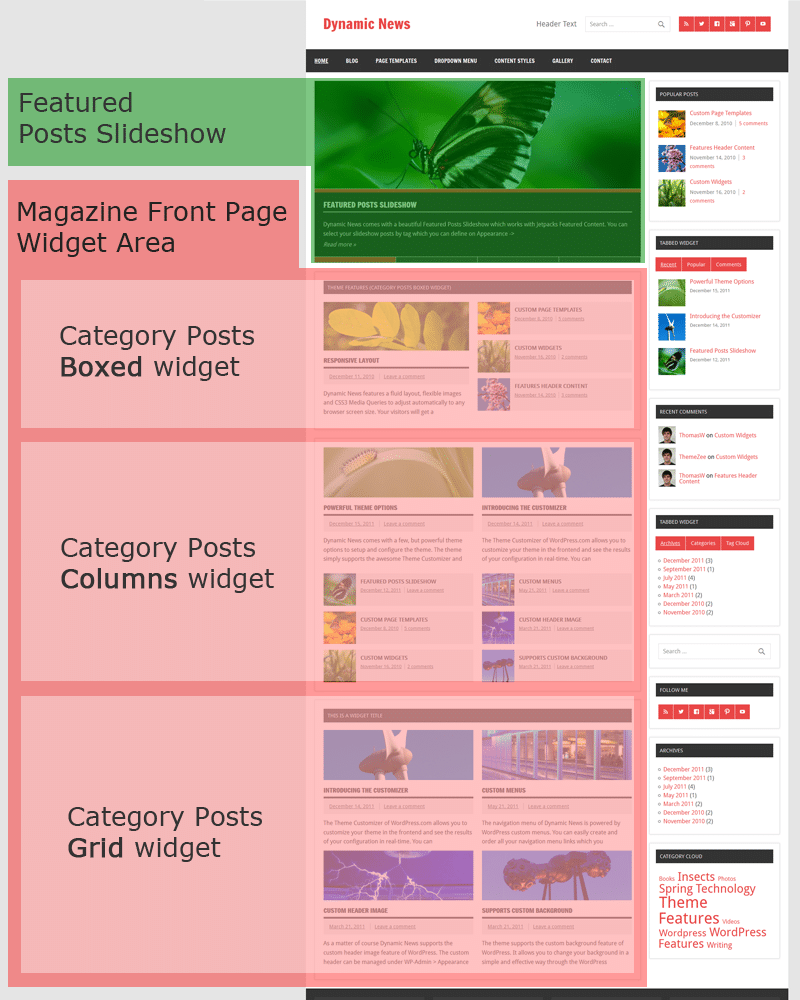
Demo Setup of Magazine Front Page widgets
Take a look at this infographic to see the Magazine Front Page setup of the demo site:
Featured Images
The Magazine Front Page template makes heavy use of featured images as thumbnails. The featured posts slider and all category posts widgets will look as intended when your posts have featured images.
If your existing posts have already had featured images, they may look disformed because they do not match the new required sizes for the front page template. In order to fix that you have to regenerate your thumbnails.
Your uploaded featured images should have a minimum image size of 880×280 pixels in order to look good at any screen size. The slider will show a grey image placeholder in case you haven’t set a featured image.
Configure Featured Post Slider
Dynamic News supports a beautiful Featured Posts Slider which displays the latest posts with a tag you’ve configured.
To set up your post slider, go to Appearance → Customize → Theme Options → Post Slider, and activate the Slider first. You can enable the slideshow on the Magazine Front Page template or the normal blog page.
Next, you have to configure which posts are highlighted in the post slideshow. Therefore add a tag under Tag Name in the Select Featured Posts section. The slideshow will display all posts which are tagged with that keyword.
You can also set the maximum number of posts and the slider animation effect within the slider settings.
Setup and Configure Pro Version Features
The Pro Version of Dynamic News is an add-on plugin which you can purchase on the Dynamic News theme page.
Since it is the same procedure for every theme, this tutorial does not explain how to install the theme. If you need help with the theme installation, please see the Install WordPress themes tutorial.
Install PRO Version Plugin
Please be aware that the PRO Version of Smartline is an Add-on plugin for the Smartline theme. Therefore you have to install and activate the Smartline Lite theme and install the Smartline Pro plugin in addition. You can learn how to install Plugins on the Install WordPress plugins tutorial.
In case you are using the old Smartline Pro theme and want to switch to the new Pro Version Plugin, please follow this tutorial.
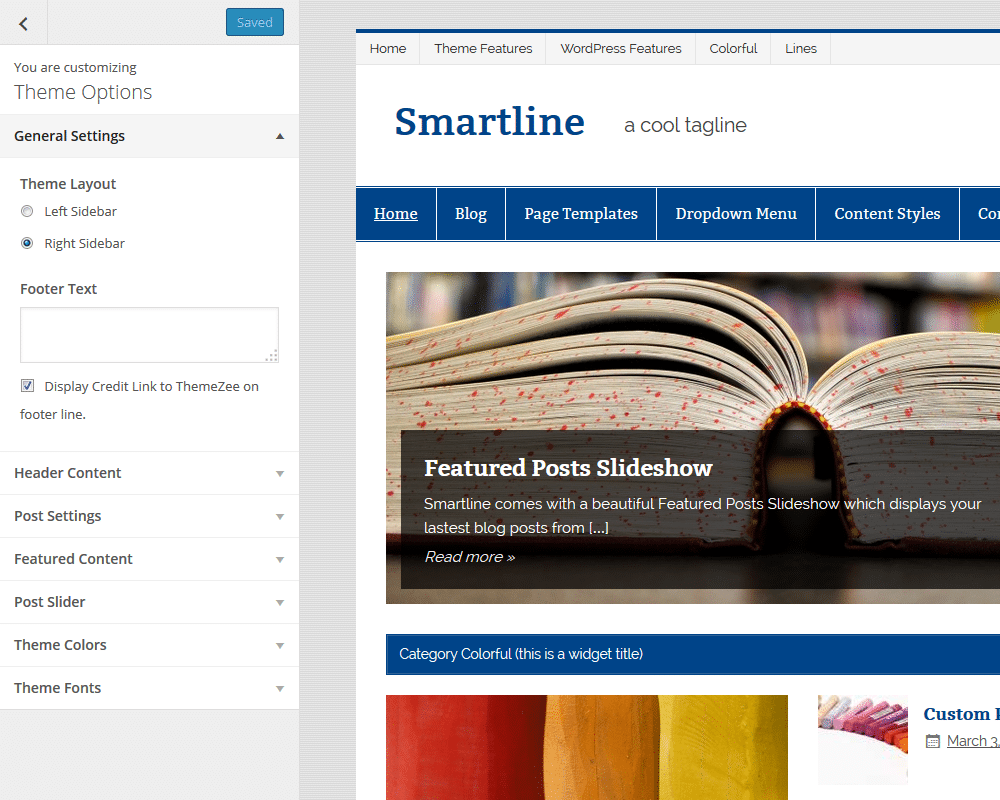
Configure Theme Options
Smartline supports the awesome Theme Customizer. You can configure all theme settings on your WordPress admin panel → Appearance → Customize on the “Theme Options” section.
Smartline adds a “Theme Options” section to the Customizer containing following sub sections:
General Settings Choose the theme layout and sidebar position.
Header Settings Upload your own logo image and turn on header content like search field and social icons.
Post Settings Decide between full posts and post summary and configure featured images of posts.
Post Slider Activate and configure the Featured Post Slideshow.
Theme Colors (only in PRO Version)
This section let you choose the font and background colors of various theme elements.
Theme Fonts (only in PRO Version)
Change the text, navigation and title fonts easily in this section.
If you’d like to have a home page with the magazine-style layout like the demo website, follow these detailed instructions:
Create a new static page
Go to Pages → Add New to create a new static page, or edit an existing page. Change the page template of your selected page to the Magazine Front Page template from the Page Attributes box.
Set Magazine Front Page Template as Front Page
If you want to use the Magazine Front Page as your homepage, go to Settings → Reading and set “Front page displays” to “A static page”. From the dropdown menu, select the homepage you created earlier. You can learn more about setting up a front page here.
Add Category Posts Widgets
After you created your Magazine Front Page homepage, go to Appearance → Widgets and set up your Magazine Front Page widget area.
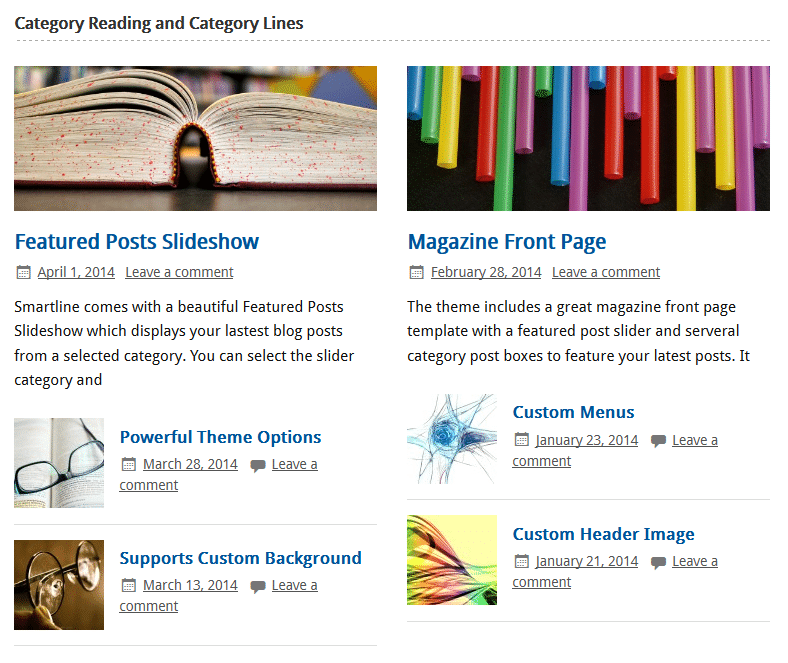
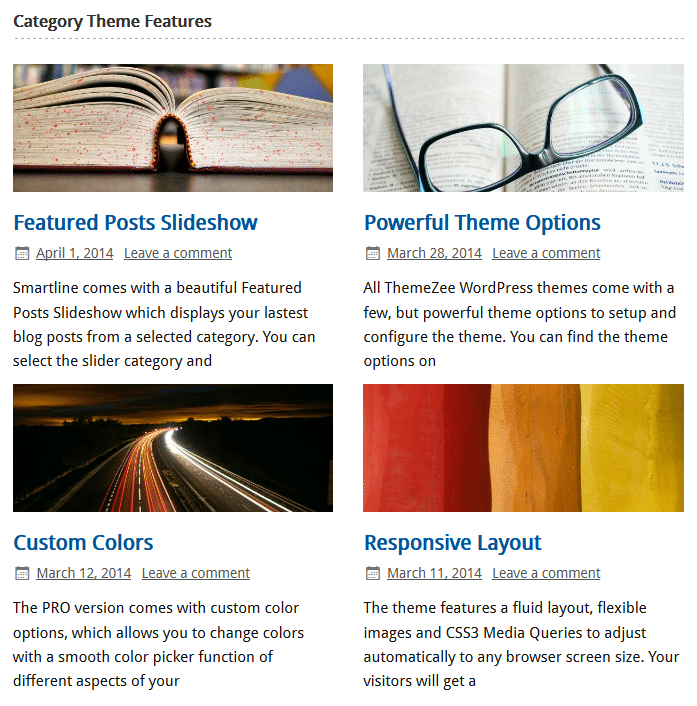
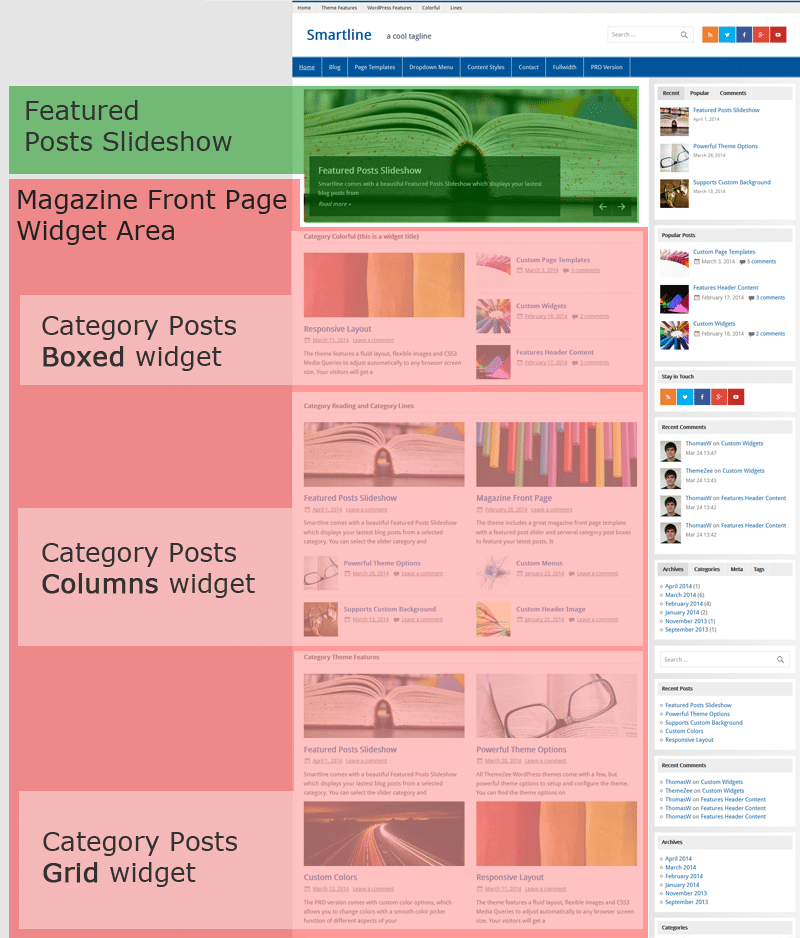
Smartline comes with three different Category Posts widgets geared to creating a magazine-style site, but you can also add any other widget you like.
Category Posts Columns
This widget displays the latest eight blog posts from two configured categories: Category Left and Category Right. The first post of each category is displayed with the excerpt, followed by two further posts in small boxes.
Category Posts Boxed
This widget displays the latest four blog posts from a configured category in a boxed layout, like in the screenshot below. The latest post is highlighted on the left column and displayed with the excerpt, and the right column displays three additional posts.
Category Posts Grid
This widget creates a two-column grid layout, showing the latest blog posts from a category you select. You can also specify the number of posts to be displayed.
Demo Setup of Magazine Front Page widgets
Take a look at this infographic to see the Magazine Front Page setup of the demo site:
Featured Images
The Magazine Front Page template makes heavy use of featured images as thumbnails. The featured posts slider and all category posts widgets will look as intended when your posts have featured images.
If your existing posts have already had featured images, they may look disformed because they do not match the new required sizes for the front page template. In order to fix that you have to regenerate your thumbnails.
Your uploaded featured images should have a minimum image size of 880×350 pixels in order to look good at any screen size. The slider will show a grey image placeholder in case you haven’t set a featured image.
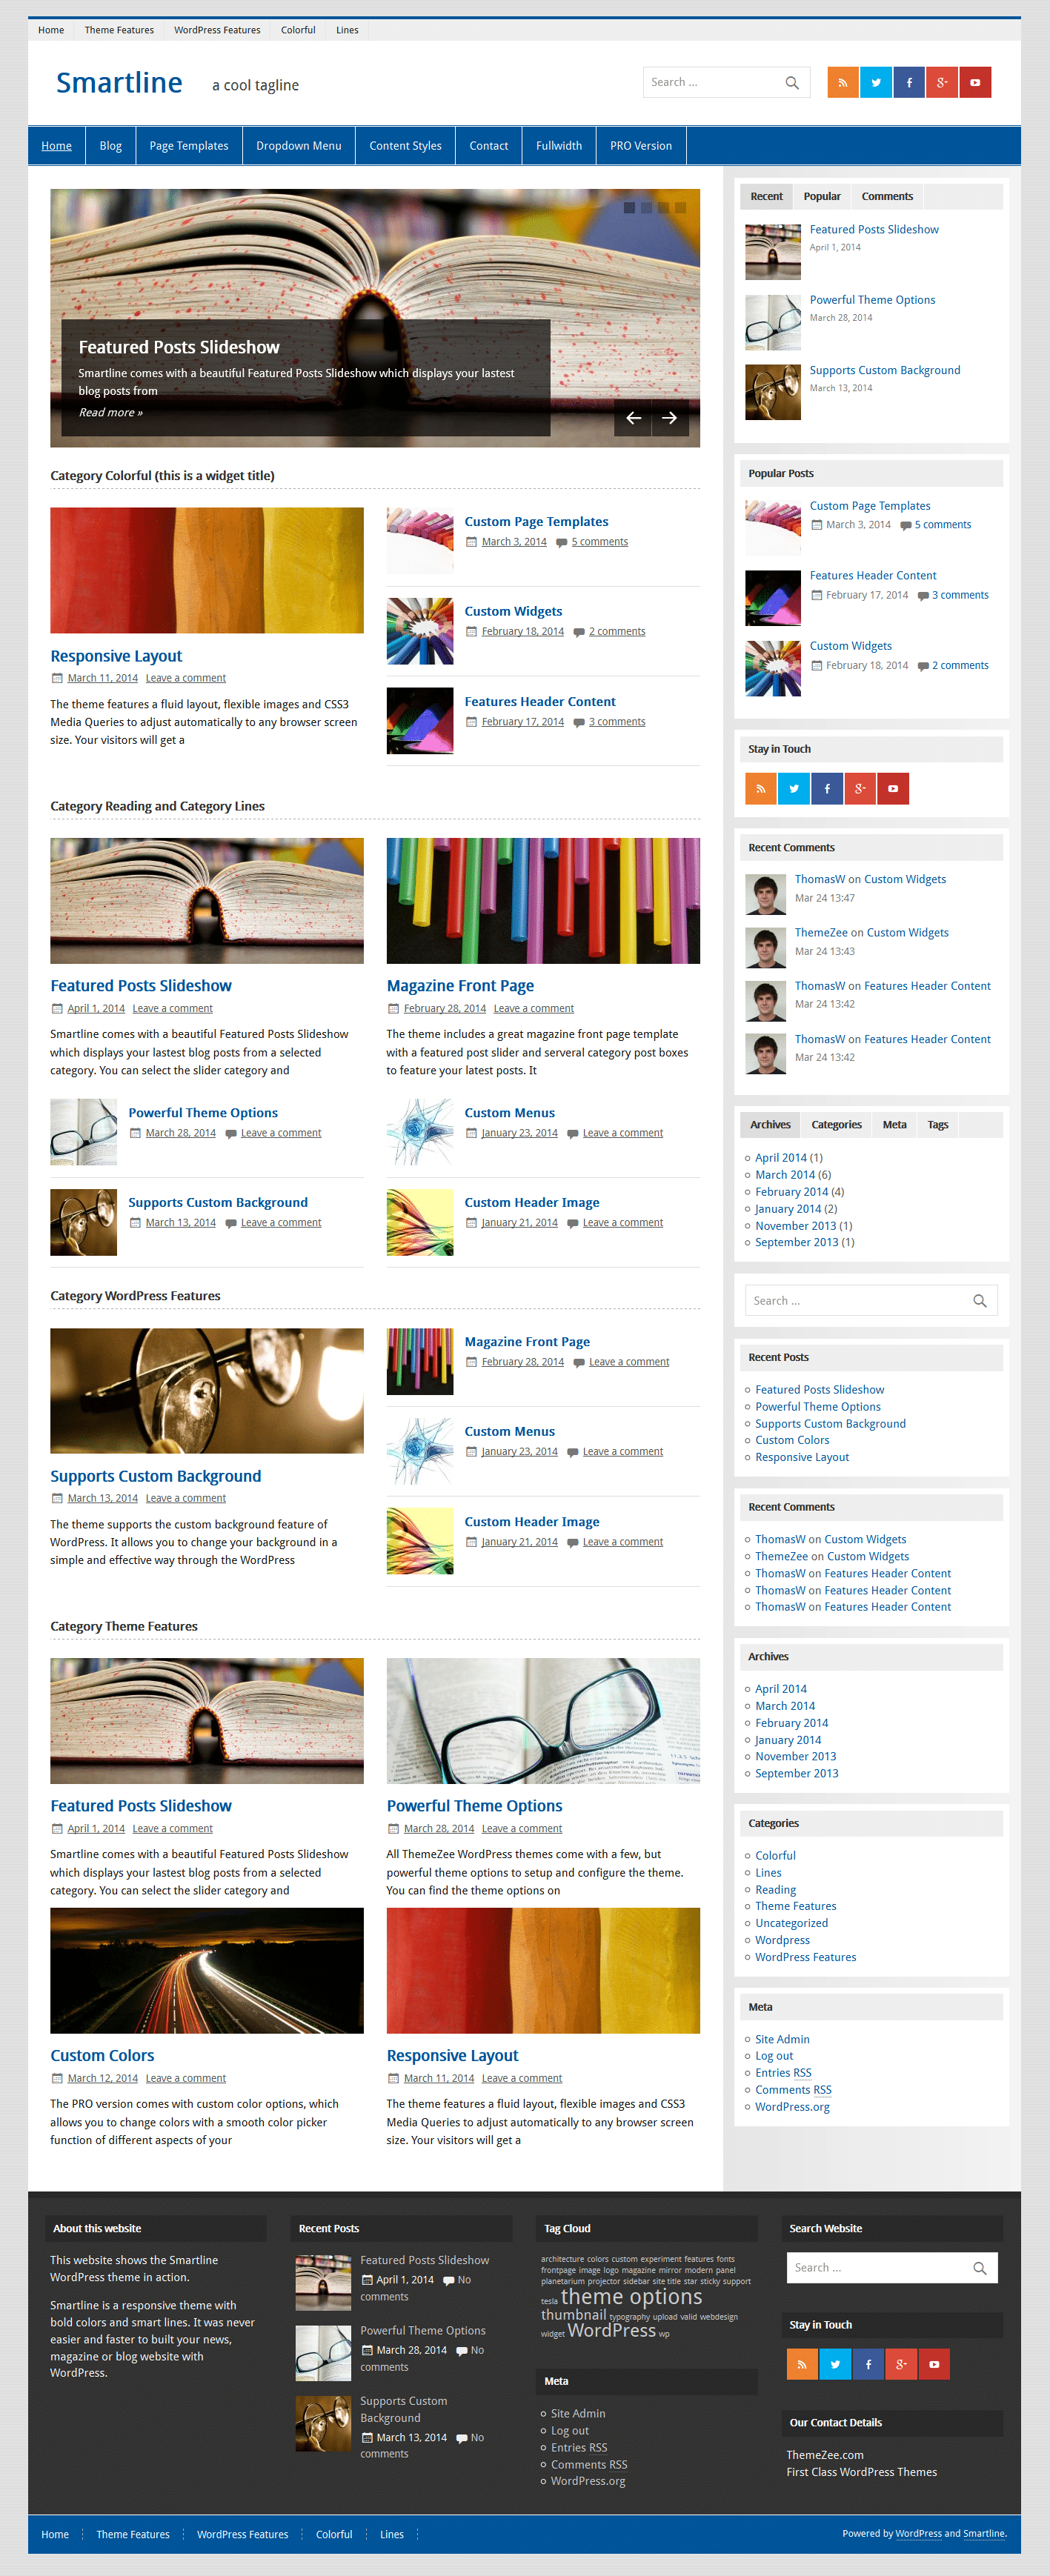
Configure Featured Post Slider
Smartline supports a beautiful Featured Posts Slider which displays the latest posts with a tag you’ve configured.
To set up your post slider, go to Appearance → Customize → Theme Options → Post Slider, and activate the Slider first. You can enable the slideshow on the Magazine Front Page template or the normal blog page.
Next, you have to configure which posts are highlighted in the post slideshow. Therefore add a tag under Tag Name in the Select Featured Posts section. The slideshow will display all posts which are tagged with that keyword.
You can also set the maximum number of posts and the slider animation effect within the slider settings.
Setup and Configure Pro Version Features
The Pro Version of Smartline is an add-on plugin which you can purchase on the Smartline theme page.
Since it is the same procedure for every theme, this tutorial does not explain how to install the theme. If you need help with the theme installation, please see the Install WordPress themes tutorial.
Install PRO Version Plugin
Please be aware that the PRO Version of Leeway is an Add-on plugin for the Leeway theme. Therefore you have to install and activate the Leeway theme and install the Leeway Pro plugin in addition. You can learn how to install Plugins on the Install WordPress plugins tutorial.
Configure Theme Options
Leeway supports the awesome Theme Customizer. You can configure all theme settings on your WordPress admin panel → Appearance → Customize on the “Theme Options” section.
Leeway adds a “Theme Options” section to the Customizer containing following sub sections:
General Settings Choose the sidebar layout and add your own footer text.
Header Settings Upload your own site logo, turn on social icons and search field on header area.
Post Settings Decide between full posts and post summary and configure featured images of posts.
Post Slider Activate and configure the Featured Post Slideshow.
Theme Colors (only in PRO version)
This section let you choose the font and background colors of various theme elements.
Theme Fonts (only in PRO version)
Change the text, navigation and title fonts easily in this section.
If you’d like to display the featured post slideshow on your homepage like the demo website, follow these instructions.
To set up your post slider, go to Appearance → Customize → Theme Options → Post Slider, and activate the Slider first. You can enable the slider on the Magazine Homepage and / or the normal blog page.
Next, you have to configure which posts are highlighted in the post slideshow. Therefore add a tag under Tag Name in the Select Featured Posts section. The slideshow will display all posts which are tagged with that keyword.
You can also set the maximum number of posts and the slider animation effect within the slider settings.
Featured Images
The Featured Post Slider as well as the Magazine Homepage template make use of featured images as thumbnails. The slideshow and Category Post widgets will look as intended when your posts have featured images.
If your existing posts have already had featured images, they may look disformed because they do not match the new required sizes for the front page template. In order to fix that you have to regenerate your thumbnails.
Your uploaded featured images should have a minimum image size of 1320×380 pixels in order to look good at any screen size.
Configure Magazine Homepage template
If you’d like to have a home page with the magazine-style layout like the demo website, follow these detailed instructions:
Create a new static page
Go to Pages → Add New to create a new static page, or edit an existing page. Change the page template of your selected page to the Magazine Homepage template from the Page Attributes box.
Set Magazine Homepage Template as Front Page
If you want to use the Magazine Homepage template as your front page, go to Settings → Reading and set “Front page displays” to “A static page”. From the dropdown menu, select the Magazine page you created earlier. You can learn more about setting up a front page here.
Add Category Posts Widgets
After you created your Magazine Homepage, go to Appearance → Widgets and set up your Magazine Homepage widget area.
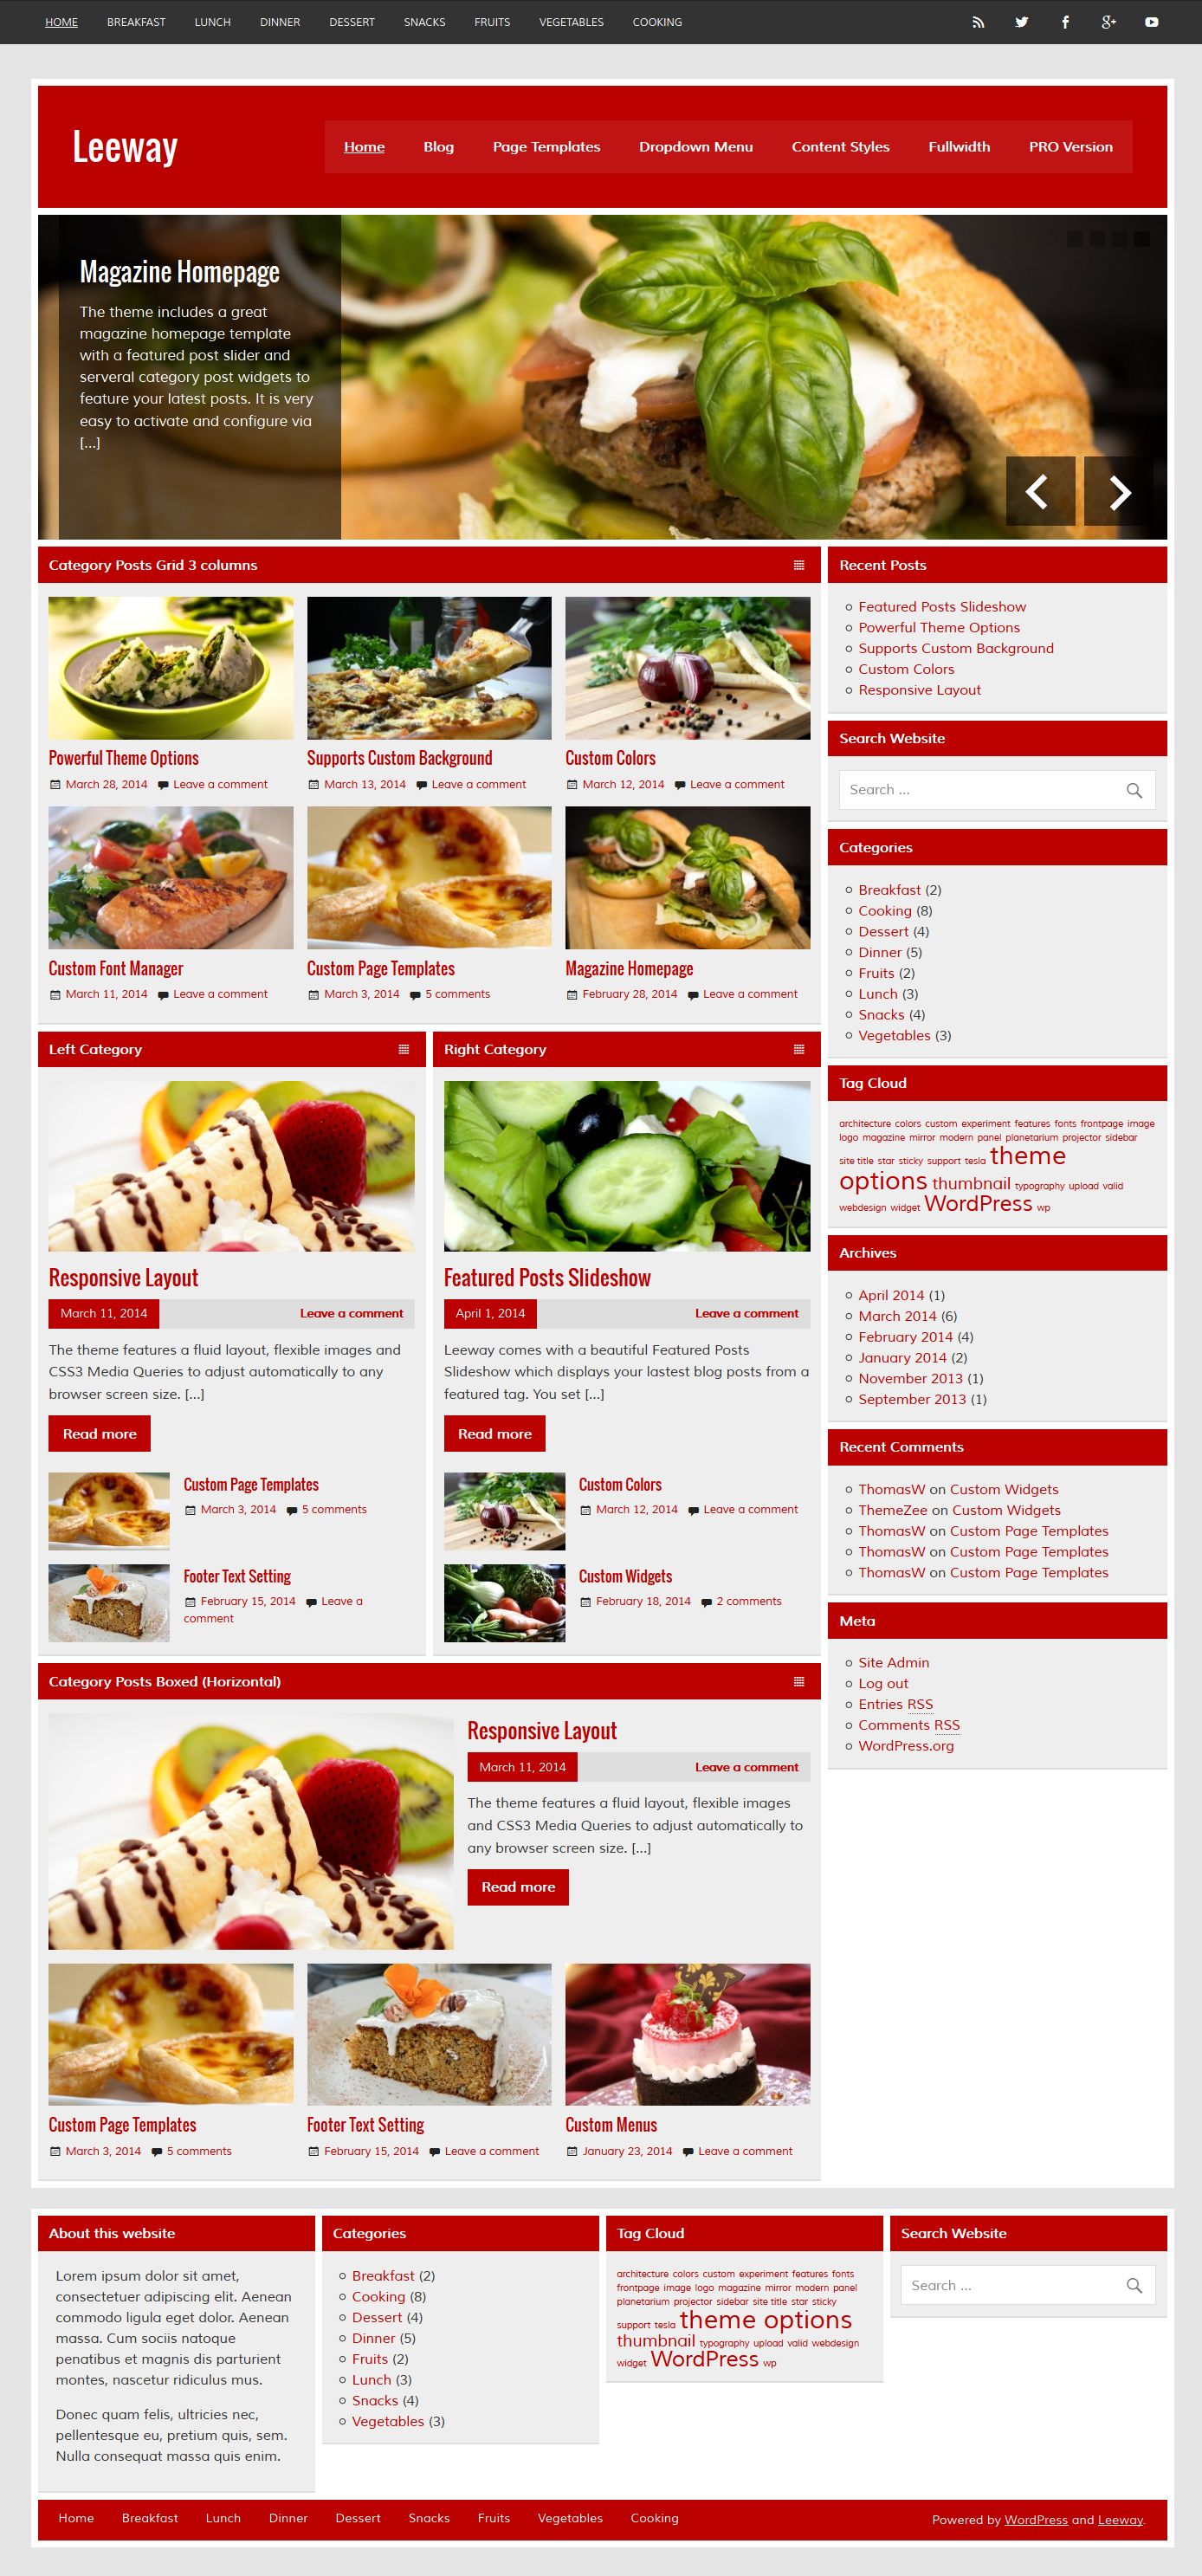
Leeway comes with four different Category Posts widgets geared to creating a magazine-style site, but you can also add any other widget you like.
Category Posts Columns
This widget displays the latest blog posts from two configured categories: Category Left and Category Right. The first post of each category can be highlighted in the widget settings and is then displayed with the excerpt, followed by the other posts with small thumbnails.
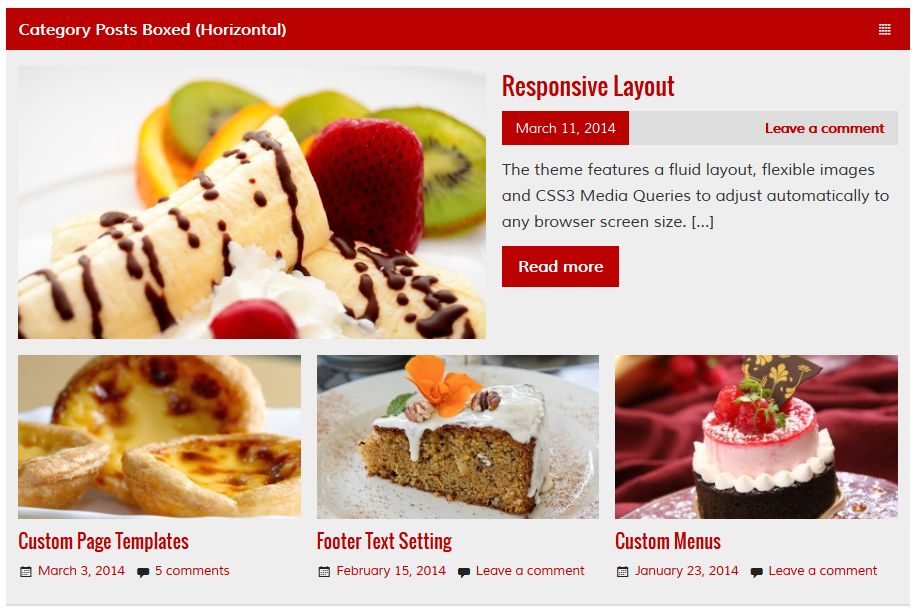
Category Posts Boxed
This widget displays the latest four blog posts from a configured category in a boxed layout, like in the screenshot below. The latest post is highlighted on the left column and displayed with the excerpt, and the right column displays three additional posts.
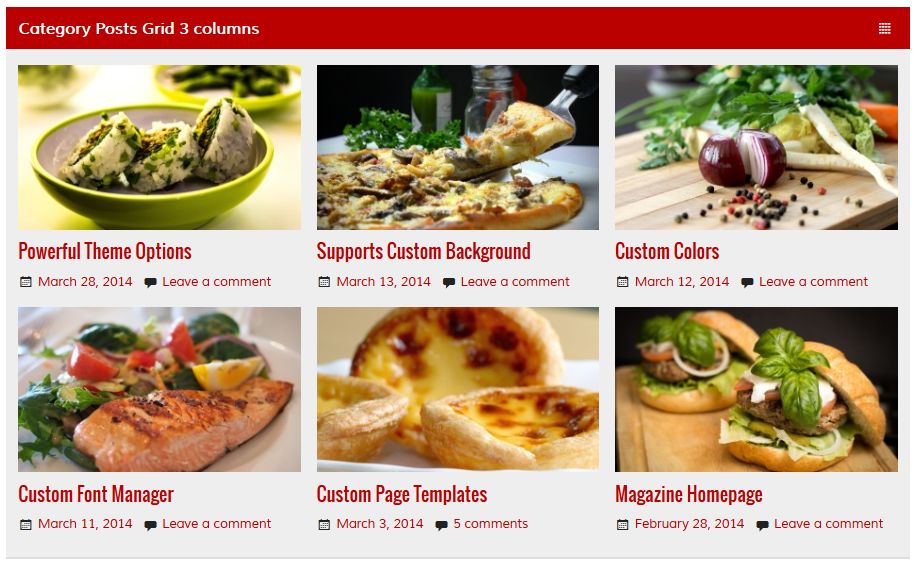
Category Posts Grid
This widget creates a two-column grid layout, showing the latest blog posts from a category you select. You can also specify the number of posts to be displayed.
Setup and Configure Pro Version Features
The Pro Version of Leeway is an add-on plugin which you can purchase on the Leeway theme page.
Since it is the same procedure for every theme, this tutorial does not explain how to install the theme. If you need help with the theme installation, please see the Install WordPress themes tutorial.
Install PRO Version Plugin
Please be aware that the PRO Version of Courage is an Add-on plugin for the Courage theme. Therefore you have to install and activate the Courage theme and install the Courage Pro plugin in addition. You can learn how to install Plugins on the Install WordPress plugins tutorial.
Configure Theme Options
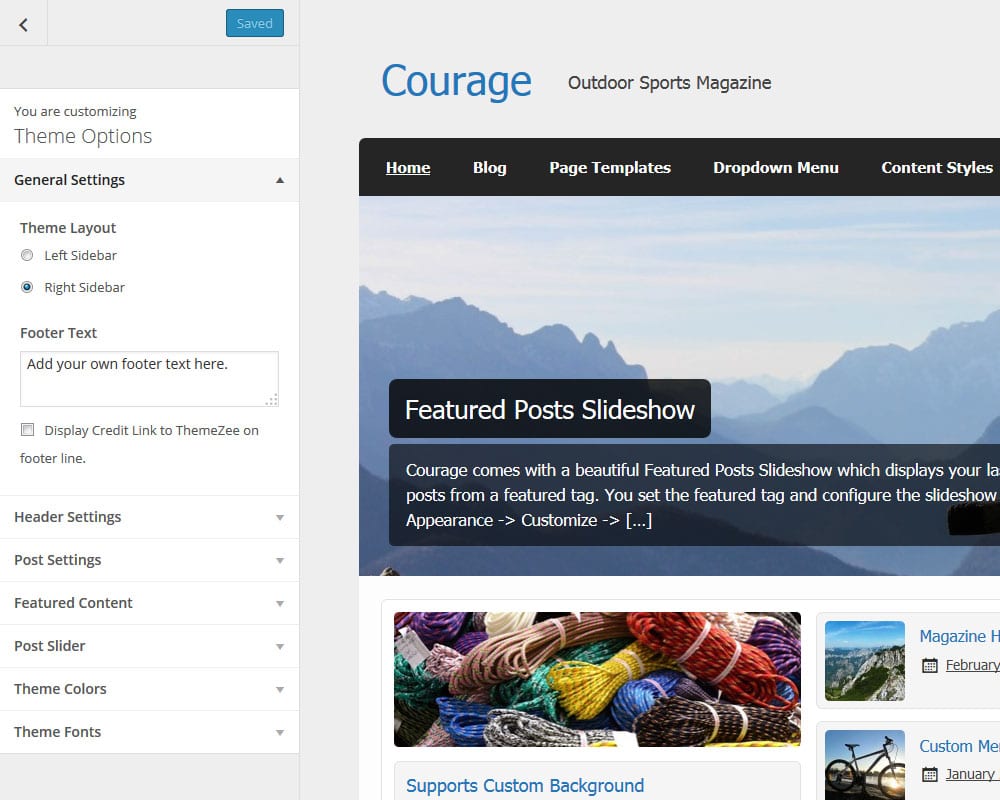
Courage supports the awesome Theme Customizer. You can configure all theme settings on your WordPress admin panel → Appearance → Customize on the “Theme Options” section.
Courage adds a “Theme Options” section to the Customizer containing following sub sections:
General Settings Choose the sidebar layout and add your own footer text.
Header Settings Upload your own site logo, turn on social icons and search field on header area.
Post Settings Decide between full posts and post summary and configure featured images of posts.
Post Slider Activate and configure the Featured Post Slideshow.
Theme Colors (only in PRO version)
This section let you choose the font and background colors of various theme elements.
Theme Fonts (only in PRO version)
Change the text, navigation and title fonts easily in this section.
If you’d like to display the featured post slideshow on your homepage like the demo website, follow these instructions.
To set up your post slider, go to Appearance → Customize → Theme Options → Post Slider, and activate the Slider first. You can enable the slider on the Magazine Homepage template and / or the normal blog page.
Next, you have to configure which posts are highlighted in the post slideshow. Therefore add a tag under Tag Name in the Select Featured Posts section. The slideshow will display all posts which are tagged with that keyword.
You can also set the maximum number of posts and the slider animation effect within the slider settings.
Featured Images
The Featured Post Slider as well as the Magazine Homepage template make use of featured images as thumbnails. The slideshow and Category Post widgets will look as intended when your posts have featured images.
If your existing posts have already had featured images, they may look disformed because they do not match the new required sizes for the front page template. In order to fix that you have to regenerate your thumbnails.
Your uploaded featured images should have a minimum image size of 1320×380 pixels in order to look good at any screen size.
Configure Magazine Homepage template
If you’d like to have a home page with the magazine-style layout like the demo website, follow these detailed instructions:
Create a new static page
Go to Pages → Add New to create a new static page, or edit an existing page. Change the page template of your selected page to the Magazine Homepage template from the Page Attributes box.
Set Magazine Homepage Template as Front Page
If you want to use the Magazine Homepage template as your front page, go to Settings → Reading and set “Front page displays” to “A static page”. From the dropdown menu, select the Magazine page you created earlier. You can learn more about setting up a front page here.
Add Category Posts Widgets
After you created your Magazine Homepage, go to Appearance → Widgets and set up your Magazine Homepage widget area.
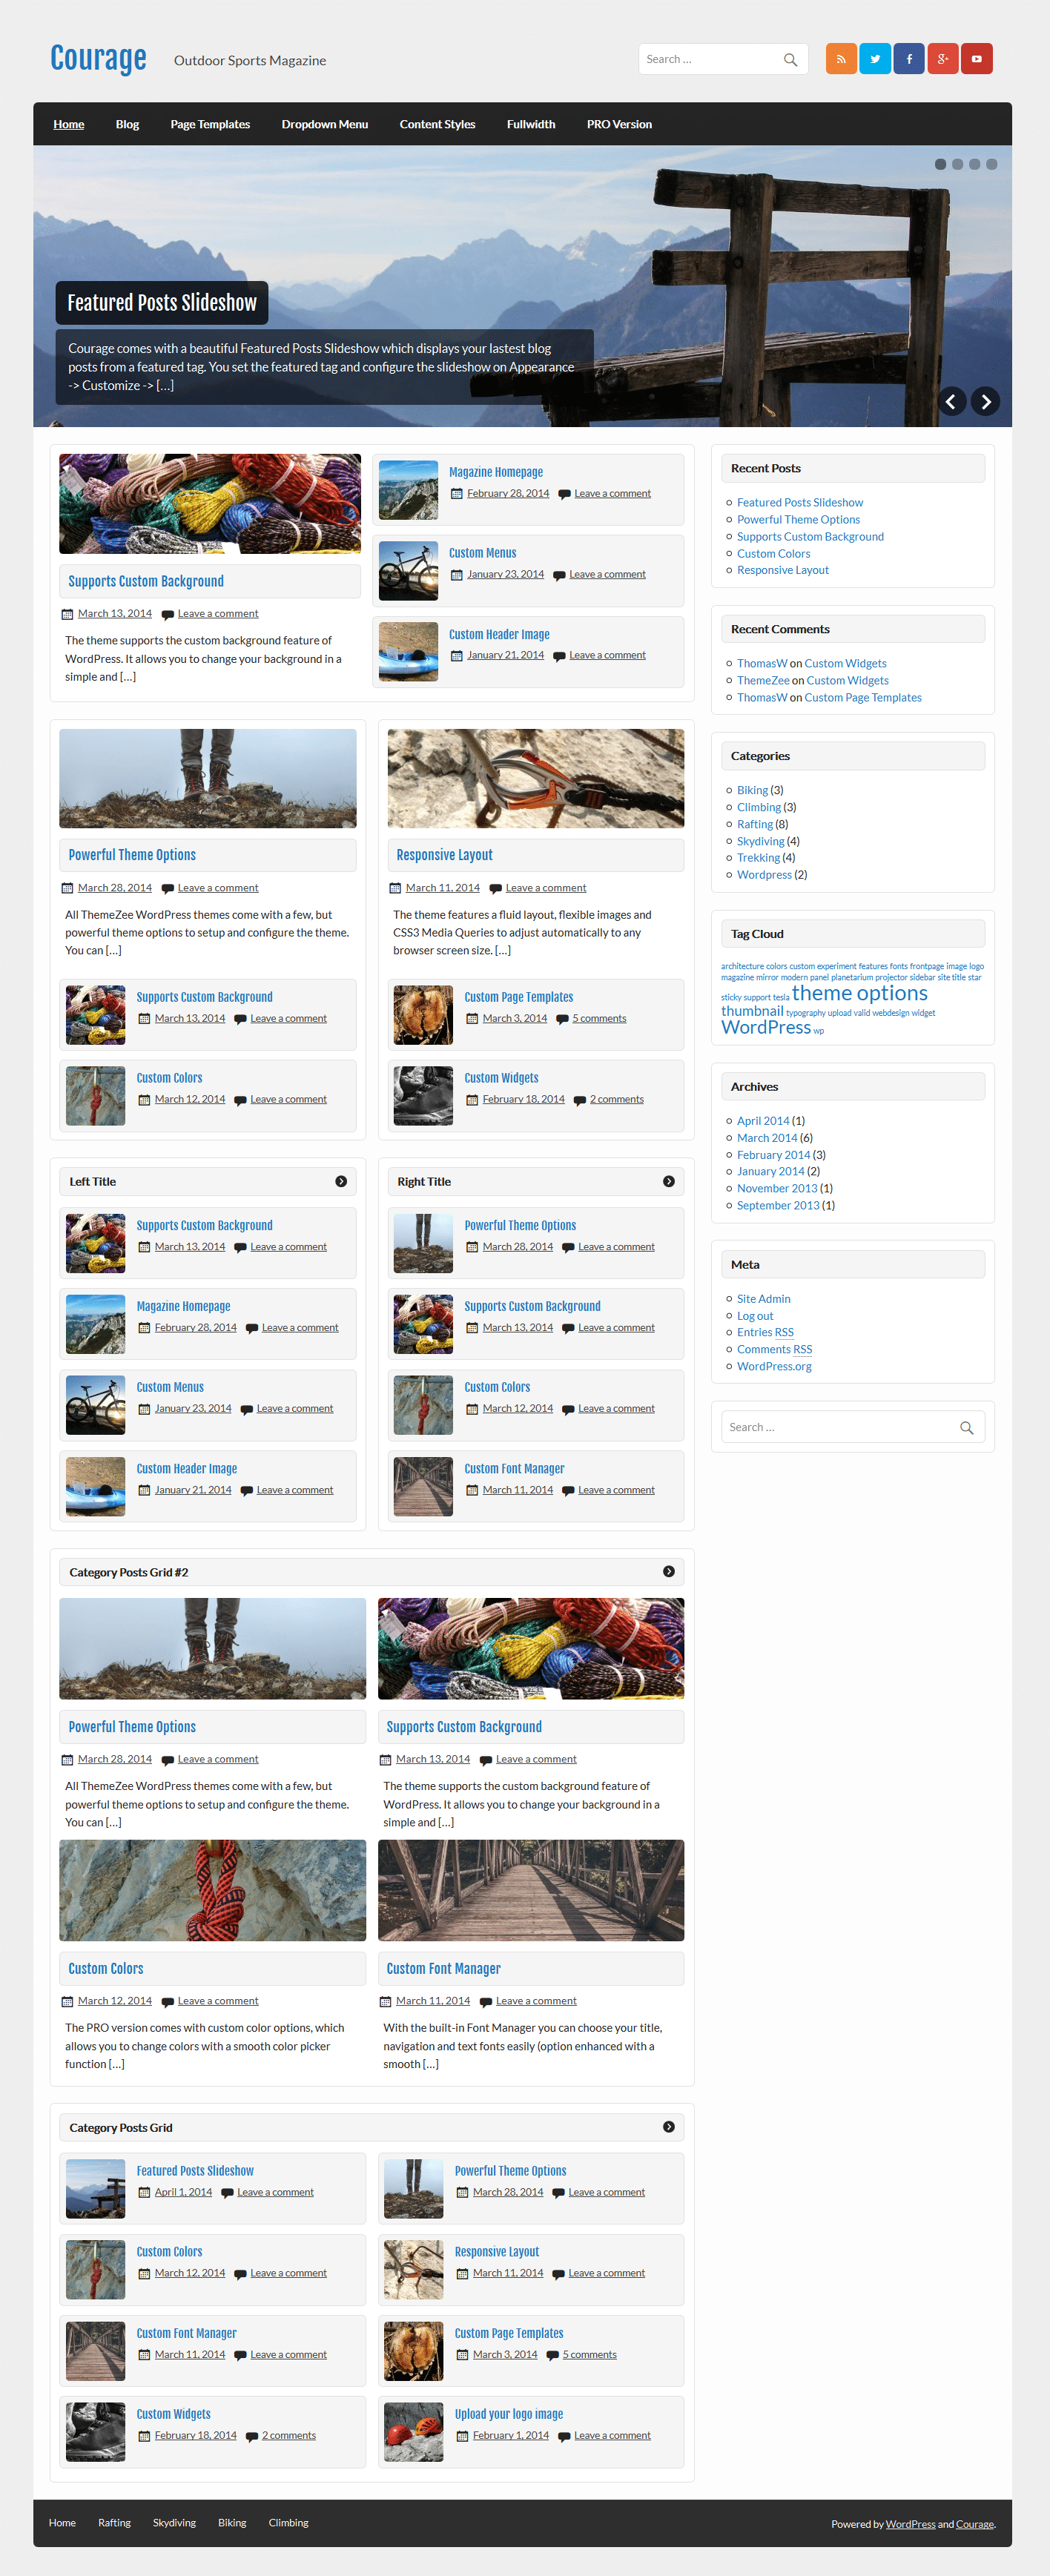
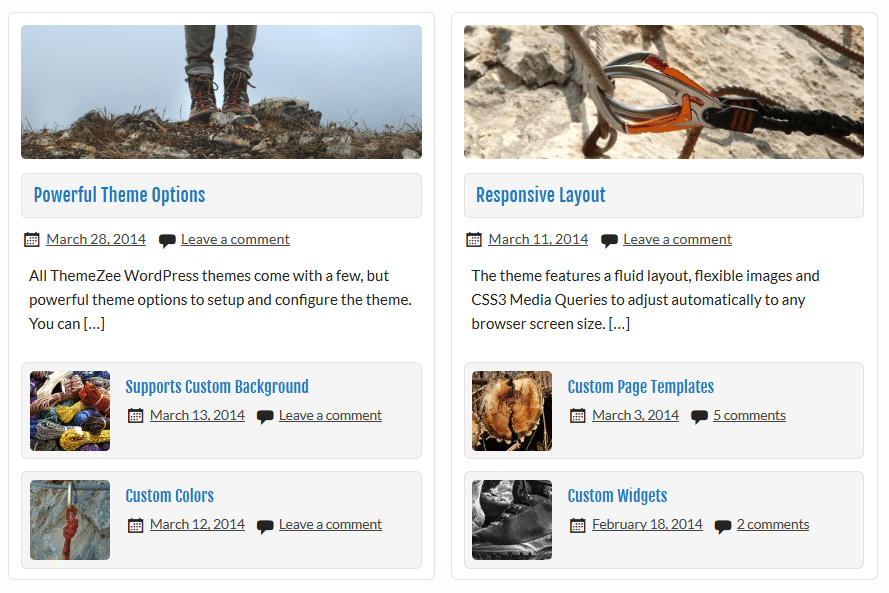
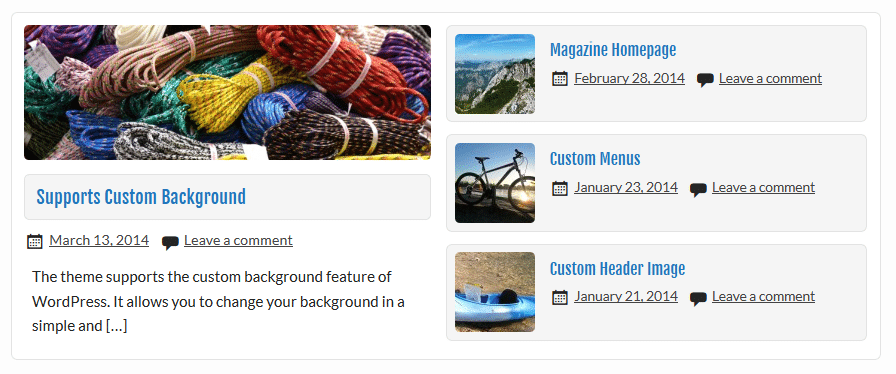
Courage comes with four different Category Posts widgets geared to creating a magazine-style site, but you can also add any other widget you like.
Category Posts Columns
This widget displays the latest blog posts from two configured categories: Category Left and Category Right. The first post of each category can be highlighted in the widget settings and is then displayed with the excerpt, followed by the other posts with small thumbnails.
Category Posts Boxed
This widget displays the latest four blog posts from a configured category in a boxed layout, like in the screenshot below. The latest post is highlighted on the left column and displayed with the excerpt, and the right column displays three additional posts.
Category Posts Grid
This widget creates a two-column grid layout, showing the latest blog posts from a category you select. You can also specify the number of posts to be displayed.
Setup and Configure Pro Version Features
The Pro Version of Courage is an add-on plugin which you can purchase on the Courage theme page.
Since it is the same procedure for every theme, this tutorial does not explain how to install the theme. If you need help with the theme installation, please see the Install WordPress themes tutorial.
Install PRO Version Plugin
Please be aware that the PRO Version of Glades is an Add-on plugin for the Glades theme. Therefore you have to install and activate the Glades theme and install the Glades Pro plugin in addition. You can learn how to install Plugins on the Install WordPress plugins tutorial.
Configure Theme Options
Glades supports the awesome Theme Customizer. You can configure all theme settings on your WordPress admin panel → Appearance → Customize on the “Theme Options” section.
Glades adds a “Theme Options” section to the Customizer containing following sub sections:
General Settings Choose the sidebar layout and add your own footer text.
Header Settings Upload your own site logo, turn on social icons and search field on header area.
Post Settings Decide between full posts and post summary and configure featured images of posts.
Featured Content Set a tag to feature your posts. Featured posts are displayed on the post slider.
Theme Colors (only in PRO version)
This section let you choose the font and background colors of various theme elements.
Theme Fonts (only in PRO version)
Change the text, navigation and title fonts easily in this section.
If you’d like to display the featured content area on your homepage like the demo website, follow these instructions.
To set up your featured posts, go to Appearance → Customize, and add a tag under Tag Name in the Featured Content section.
Afterwards Glades will display the 3 latest posts which are tagged with that keyword in the featured content area at the top of your home page. The first post is highlighted in the left column followed by the other two posts in the right column.
Featured Images
The Featured Content layout as well as normal posts make use of featured images as thumbnails. The theme will look as intended when your posts have featured images.
If your existing posts have already had featured images, they may look disformed because they do not match the new required sizes for the front page template. In order to fix that you have to regenerate your thumbnails.
Your uploaded featured images should have a minimum image size of 900×280 pixels for normal posts and a minimum size of 820×370 pixels for featured posts in order to look good at any screen size.
Configure Magazine Homepage template
If you’d like to have a home page with the magazine-style layout like the demo website, follow these detailed instructions:
Create a new static page
Go to Pages → Add New to create a new static page, or edit an existing page. Change the page template of your selected page to the Magazine Homepage template from the Page Attributes box.
Set Magazine Homepage Template as Front Page
If you want to use the Magazine Homepage template as your front page, go to Settings → Reading and set “Front page displays” to “A static page”. From the dropdown menu, select the Magazine page you created earlier. You can learn more about setting up a front page here.
Add Category Posts Widgets
After you created your Magazine Homepage, go to Appearance → Widgets and set up your Magazine Homepage widget area.
Glades comes with four different Category Posts widgets geared to creating a magazine-style site, but you can also add any other widget you like.
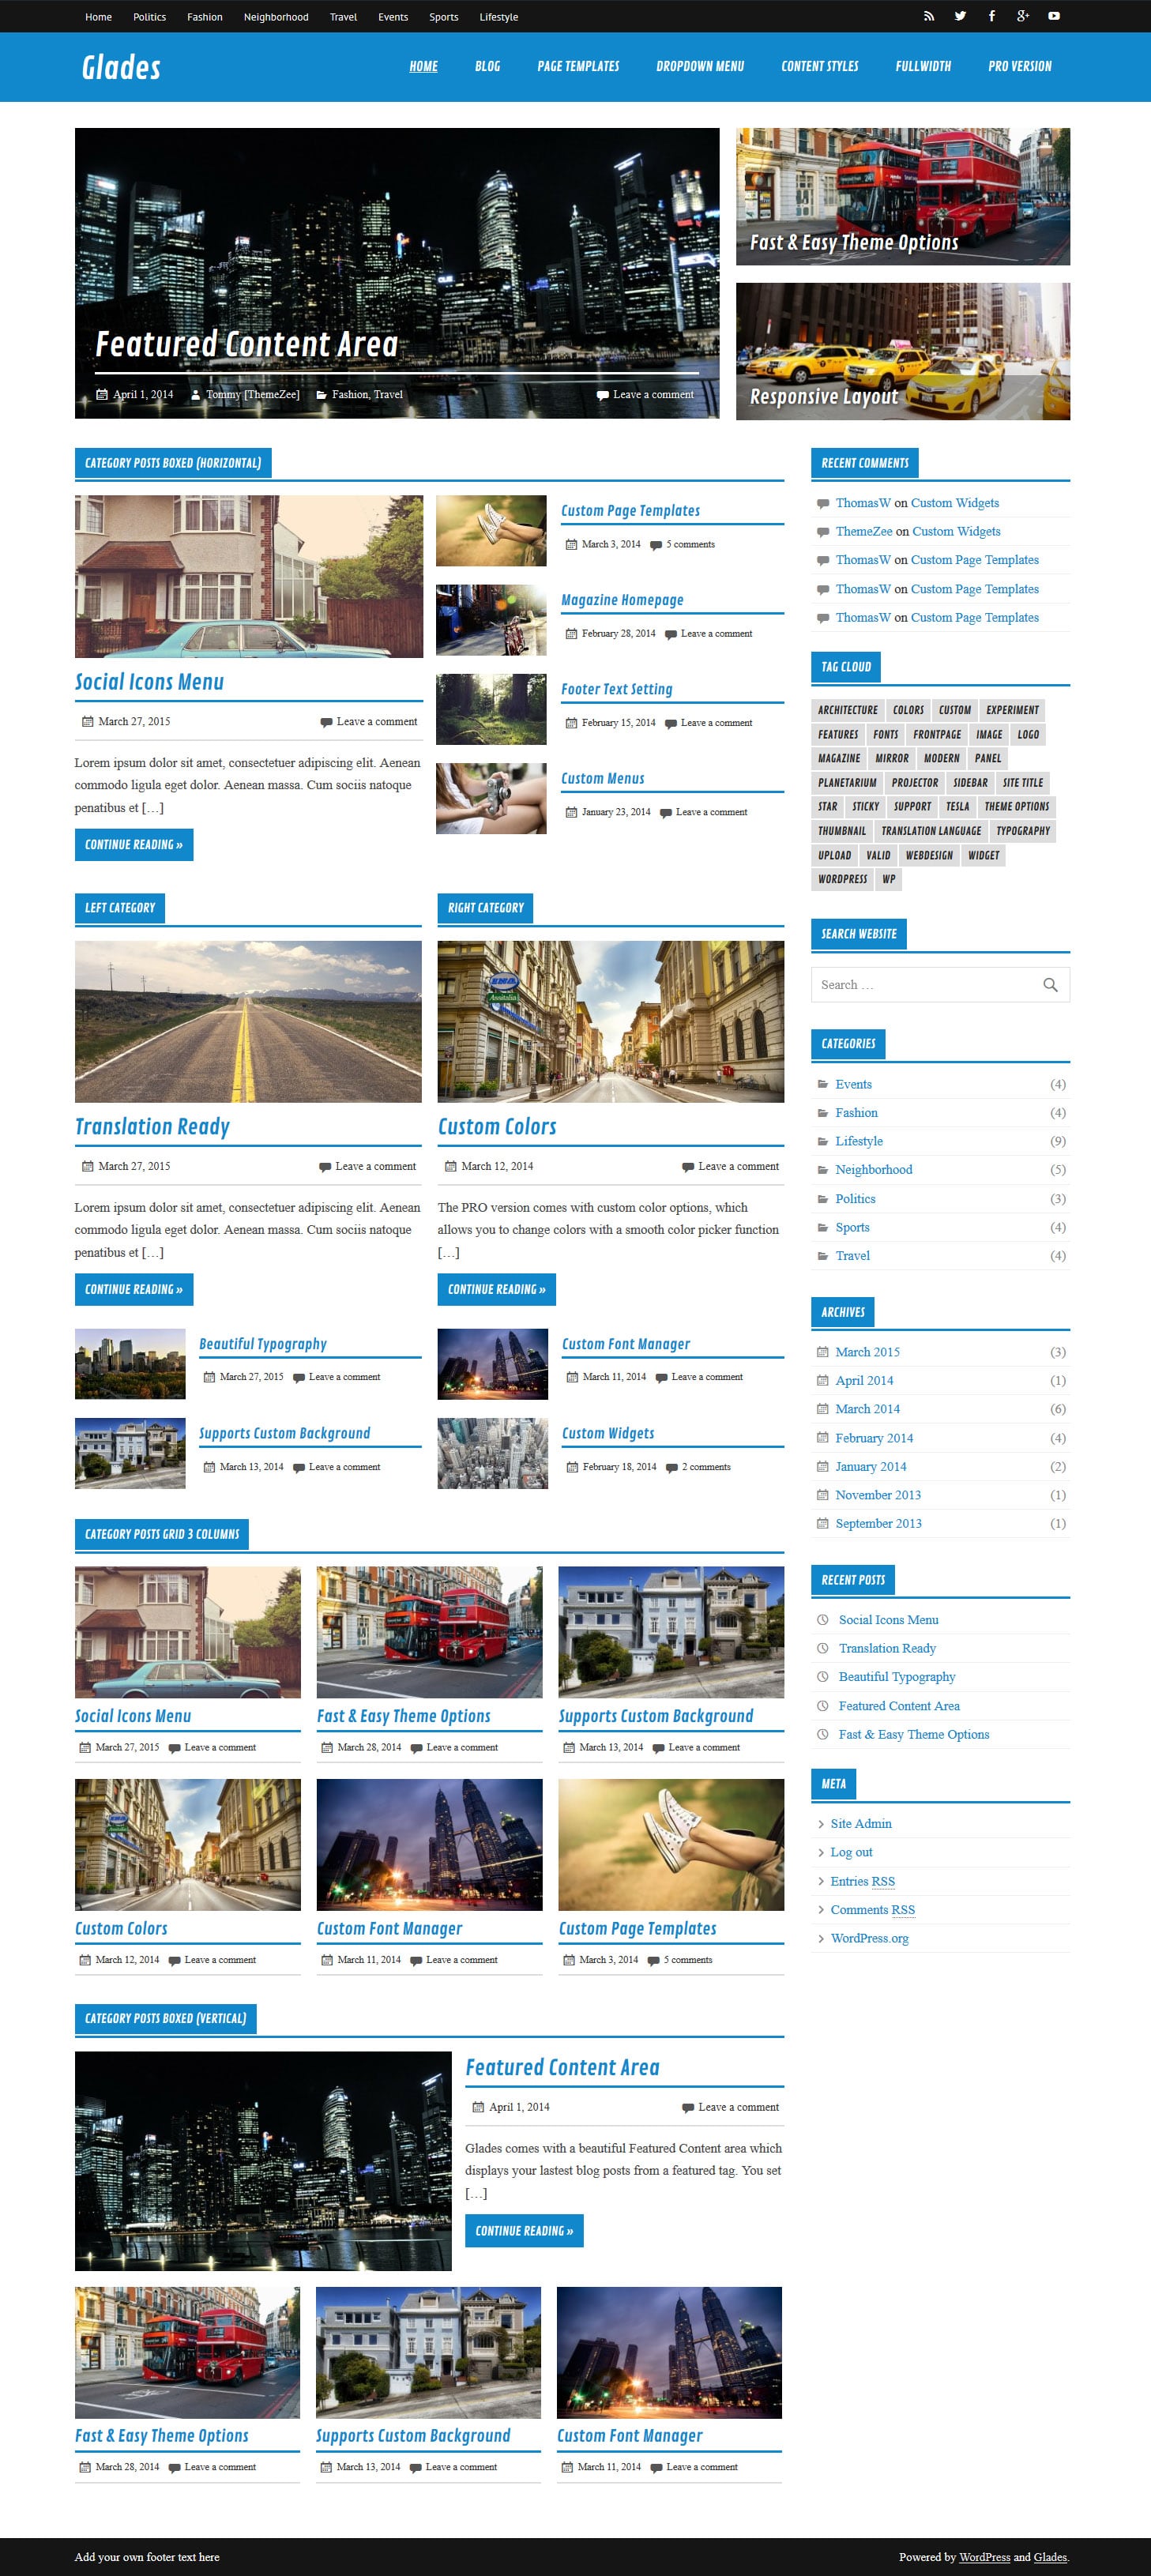
Category Posts Columns
This widget displays the latest blog posts from two configured categories: Category Left and Category Right. The first post of each category can be highlighted in the widget settings and is then displayed with the excerpt, followed by the other posts with small thumbnails.
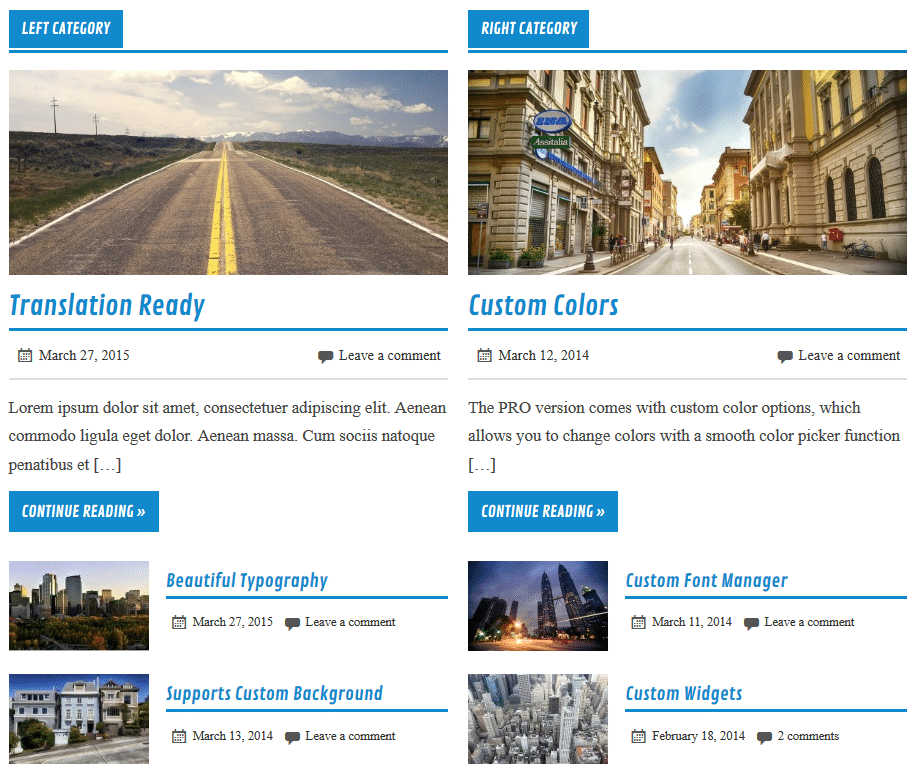
Category Posts Boxed
This widget displays the latest five blog posts from a configured category in a boxed layout, like in the screenshot below. The latest post is highlighted on the left column and displayed with the excerpt, and the right column displays four additional posts.
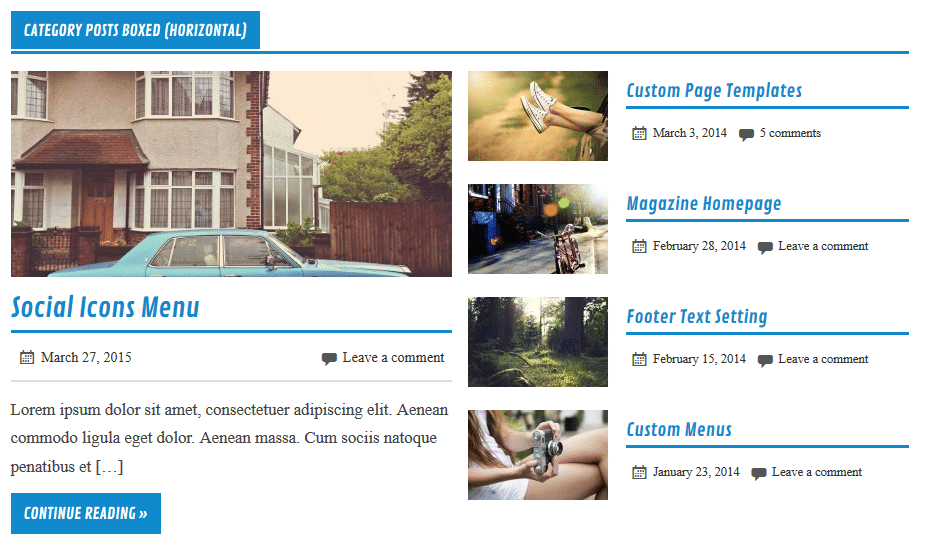
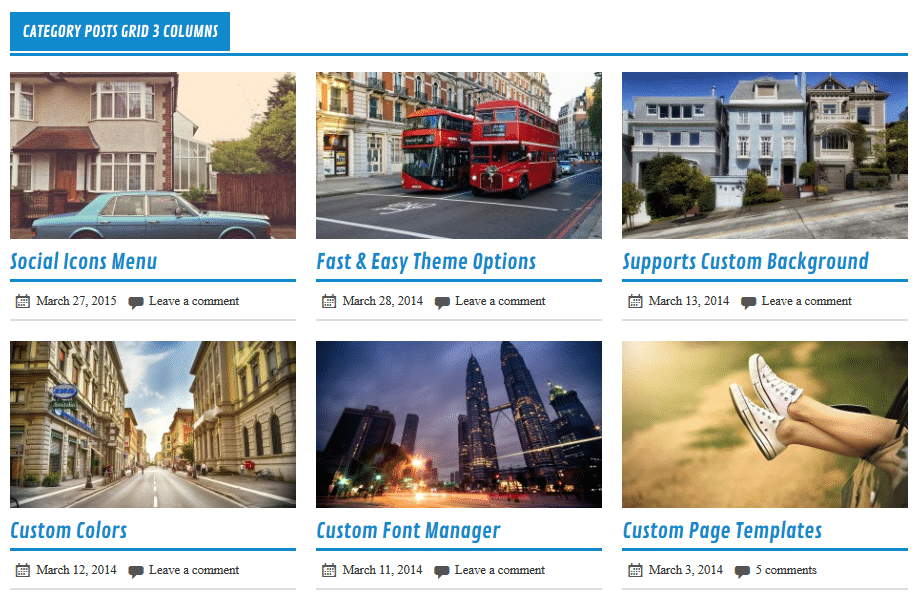
Category Posts Grid
This widget creates a two-column or three-column grid layout, showing the latest blog posts from a category you select. You can also specify the number of posts to be displayed.
Setup and Configure Pro Version Features
The Pro Version of Glades is an add-on plugin which you can purchase on the Glades theme page.
Since it is the same procedure for every theme, this tutorial does not explain how to install the theme. If you need help with the theme installation, please see the Install WordPress themes tutorial.
Install PRO Version Plugin
Please be aware that the PRO Version of Momentous is an Add-on plugin for the Momentous theme. Therefore you have to install and activate the Momentous Lite theme and install the Momentous Pro plugin in addition. You can learn how to install Plugins on the Install WordPress plugins tutorial.
In case you are using the old Momentous Pro theme and want to switch to the new Pro Version Plugin, please follow this tutorial.
Configure Theme Options
Momentous supports the awesome Theme Customizer. You can configure all theme settings on your WordPress admin panel → Appearance → Customize on the “Theme Options” section.
Momentous adds a “Theme Options” section to the Customizer containing following sub sections:
General Settings Choose the sidebar layout and turn off the image grayscale filter.
Header Content Upload your own logo image, turn on social icons on navigation bar and activate dropdown search bar in header area.
Post Settings Decide between full posts and post summary and configure featured images of posts.
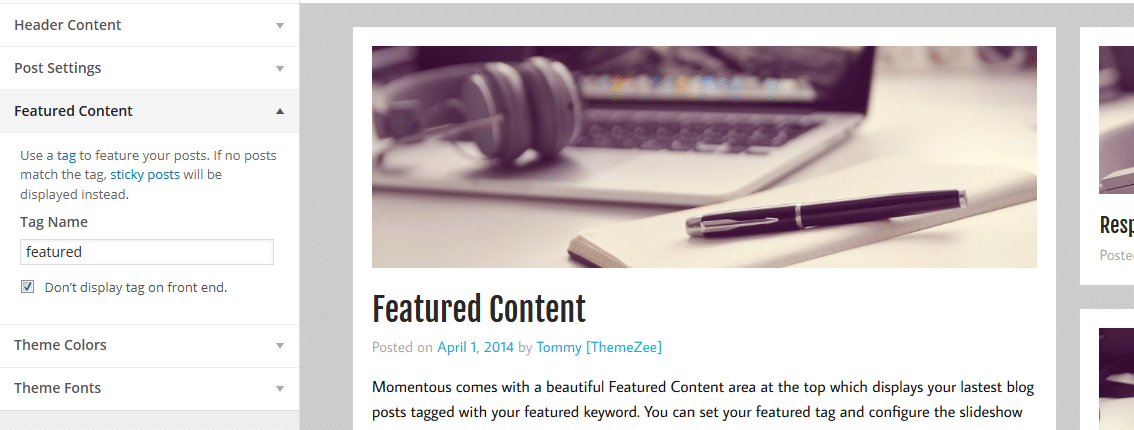
Featured Content Set a tag to feature your posts. Featured posts are displayed on the post slider.
Theme Colors (only in PRO version)
This section let you choose the font and background colors of various theme elements.
Theme Fonts (only in PRO version)
Change the text, navigation and title fonts easily in this section.
If you’d like to display the featured content area on your homepage like the demo website, follow these instructions.
To set up your featured posts, go to Appearance → Customize, and add a tag under Tag Name in the Featured Content section.
Afterwards Momentous will display the 3 latest posts which are tagged with that keyword in the featured content area at the top of your home page. The first post is highlighted in the left column followed by the other two posts in the right column.
Featured Images
The Featured Content layout as well as normal posts make use of featured images as thumbnails The slideshow and also normal posts will look as intended when your posts have featured images.
If your existing posts have already had featured images, they may look disformed because they do not match the new required sizes for the front page template. In order to fix that you have to regenerate your thumbnails.
Your uploaded featured images should have a minimum image size of 900×300 pixels in order to look good at any screen size.
Setup and Configure Pro Version Features
The Pro Version of Momentous is an add-on plugin which you can purchase on the Momentous theme page.
Since it is the same procedure for every theme, this tutorial does not explain how to install the theme. If you need help with the theme installation, please see the Install WordPress themes tutorial.
Install PRO Version Plugin
Please be aware that the PRO Version of Anderson is an Add-on plugin for the Anderson theme. Therefore you have to install and activate the Anderson Lite theme and install the Anderson Pro plugin in addition. You can learn how to install Plugins on the Install WordPress plugins tutorial.
In case you are using the old Anderson Pro theme and want to switch to the new Pro Version Plugin, please follow this tutorial.
Configure Theme Options
Anderson supports the awesome Theme Customizer. You can configure all theme settings on your WordPress admin panel → Appearance → Customize on the “Theme Options” section.
Anderson adds a “Theme Options” section to the Customizer containing following sub sections:
General Settings Choose the sidebar layout and turn off the image grayscale filter.
Header Content Upload your own site logo, turn on social icons and insert an ad code to the header area.
Post Settings Decide between full posts and post summary and configure featured images of posts.
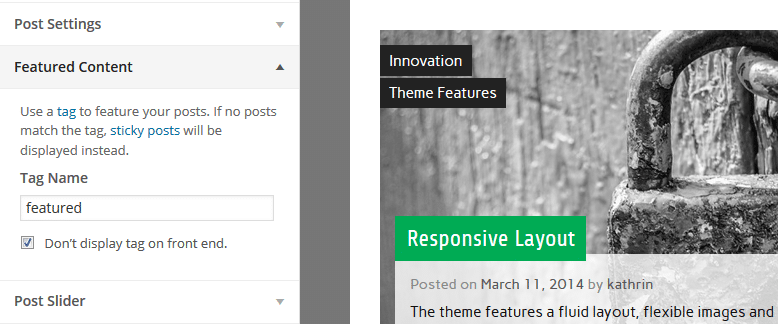
Featured Content Set a tag to feature your posts. Featured posts are displayed on the post slider.
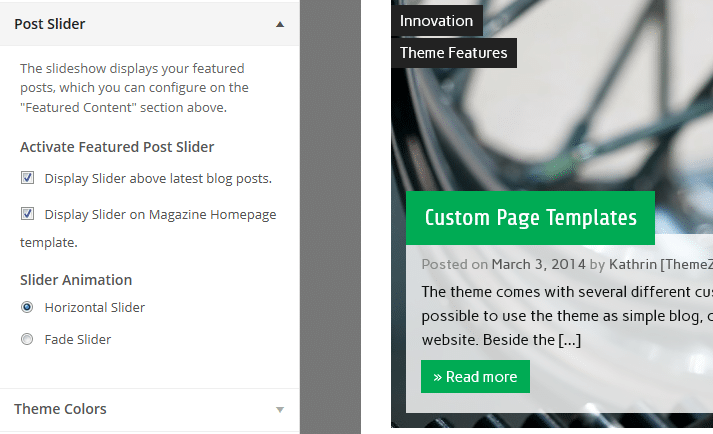
Post Slider Activate the Post Slider and choose the slider animation style.
Theme Colors (only in PRO version)
This section let you choose the font and background colors of various theme elements.
Theme Fonts (only in PRO version)
Change the text, navigation and title fonts easily in this section.
If you’d like to display a featured post slideshow on your homepage like the demo website, follow these instructions.
To set up your featured posts, go to Appearance → Customize → Theme Options, and add a tag under Tag Name in the Featured Content section. The slideshow will display all posts which are tagged with that keyword.
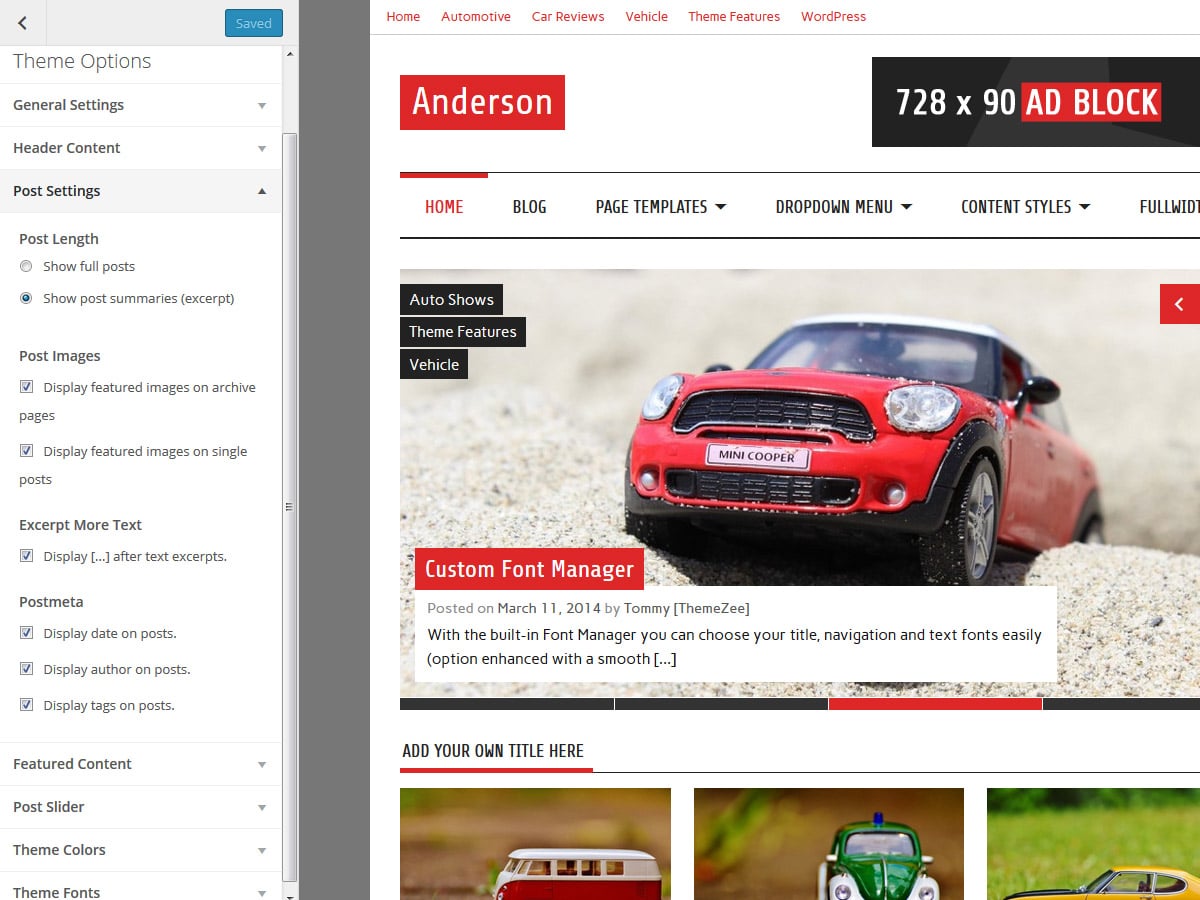
Next, you have to activate the slider and choose the slider animation style in the Post Slider section in the Customizer (Appearance → Customize → Theme Options). You can turn on the post slideshow above the normal blog index or on the Magazine Homepage template.
Featured Images
The Featured Post Slider as well as the Magazine Homepage template make use of featured images as thumbnails. The slideshow and Category Post widgets will look as intended when your posts have featured images.
If your existing posts have already had featured images, they may look disformed because they do not match the new required sizes for the front page template. In order to fix that you have to regenerate your thumbnails.
Your uploaded featured images should have a minimum image size of 840×440 pixels in order to look good at any screen size.
Configure Magazine Homepage template
If you’d like to have a home page with the magazine-style layout like the demo website, follow these detailed instructions:
Create a new static page
Go to Pages → Add New to create a new static page, or edit an existing page. Change the page template of your selected page to the Magazine Homepage template from the Page Attributes box.
Set Magazine Homepage Template as Front Page
If you want to use the Magazine Homepage template as your front page, go to Settings → Reading and set “Front page displays” to “A static page”. From the dropdown menu, select the Magazine page you created earlier. You can learn more about setting up a front page here.
Add Category Posts Widgets
After you created your Magazine Homepage, go to Appearance → Widgets and set up your Magazine Homepage widget area.
Anderson comes with four different Category Posts widgets geared to creating a magazine-style site, but you can also add any other widget you like.
Category Posts Columns
This widget displays the latest blog posts from two configured categories: Category Left and Category Right. The first post of each category can be highlighted in the widget settings and is then displayed with the excerpt, followed by the other posts with small thumbnails.
Category Posts Boxed
This widget displays the latest four blog posts from a configured category in a boxed layout, like in the screenshot below. The latest post is highlighted on the left column and displayed with the excerpt, and the right column displays three additional posts.
Category Posts Grid
This widget creates a two-column grid layout, showing the latest blog posts from a category you select. You can also specify the number of posts to be displayed.
Category Posts Horizontal
This simple widget displays the latest three blog posts from a selected category horizontally, like in the screenshot below.
Setup and Configure Pro Version Features
The Pro Version of Anderson is an add-on plugin which you can purchase on the Anderson theme page.
Since it is the same procedure for every theme, this tutorial does not explain how to install the theme. If you need help with the theme installation, please see the Install WordPress themes tutorial.
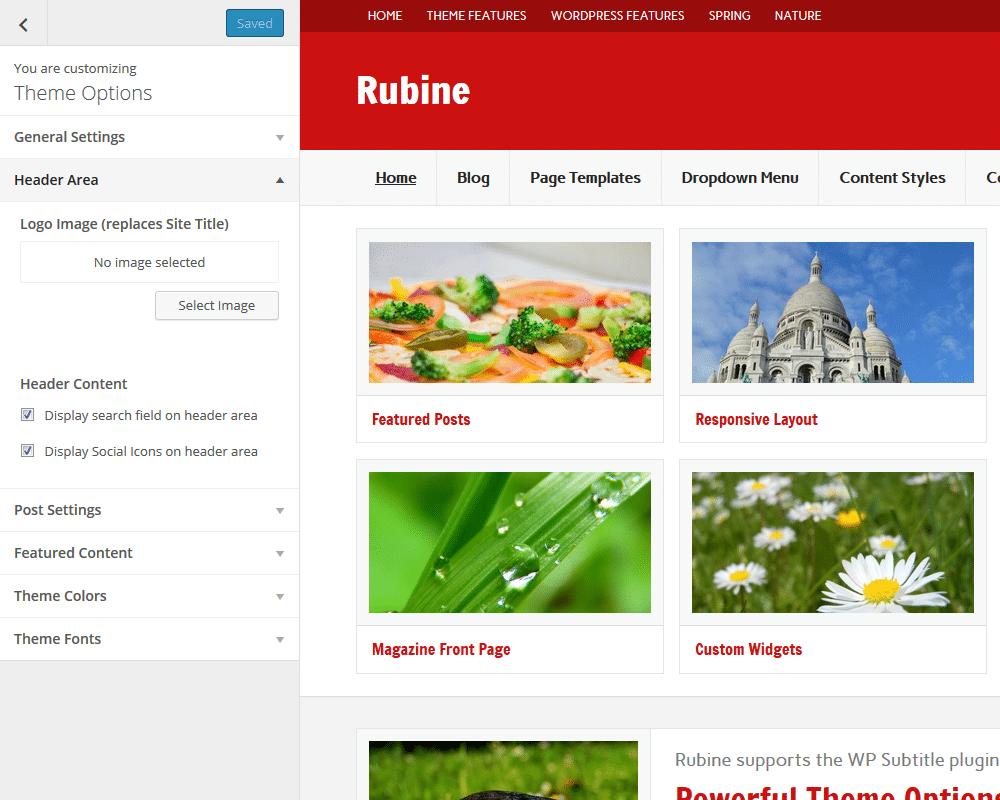
Install PRO Version Plugin
Please be aware that the PRO Version of Rubine is an Add-on plugin for the Rubine theme. Therefore you have to install and activate the Rubine Lite theme and install the Rubine Pro plugin in addition. You can learn how to install Plugins on the Install WordPress plugins tutorial.
In case you are using the old Rubine Pro theme and want to switch to the new Pro Version Plugin, please follow this tutorial.
Configure Theme Options
Rubine supports the awesome Theme Customizer. You can configure all theme settings on your WordPress admin panel → Appearance → Customize on the “Theme Options” section.
Rubine adds a “Theme Options” section to the Customizer containing following sub sections:
General Settings Choose the sidebar layout and turn on social icons in footer.
Header Settings Upload your own logo image and turn on header content like search field and social icons.
Post Settings Decide between full posts and post summary and configure featured images of posts.
Featured Content Set a tag to feature your posts. Featured posts are displayed on the post slider.
Theme Colors (only in PRO Version)
This section let you choose the font and background colors of various theme elements.
Theme Fonts (only in PRO Version)
Change the text, navigation and title fonts easily in this section.
If you’d like to display featured posts on your homepage in a four column grid layout like the demo website, follow these instructions:
To set up your featured posts, go to Appearance → Customize, and add a tag under Tag Name in the Featured Content section.
Afterwards Rubine will display all posts which are tagged with that keyword in the four column layout at the top of your home page. Please note that the featured content section has a maximum of 8 posts.
Featured Images
The Featured Content layout as well as normal posts make use of featured images as thumbnails. The featured posts and also normal posts will look as intended when your posts have featured images.
If your existing posts have already had featured images, they may look disformed because they do not match the new required sizes for the front page template. In order to fix that you have to regenerate your thumbnails.
Your uploaded featured images should have a minimum image size of 460×230 pixels in order to look good at any screen size.
Add Subtitles to your Posts
Rubine has built-in support for the WP Subtitle plugin, which makes it super easy to add subtitles to your posts. Just install the plugin and you’re ready to go. You can add subtitles right below the title field when you add a new post or edit an existing one.
Setup and Configure Pro Version Features
The Pro Version of Rubine is an add-on plugin which you can purchase on the Rubine theme page.