Most of our themes support the header image feature of WordPress Core which allows you to display an extra image in the header area, usually below the navigation menu.
The header image is usally a big fullscreen image. If you are trying to replace the site title with a smaller logo image, have a look at our Logo Image tutorial instead.
Adding a custom header image
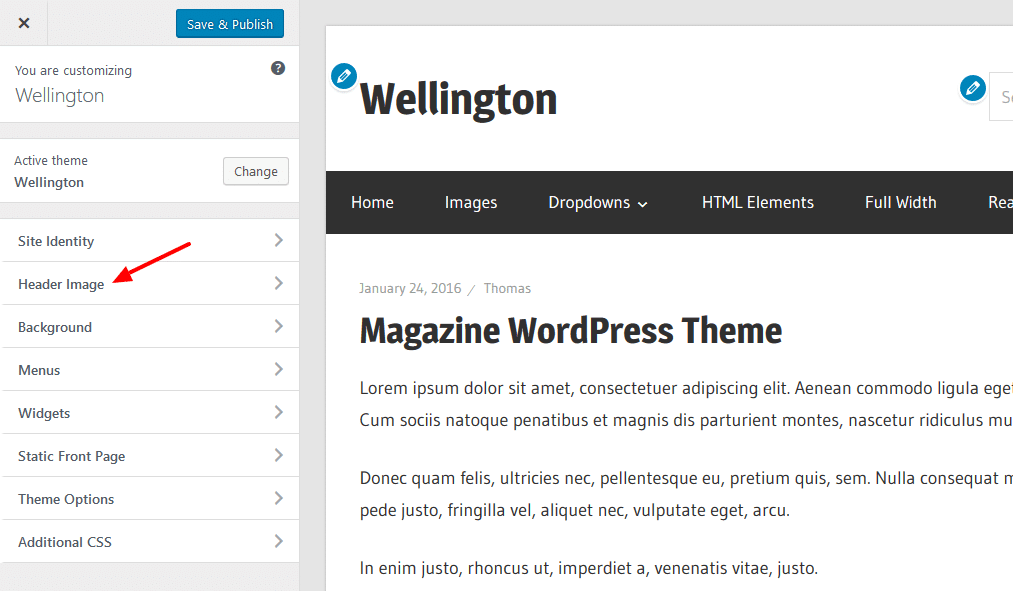
You can upload the header image in the Customizer. Please go to Appearance → Customize → Header Image.

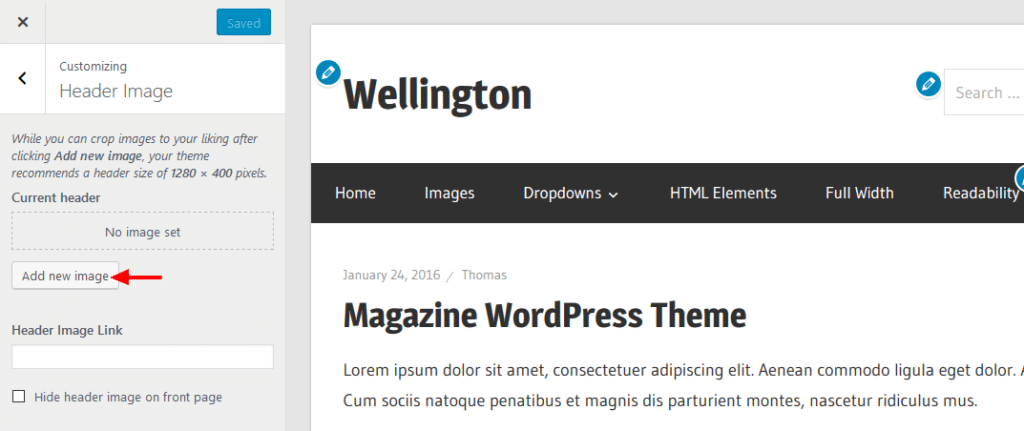
Click on the Add new image button to select a header image from the media library or upload a new image. The description above the Current header setting shows you the recommended size for the header image.

After selecting a header image WordPress allows you to crop the image to your liking. If you upload multiple images you also have the possibility to randomize the uploaded header images.
You can remove the header image by clicking on the Hide image button.

Header Image Settings
The location of the header image is defined by the theme and can not be changed. For most of our themes, we chose to display the header image below the navigation menu, while the Logo image is typically displayed in the header area above or beside the navigation.
Some of our themes support extra settings to link the header image to an external URL. Otherwise the header image usually links to the homepage.
There are also settings to hide the header image on the front page, which is great if you want to show the Post Slider or Featured Content area of the theme on the homepage.
Please note that header image settings are theme related and not included in every theme.
