The Customizer of WordPress allows you to tweak the Appearance settings of the theme and gives you a live preview of those changes. Our themes also add options to the Customizer, which let you configure various elements of the theme.
How to use the WordPress Customizer
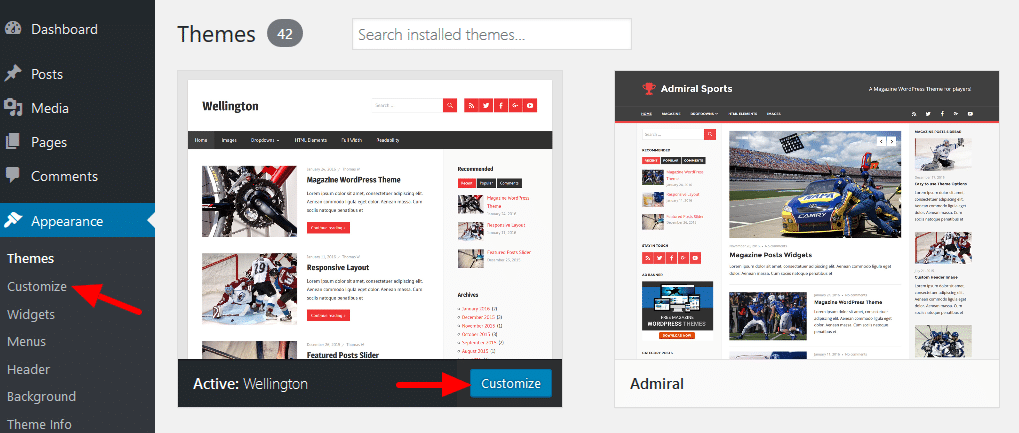
You can open the Customizer by clicking on Appearance → Customize in your WordPress backend. You can also use the Customizer by clicking on the Customize link underneath the theme screenshot on Appearance → Themes.

You can also click on the Customize link in the WordPress toolbar in order to open the Customizer.

Default Sections in the Customizer
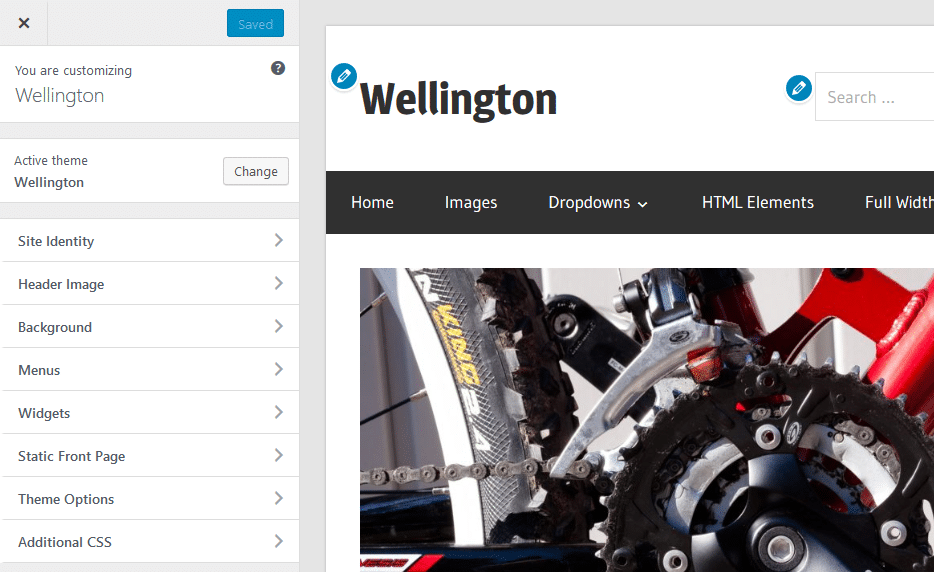
By default, WordPress adds following sections to the Customizer.
- Site Identity
You can change the site title and description here, and upload a custom logo image. - Header Image
This section allows you to upload a custom header image. - Background
You can change the background color and image here. - Menus
This section lets you choose menu positions as well as create and edit custom menus. - Widgets
This section allows you to add and configure widgets in the Customizer. - Static Front Page
Configure what will appear on your front page. - Additional CSS
Add own CSS code to customize the styling of your website.
Theme Options
Our themes add a new section Theme Options for all theme settings. Depending on the theme you’re using, the section will have different sub sections. Usually there will be sections for general settings, blog and post settings as well as theme colors and fonts (with the Pro Add-on).
The Customizer
The Customizer shows all settings in the left sidebar and a live preview of your website on the right hand side. You can also click on the blue Edit icons to open the setting for this element.

